Tag: Oxford cleaning

  • 7 Surprising Window Cleaning Hacks for a Streak-Free Shine

    7 Surprising Window Cleaning Hacks for a Streak-Free Shine

    Achieving perfectly clear, streak-free windows can often feel like an impossible task. Smudges, lint, and stubborn water spots seem to reappear moments after you have finished, leaving you frustrated and questioning your technique. What if the secret to a flawless finish isn't found in expensive, specialised products, but in clever, time-tested methods? This guide reveals seven surprising yet highly effective window cleaning hacks that professionals and savvy homeowners use to get that coveted invisible-glass look.

    From common kitchen staples like cornstarch to unconventional tools such as coffee filters, these methods are designed to cut through grime, save you time, and deliver brilliant, long-lasting results. We will explore each hack in detail, providing clear step-by-step instructions, practical tips for implementation, and the simple science behind why they work so well. By mastering these techniques, you can finally conquer streaks and smudges for good.

    This article is your definitive resource for transforming a tedious chore into a simple, satisfying task. Forget the frustration and get ready to enjoy crystal-clear views that let the sunshine in like never before. Each tip is actionable, easy to follow, and leverages items you likely already have around the house.

    1. Coffee Filter Window Cleaning

    While paper towels or old newspapers are common choices for wiping windows, they often leave behind lint and streaks. For a truly professional, lint-free shine, one of the most effective window cleaning hacks involves an everyday item from your kitchen cupboard: the humble coffee filter. Their tightly woven paper fibres are designed to be highly absorbent without disintegrating, making them perfect for wiping glass surfaces clean without leaving any residue behind.

    This method’s strength lies in the material itself. Unlike paper towels, which can shed tiny fibres, coffee filters are manufactured to be lint-free. This ensures that as you wipe, you are only removing dirt and cleaning solution, not depositing a new layer of fuzzy particles onto the glass.

    Coffee Filter Window Cleaning

    Why It Works and Where It Shines

    This technique has been popularised by professional cleaners and car detailers who demand a flawless finish on glass. Car detailers, for instance, frequently use coffee filters on windscreens to ensure perfect clarity without any distracting lint. At home, this hack is especially useful for large picture windows, glass doors, and mirrors where streaks and fibres are most noticeable. The result is a crystal-clear finish that rivals professional services.

    Key Insight: The secret to a streak-free window is not just the cleaning solution but the material used for the final wipe. Coffee filters provide a lint-free, absorbent surface that buffs glass to a perfect shine.

    How to Implement This Hack

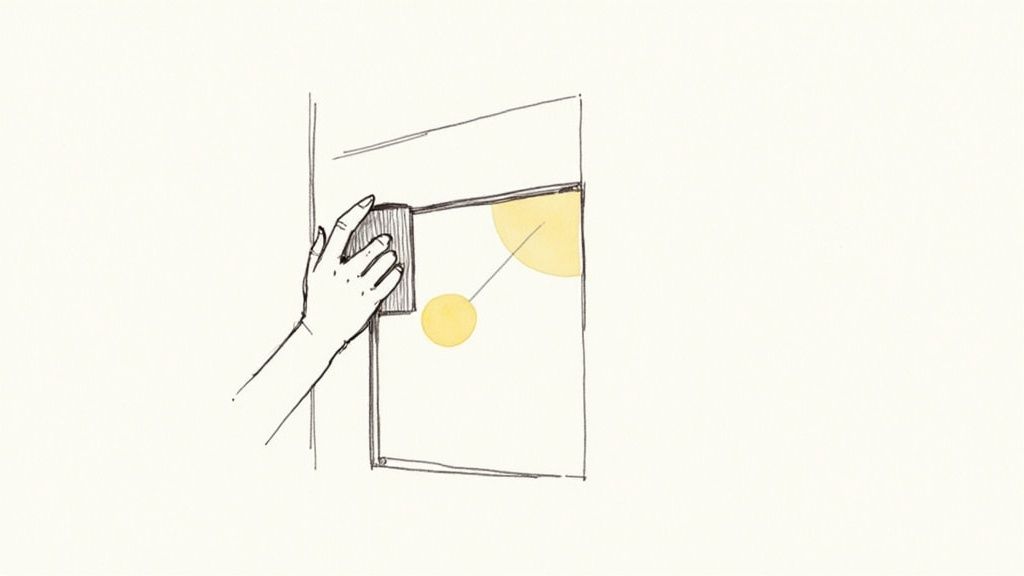
    For the best results, follow a simple but specific process. First, clean the window with your preferred solution, perhaps a homemade mix of equal parts white vinegar and water, using a squeegee or a microfibre cloth to remove the initial layer of grime. The coffee filter comes in for the final, crucial step.

    • Final Polish: Use a dry coffee filter to buff the glass after the main cleaning. This will remove any remaining moisture and prevent streaks from forming as the window dries.
    • Application Technique: For optimal results, use a circular motion to polish the main surface of the window, then finish with straight vertical and horizontal strokes to catch any final drips or lines.
    • Choose Wisely: Opt for unbleached coffee filters to avoid transferring any trace chemicals from the bleaching process onto your windows.
    • More Than Windows: This hack is also excellent for cleaning other glass surfaces around the home, including television screens, shower doors, and glass tabletops.

    2. Newspaper and Vinegar Method

    Before microfibre cloths became a household staple, one of the most trusted window cleaning hacks relied on two simple, low-cost items: newspaper and vinegar. This traditional technique, passed down through generations, is celebrated for its ability to deliver a streak-free shine using materials you likely already have. The unique composition of newsprint, combined with the acidic cleaning power of vinegar, makes for a surprisingly effective duo.

    The logic behind this old-school method is sound. The dense fibres of newspaper are highly absorbent and don't leave lint behind like paper towels can. Furthermore, the ink used in traditional black-and-white print has a mild abrasive quality that helps to scrub away stubborn grime and buff the glass to a brilliant finish without scratching it.

    Newspaper and Vinegar Method

    Why It Works and Where It Shines

    This hack’s enduring popularity stems from its frugal roots during the Depression era and its perfection by traditional European window cleaners. It’s an economical and environmentally friendly alternative to chemical-laden sprays and disposable wipes. The method is particularly effective for cutting through the greasy film that can build up on kitchen windows or the hazy residue on the inside of car windscreens, leaving behind nothing but crystal-clear glass.

    Key Insight: The combination of vinegar's natural degreasing properties and the newspaper's lint-free, slightly abrasive texture creates a powerful cleaning system that dissolves dirt and polishes the glass simultaneously.

    How to Implement This Hack

    To get the most out of this classic technique, a few specific steps should be followed. The key is in the preparation of both the solution and the newspaper itself. Start by mixing a simple cleaning solution of one part white vinegar to four parts water in a spray bottle.

    • Choose the Right Paper: Only use traditional black-and-white newsprint. The glossy, coloured sections or magazine-style inserts often use different inks and paper that can smear or leave residue.
    • Application Technique: Crumple the newspaper into loose balls, which are easier to grip and provide a good surface area for wiping. Spray the vinegar solution directly onto the glass and use one ball of newspaper to scrub away the dirt.
    • The Final Buff: Use a second, dry ball of crumpled newspaper to wipe the window dry, polishing it to a streak-free shine. Work in a shaded area to prevent the solution from evaporating too quickly and causing spots.
    • Protect Your Hands: The ink can transfer to your hands, so it's a good idea to wear gloves while you work.

    3. Squeegee with Dish Soap Technique

    To achieve the truly flawless, streak-free finish seen on commercial buildings and high-rise flats, you need to adopt the methods of the professionals. One of the most effective window cleaning hacks relies on two simple tools: a quality squeegee and a few drops of washing-up liquid. This combination creates a powerful cleaning solution that allows the squeegee to glide smoothly across the glass, lifting dirt and grime without leaving any streaks behind.

    The magic of this technique lies in its simplicity and efficiency. The washing-up liquid acts as a surfactant, breaking the surface tension of the water and helping to dissolve dirt, while the squeegee blade pulls the dirty water away in a single, clean motion. This method is far superior to using cloths or paper towels alone, which often just push dirty water around the pane.

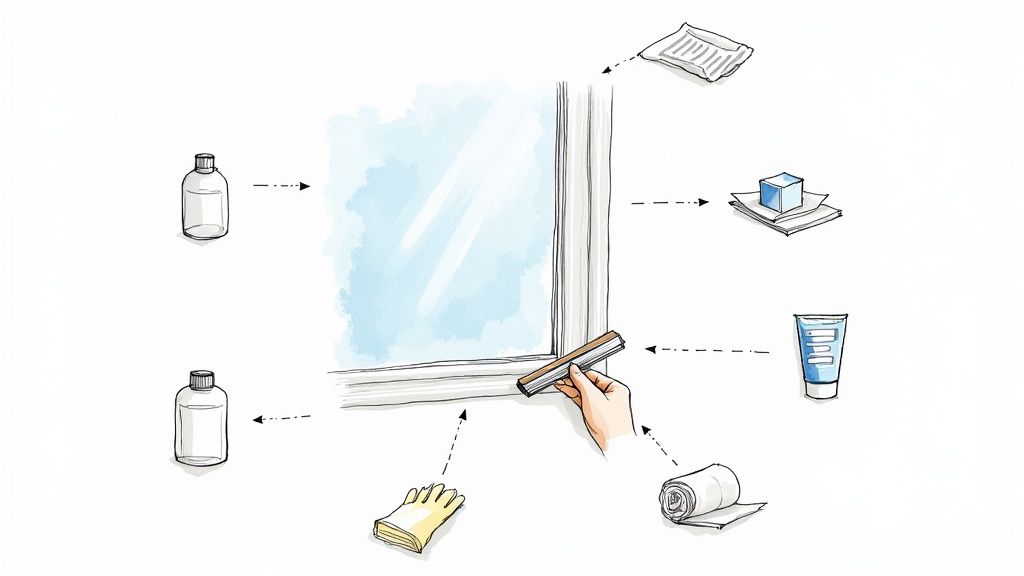
    The following infographic illustrates the simple yet crucial process for mastering this professional technique.

    Infographic showing key data about Squeegee with Dish Soap Technique

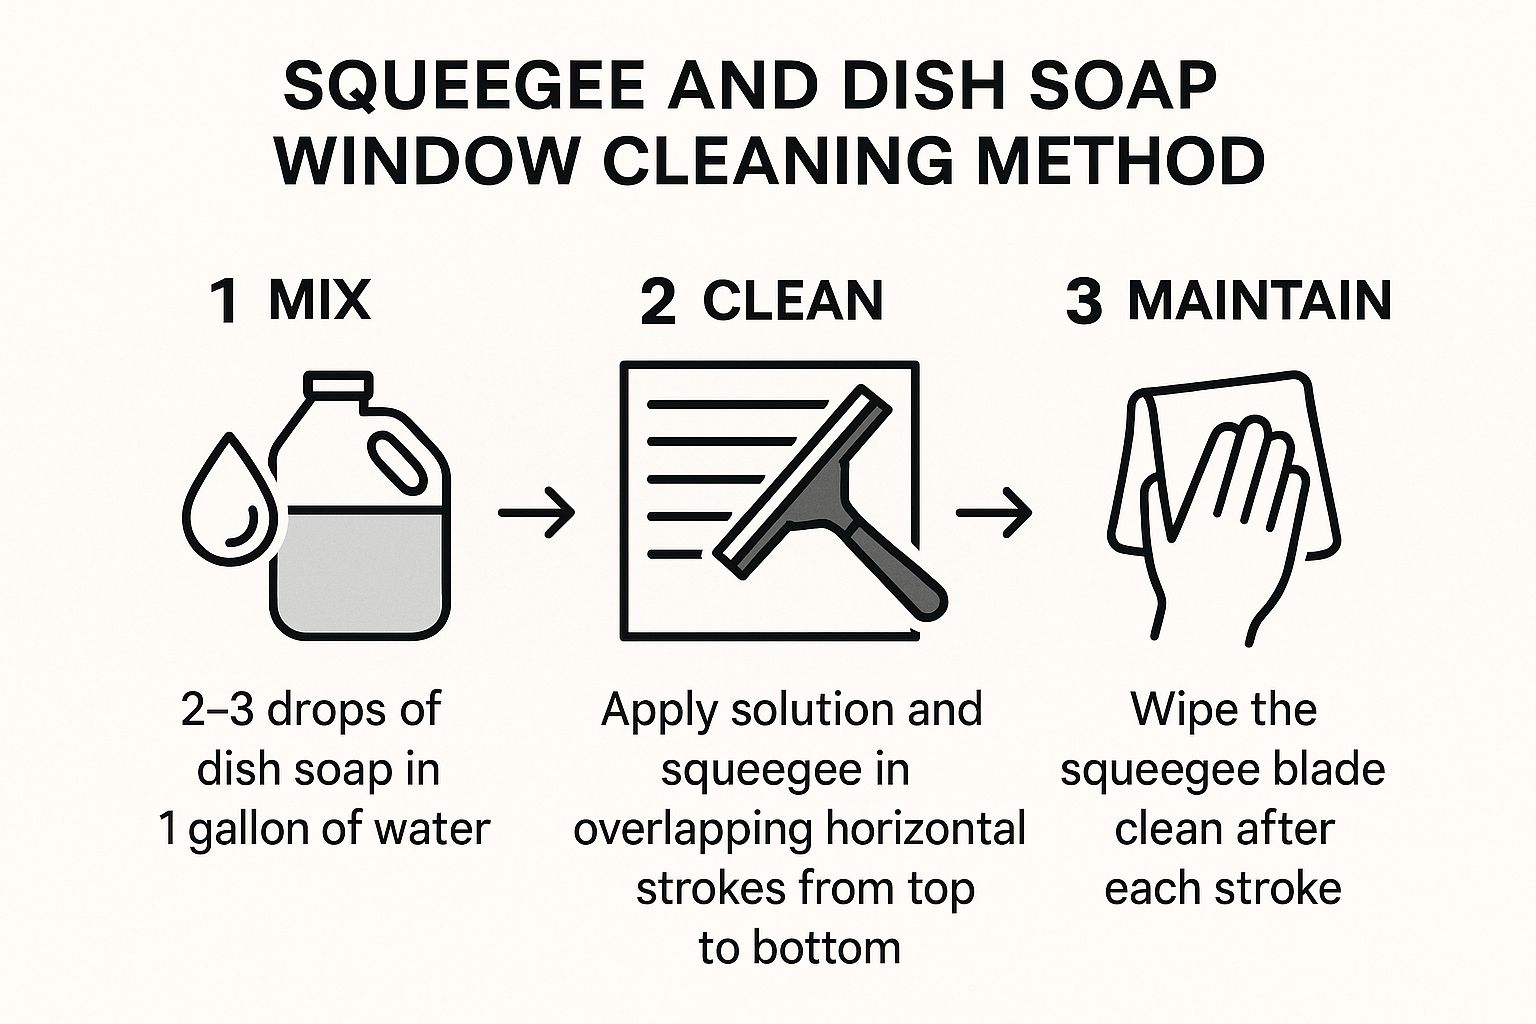
    As the diagram shows, success depends on the correct solution ratio and a methodical, clean-wiping process.

    Why It Works and Where It Shines

    This method has long been the industry standard for professional window cleaners, popularised by companies like Ettore who perfected the modern squeegee. Its effectiveness is most apparent on large glass surfaces like sliding patio doors, picture windows, and glass conservatories, where streaks and smears are highly visible. By mimicking the professionals, you can achieve a superior level of clarity that is difficult to replicate with other household methods.

    Key Insight: A professional finish comes from technique, not complex solutions. A squeegee combined with a minimal amount of washing-up liquid provides the perfect slip, allowing you to remove water and dirt completely before streaks can form.

    How to Implement This Hack

    Proper execution is vital for streak-free results. Start by preparing your cleaning solution and ensuring your squeegee blade is clean and sharp. Apply the soapy water to the window with a sponge or microfibre cloth, covering the entire surface.

    • Start at the Top: Place your squeegee at the top corner of the pane, angled slightly downwards, and pull it across horizontally. Overlap each stroke by about an inch.
    • Wipe the Blade: After every single stroke, use a clean, lint-free cloth to wipe the rubber blade. This crucial step prevents you from transferring dirt back onto the clean glass.
    • Less Is More: Use only two to three drops of washing-up liquid per gallon of water. Too much soap will create excess suds and leave a film on the glass, leading to streaks.
    • Maintain Pressure: Apply light, even pressure as you pull the squeegee. Let the tool do the work to avoid pressing too hard, which can cause the blade to skip or leave lines.

    4. Cornstarch Glass Cleaner

    For a powerful, eco-friendly window cleaner made from simple pantry staples, cornstarch offers a surprisingly effective solution. When mixed with water and vinegar, this common kitchen ingredient creates a homemade cleaner that cuts through grime and leaves a streak-free shine. The cornstarch acts as a very gentle abrasive, helping to lift stubborn dirt and film without scratching the glass.

    The strength of this method lies in its dual-action formula. The vinegar works to dissolve dirt and hard water stains, while the fine cornstarch particles provide a gentle scrubbing power. This combination is particularly effective for windows with a hazy film or built-up residue that regular cleaners might struggle with, making it one of the most resourceful window cleaning hacks available.

    Why It Works and Where It Shines

    Popularised by the green cleaning movement and DIY home care communities, this hack is a favourite among eco-conscious homeowners and those with sensitivities to harsh chemicals. The formula’s gentle abrasive quality makes it ideal for tackling grime on kitchen windows that are prone to greasy film, or for cleaning glass that hasn't been washed in a long time. It’s also a cost-effective and accessible option for anyone looking to reduce their reliance on commercial cleaning products.

    Key Insight: Cornstarch provides a mild abrasive action that lifts stubborn grime and film from glass, while its fine particles help to absorb oils and prevent streaks as the window dries, resulting in a superior clean.

    How to Implement This Hack

    Creating and using this cleaner is straightforward, but correct preparation is key to avoiding a lumpy mixture. Start by gathering your ingredients: cornstarch, white vinegar, and warm water. For particularly tough marks, understanding how to tackle different types of blemishes can be beneficial; you can learn more about how to remove stubborn stains for advanced techniques.

    • Create the Solution: In a spray bottle, combine one tablespoon of cornstarch, 1/4 cup of white vinegar, and two cups of warm water.
    • Mix Thoroughly: Shake the bottle vigorously until the cornstarch is completely dissolved. To prevent lumps, you can first make a paste with the cornstarch and a small amount of water before adding the rest of the ingredients.
    • Shake Before Use: The cornstarch will settle at the bottom, so it is essential to shake the bottle well before each use to ensure the mixture is properly combined.
    • Application Method: Spray the solution onto the window, wipe clean with a microfibre cloth, and then buff to a streak-free shine with a dry cloth or squeegee.

    5. Rain-X and Water Repellent Treatment

    To keep windows cleaner for longer, one of the most proactive window cleaning hacks involves borrowing a trick from the automotive world: applying a water repellent treatment. Products like Rain-X create an invisible, super-slick hydrophobic coating on the glass. This technology causes rain, sleet, and grime to bead up and roll right off, drastically reducing the build-up of water spots and dirt between cleans.

    This method’s power lies in its preventative nature. Instead of just cleaning your windows, you are actively treating them to resist future soiling. The polymer-based formula bonds with the glass, creating a non-stick surface that makes subsequent cleaning significantly easier and less frequent, saving you time and effort in the long run.

    Rain-X and Water Repellent Treatment

    Why It Works and Where It Shines

    Originally popularised by car enthusiasts for perfect windscreen visibility, this hack has been adopted by homeowners and commercial property managers for its impressive results. It is especially beneficial for hard-to-reach windows, such as those on upper floors, where reducing cleaning frequency is a major advantage. Coastal homeowners also find it invaluable for combating the constant build-up of salt spray, while commercial buildings use it to lower maintenance costs and maintain a pristine appearance.

    Key Insight: Treating your windows with a hydrophobic coating is a preventative measure that transforms glass into a self-cleaning surface, minimising the adhesion of water and dirt.

    How to Implement This Hack

    Proper application is essential to achieve a clear, durable, and streak-free finish. Start with a window that is immaculately clean and completely dry, as the treatment needs to bond directly with the glass, not with any lingering dirt or residue.

    • Thorough Preparation: Ensure the window is spotless before you begin. Any trapped dirt will be sealed under the coating.
    • Application Technique: Apply a small amount of the product to a clean, dry microfibre cloth. Wipe it onto the glass using firm, circular, overlapping motions to ensure even coverage.
    • Haze and Buff: Allow the treatment to dry to a light haze, which usually takes a few minutes. Then, use a separate clean, dry cloth to buff the haze away until the glass is crystal clear.
    • Maintenance: You will know it is time to reapply when you notice water is no longer beading up and rolling off the glass effectively. Depending on weather exposure, a single application can last for several months.

    6. Dryer Sheet Window Cleaning

    While commonly used for laundry, fabric dryer sheets offer a surprisingly effective solution for cleaning glass, going beyond a simple wipe-down. This is one of the more ingenious window cleaning hacks because dryer sheets not only clean but also leave behind an anti-static coating. This invisible barrier actively repels dust, lint, and pet hair, helping your windows stay cleaner for much longer.

    The magic lies in the fabric softener agents embedded in the sheets. When lightly dampened, these agents help break down grime and smudges. More importantly, they neutralise the static charge on the glass surface that naturally attracts airborne particles, making this method a preventative measure as well as a cleaning one.

    Why It Works and Where It Shines

    This hack has gained popularity on cleaning blogs and social media for its dual-action benefit. It is particularly valuable for pet owners struggling with dander and hair clinging to glass doors and low windows. Similarly, homes in dusty environments or near busy roads will see a noticeable difference, as the anti-static properties keep grime from settling as quickly. For allergy sufferers, reducing the amount of dust and pollen that collects on windows can be a significant advantage.

    Key Insight: The true value of using a dryer sheet is its preventative power. By creating an anti-static surface, it tackles the root cause of dirty windows – the attraction of dust and debris – keeping them pristine for longer.

    How to Implement This Hack

    To get the most out of this method, the dryer sheet should be used as a final cleaning or touch-up tool. It is not designed to handle heavy, caked-on dirt but excels at removing light films of dust and preventing future build-up.

    • Prep the Sheet: Lightly dampen a new dryer sheet with a small amount of water. It should be moist, not saturated, to activate the cleaning agents without leaving excess residue.
    • Application Technique: Wipe the glass using broad, circular motions to lift dust and grime. Finish with straight vertical and horizontal strokes to ensure even coverage and a streak-free finish.
    • Final Buff: After wiping with the damp dryer sheet, use a clean, dry microfibre cloth to buff away any faint residue, revealing a clear, polished surface.
    • Choose Wisely: For households with sensitivities to fragrances, opt for unscented dryer sheets to avoid leaving a strong smell in the room.

    7. Microfibre and Distilled Water Method

    For those seeking an effective, chemical-free cleaning solution, one of the most powerful window cleaning hacks pairs a high-quality microfibre cloth with simple distilled water. This minimalist approach leverages advanced textile technology and pure water to deliver a streak-free shine without a single drop of cleaner, making it ideal for households with children, pets, or chemical sensitivities.

    The method’s effectiveness comes from two key components. First, the ultra-fine fibres of a microfibre cloth are designed to mechanically scrub and trap dust, grime, and oils. Second, using distilled water, which is free from the minerals found in tap water, ensures that no residue or hard water spots are left behind as the surface dries. This combination cleans and polishes simultaneously.

    Why It Works and Where It Shines

    This technique is a cornerstone of the green cleaning movement and is frequently used by professional services and facilities that prioritise a non-toxic environment, such as hospitals and schools. Companies like Norwex have popularised the concept, demonstrating that a superior clean can be achieved without harsh chemicals. It is particularly effective for interior windows, mirrors, and glass doors where heavy-duty cleaning is not required but a perfect, fingerprint-free finish is desired.

    Key Insight: A truly flawless window doesn't always require chemicals. The physical cleaning power of microfibre combined with the purity of distilled water can remove dirt and prevent mineral deposits for an impeccably clear result.

    How to Implement This Hack

    Success with this method depends on using the right materials and a specific two-cloth technique. You will need one microfibre cloth for cleaning and a second, separate one for polishing. This ensures you are not simply moving dirty water around the glass but are actively removing it.

    • The Two-Cloth System: Lightly dampen the first microfibre cloth with distilled water, ensuring it is moist but not dripping wet. Use this to wipe down the window and lift away all the dirt.
    • Immediate Polishing: Immediately follow with the second, completely dry microfibre cloth. Use this polishing cloth to buff the glass until it is dry and streak-free.
    • Maintain Your Tools: To preserve their effectiveness, wash your microfibre cloths separately without fabric softener, which clogs the fibres and reduces their cleaning power.
    • Pure Water is Key: In areas with hard water, using distilled water is non-negotiable. It is the secret to preventing the frustrating mineral spots that tap water leaves behind.

    7 Window Cleaning Hacks Comparison

    Method Implementation Complexity 🔄 Resource Requirements ⚡ Expected Outcomes 📊 Ideal Use Cases 💡 Key Advantages ⭐
    Coffee Filter Window Cleaning Low – Simple to use, minimal skill Low – Coffee filters, vinegar Streak-free, lint-free windows Final polishing, small to medium windows Cost-effective, lint-free, reusable multiple times
    Newspaper and Vinegar Method Medium – Requires technique mastery Very low – Newspaper, vinegar Streak-free, effective on grime Heavily soiled windows, traditional cleaning Cost-effective, natural ingredients, no lint
    Squeegee with Dish Soap Medium to High – Skill and practice required Medium – Squeegee, dish soap, cloth Professional-grade streak-free finish Large windows, commercial or frequent cleaning Fast, efficient, reusable tools
    Cornstarch Glass Cleaner Medium – Requires mixing & prep Low – Cornstarch, vinegar, water Removes stubborn film, leaves protective film Eco-conscious users, safe for kids and pets Natural, environmentally friendly, protective coating
    Rain-X and Water Repellent Medium – Clean prep & careful application Medium to High – Rain repellent products Hydrophobic coating, reduces water spots Automotive glass, coastal homes, commercial buildings Long-lasting, reduces cleaning frequency
    Dryer Sheet Window Cleaning Low – Easy to use Low – Dryer sheets Anti-static, reduces dust and pet hair Pet owners, dusty environments, allergy-friendly spaces Reduces static, leaves pleasant scent
    Microfiber and Distilled Water Low to Medium – Simple but needs proper cloths Medium – Microfiber cloths, distilled water Chemical-free, streak-free cleaning Chemical-sensitive environments, hospitals, green cleaning Safe, reusable cloths, no chemicals needed

    From Hazy to Heavenly: Your Next Step to Sparkling Windows

    You've now explored a full spectrum of clever and effective window cleaning hacks, moving far beyond the simple spray-and-wipe routine. We’ve journeyed from the surprisingly effective, lint-free magic of coffee filters to the tried-and-true combination of vinegar and newspaper. Each method offers a unique solution to the common problem of dirty, streaky glass, proving that a professional finish is well within your reach without resorting to expensive, chemical-laden products.

    The true value of these techniques lies in their adaptability. By understanding the principles behind them, you can arm yourself with the right approach for any situation. Whether you're tackling greasy kitchen window smudges with the cornstarch solution or preparing your exterior glass for a rainy spell with a water-repellent treatment, you are now equipped with the knowledge to achieve a crystal-clear view. The days of frustrating streaks and hazy films are officially over.

    Key Takeaways for a Streak-Free Finish

    Mastering these window cleaning hacks is not just about cleanliness; it's about reclaiming the natural light in your home and enhancing your living space. Let’s recap the most crucial insights:

    • The Right Tool is Half the Battle: The success of any cleaning task often depends on the tools you use. From a high-quality squeegee to a simple microfiber cloth or even a humble coffee filter, choosing the appropriate applicator is essential for avoiding lint and streaks.
    • DIY Solutions are Powerful: You don't need a cupboard full of commercial cleaners. Simple, household ingredients like white vinegar, cornstarch, and even dish soap can be combined to create potent cleaning solutions that cut through grime effectively and economically.
    • Technique Matters Most: Whether you're using an ‘S’ pattern with your squeegee or wiping in a consistent direction, your technique is paramount. Methodical, deliberate movements prevent the redistribution of dirt and ensure a uniform, streak-free shine across the entire pane.

    Embracing these principles will transform window cleaning from a dreaded chore into a satisfying task. The impact of immaculately clean windows is immediate and profound. It brightens your rooms, makes your home feel more spacious and organised, and offers an unobstructed view of the world outside. You've learned not just how to clean, but how to clean intelligently. This newfound expertise allows you to maintain a pristine home with less effort and more pride, letting the sunshine pour in and illuminate your space. Now, it's time to choose your favourite hack, gather your supplies, and let there be light.


    For those times when your schedule is simply too demanding, or for large-scale jobs that require a professional touch, consider letting the experts handle it. Signal Cleaning offers exceptional window cleaning services across Oxfordshire, delivering guaranteed, streak-free results with the convenience of an easy online booking system. Let us bring the sparkle to your windows so you can focus on enjoying the view.

  • The Ultimate Deep Cleaning House Checklist for 2025

    The Ultimate Deep Cleaning House Checklist for 2025

    Welcome to the ultimate guide for transforming your living space. A standard tidy-up is one thing, but a deep clean is a reset button for your entire home. It reaches the forgotten corners, banishes built-up grime, and revitalises your environment, which can improve air quality and overall well-being. This comprehensive deep cleaning house checklist is designed to guide you systematically through every room, ensuring no surface is overlooked. Forget vague advice; we provide specific, actionable tasks that deliver a truly spotless result.

    Whether you're preparing for a new season, getting ready for guests, or simply craving a pristine home, this room-by-room plan has you covered. Our guide breaks down this monumental task into seven manageable, high-impact stages, from deep cleaning kitchen appliances to performing essential HVAC maintenance. Following this structured approach will turn an overwhelming project into a satisfying and organised achievement. By focusing on areas often missed during regular cleaning, you will not only make your home look immaculate but also prolong the life of your appliances and furnishings. Let's get started on creating a healthier, cleaner home environment.

    1. Deep Clean Kitchen Appliances and Hidden Areas

    A standard kitchen wipe-down often misses the areas where grease, dust, and food debris accumulate, impacting both hygiene and appliance performance. A cornerstone of any effective deep cleaning house checklist involves tackling these hidden areas and giving your appliances a thorough, inside-and-out service. This means moving beyond the visible surfaces to address the components that keep your kitchen running efficiently.

    This task involves carefully pulling appliances like your refrigerator and oven away from the wall to clean the floors and walls behind them. It also includes detailed internal cleaning, such as degreasing the oven interior, descaling the dishwasher, and clearing refrigerator coils, which are essential for maintaining your appliances and preventing potential hazards.

    Why This Task is Crucial

    Neglecting these areas can lead to reduced appliance efficiency, unpleasant odours, and even fire risks from grease build-up. The Good Housekeeping Institute's rigorous testing protocols have long emphasised that regular deep cleaning extends appliance lifespan. Professional kitchen cleaning services often report that cleaning refrigerator coils alone can improve energy efficiency by up to 30%, saving you money on electricity bills.

    Expert Insight: Regularly deep cleaning your appliances not only improves their function but can also be vital for home warranty claims. Many policies require proof of proper maintenance, and a clean, well-serviced appliance is less likely to break down due to neglect.

    How to Implement a Deep Appliance Clean

    Follow a systematic approach for each appliance to ensure nothing is missed.

    • Safety First: Always unplug appliances before you begin cleaning. If you have just used an oven or hob, allow it ample time to cool down completely.
    • Oven and Hob: For stubborn, baked-on food in the oven, create a paste using baking soda and water. Apply it to the interior surfaces, let it sit for several hours or overnight, and then wipe it away. Remove and soak oven racks and hob grates in hot, soapy water.
    • Refrigerator and Freezer: Empty the contents and remove all shelves and drawers, washing them in warm, soapy water. Use a vacuum with a brush attachment to gently clean the dust and debris from the condenser coils, typically located at the back or bottom of the unit. This should be done every six months for optimal performance.
    • Dishwasher: Clean the filter, usually found at the bottom of the unit, to remove trapped food particles. Run an empty cycle with a specialised dishwasher cleaner or a bowl of white vinegar placed on the top rack to descale the interior and remove soap scum.

    This focused cleaning, popularised by guides from sources like Martha Stewart Living, transforms your kitchen from superficially tidy to truly sanitised and functional.

    2. Scrub and Disinfect All Bathroom Surfaces

    A quick wipe of the bathroom sink and mirror barely scratches the surface of the germs and grime lurking within. A proper bathroom deep clean, a vital component of any deep cleaning house checklist, requires a meticulous approach to sanitisation, tackling everything from tile grout and shower doors to hidden areas like the toilet base and exhaust fan vent. This process is about eliminating soap scum, mildew, and hard water stains while thoroughly disinfecting the high-touch and often-neglected spots where bacteria and mould thrive.

    This task involves more than just surface-level cleaning; it's a systematic effort to restore hygiene and freshness to one of the most used rooms in the house. It means descaling shower heads, scrubbing grout lines, and cleaning behind the toilet, ensuring every corner is addressed according to professional standards.

    Scrub and Disinfect All Bathroom Surfaces

    Why This Task is Crucial

    A superficially clean bathroom can still harbour harmful pathogens. The damp environment is an ideal breeding ground for mould and mildew, which can trigger allergies and respiratory issues. The CDC’s cleaning and disinfection guidelines emphasise the importance of sanitising surfaces to prevent the spread of illness. Following these protocols is standard practice in medical facilities and high-end hotels to ensure a safe and hygienic environment for everyone.

    Expert Insight: Professional cleaning services, like those detailed on many blogs, often adopt a top-to-bottom, left-to-right cleaning method in bathrooms. This ensures that dust and dirty water from higher surfaces don't contaminate already cleaned lower areas, maximising efficiency and effectiveness. Explore additional professional cleaning strategies on the Signal Cleaning blog.

    How to Implement a Deep Bathroom Clean

    For a truly sanitised bathroom, address each area with the right tools and techniques.

    • Safety First: Ensure proper ventilation by opening a window or turning on the exhaust fan, especially when using strong cleaning agents like bleach or ammonia-based products. Always wear protective gloves.
    • Tackle Grime Build-up: For stubborn soap scum on shower doors and tiles, apply a dedicated bathroom cleaner or a mixture of white vinegar and water and let it sit for 10-15 minutes before scrubbing. This allows the product to break down the grime, making it easier to remove.
    • Grout and Details: Use an old toothbrush or a small grout brush dipped in a paste of baking soda and hydrogen peroxide to scrub grout lines. This is highly effective for lifting stains and killing mildew. Clean around the base of the toilet and taps with the same detailed approach.
    • Exhaust Fan and Fixtures: Carefully remove the cover of your bathroom exhaust fan and wash it in warm, soapy water. Use a vacuum with a brush attachment to remove dust from the fan itself. Wipe down light fixtures to remove accumulated dust and grime.

    This thorough method, championed by home maintenance experts like This Old House, ensures your bathroom is not just visually clean but hygienically sound, protecting your family’s health and well-being.

    3. Wash Walls, Baseboards, and Light Fixtures

    While floors and surfaces get regular attention, the vertical planes of your home, like walls and baseboards, often go unnoticed until they are visibly grimy. An essential component of a comprehensive deep cleaning house checklist is the systematic washing of walls, baseboards, and light fixtures. This process removes the slow accumulation of dust, fingerprints, scuff marks, and airborne grime that can make a room feel dull and dirty.

    This task involves more than just a quick wipe; it requires a top-to-bottom approach, addressing everything from crown moulding and light fixtures down to the skirting boards and light switches. It’s a methodical process that brightens the entire home, similar to the preparation professional painters undertake before applying a fresh coat of paint to ensure a flawless finish.

    Wash Walls, Baseboards, and Light Fixtures

    Why This Task is Crucial

    Washing walls and fixtures dramatically brightens a space and improves indoor air quality by removing settled dust and allergens. Real estate staging companies prioritise this task before a viewing, as clean walls and sparkling fixtures make a property appear larger, better maintained, and more inviting. For homeowners, it’s a restorative task that revitalises the appearance of a room without the cost of redecorating.

    Expert Insight: According to Benjamin Moore's paint experts, cleaning walls correctly is crucial for paint longevity. Grime can break down the paint finish over time, leading to premature fading and deterioration. Regular gentle washing can extend the life of your paintwork significantly.

    How to Implement a Wall and Fixture Clean

    A systematic approach ensures an even, streak-free result and protects your home's surfaces.

    • Safety First: Before cleaning any light fixtures, light switches, or plug sockets, always turn off the electricity at the circuit breaker to eliminate the risk of electric shock.
    • Work Top to Bottom: Begin with light fixtures, then move to the walls, and finish with the baseboards. This ensures that any dislodged dust or drips fall onto areas you have yet to clean, preventing rework.
    • Use the Right Solution: For most painted walls (latex or acrylic), a simple solution of mild washing-up liquid and warm water is effective. Use a soft sponge or microfibre cloth. For stubborn scuffs, a magic eraser can be used gently. Avoid harsh chemicals on delicate paint finishes.
    • Prevent Streaks: Use two buckets: one with your cleaning solution and one with clean rinse water. Wring your sponge or cloth out thoroughly to avoid oversaturating the wall, and change the rinse water frequently to prevent spreading dirt around.

    This detailed cleaning, often highlighted in professional painting contractor guides, is a high-impact task that elevates your home from simply clean to immaculately maintained.

    4. Deep Clean and Organise All Storage Areas

    A standard tidy-up rarely addresses the clutter and grime that accumulates in storage spaces like closets, pantries, and attics. A vital component of any comprehensive deep cleaning house checklist is to systematically declutter, clean, and reorganise these often-neglected areas. This process transforms them from chaotic dumping grounds into functional, accessible spaces.

    This task involves more than just reshuffling items. It requires emptying the space entirely, cleaning every surface from shelves to floors, and making conscious decisions about what to keep, donate, or discard. It’s an opportunity to assess for issues like pests or dampness and implement lasting organisational systems that maintain order.

    Why This Task is Crucial

    Neglected storage areas can become breeding grounds for dust, mould, and pests, which can affect your home's air quality and overall hygiene. The principles popularised by Marie Kondo highlight how a disorganised space contributes to mental clutter and stress. Furthermore, professional organisers consistently demonstrate that a well-organised home saves time and reduces waste, as you can easily find what you need and avoid buying duplicates.

    Expert Insight: Decluttering before organising is non-negotiable. Trying to organise clutter is a futile exercise. By removing items you no longer need, you create the physical and mental space required to build a system that works for you long-term, preventing the rapid return of chaos.

    How to Implement a Deep Storage Clean

    To avoid feeling overwhelmed, tackle one storage area at a time with a clear, methodical approach.

    • Empty and Sort: Remove every single item from the space. Create three distinct piles: keep, donate/sell, and discard. Be ruthless; a good rule of thumb is the "one-year rule" – if you haven't used it in the past year, it's likely time to let it go.
    • Clean Thoroughly: With the space empty, vacuum all dust and debris, paying special attention to corners and crevices. Wipe down all shelves, walls, and flooring with an appropriate cleaning solution. This is the perfect time to check for any signs of damp, mould, or pest activity.
    • Organise and Contain: Group the "keep" items into logical categories. Invest in clear, labelled storage containers to protect items from dust and make them easy to identify. Utilise vertical space with shelving units and use dividers to keep smaller items neat.
    • Sentimental Items: For items with sentimental value that you cannot keep, take a high-quality photograph. This allows you to preserve the memory without sacrificing valuable storage space.

    This focused approach, championed by shows on HGTV and organisational giants like The Container Store, ensures every square inch of your home is clean and functional. To explore professional services that cover every nook and cranny of your property, you can learn more about our comprehensive cleaning services.

    5. Clean Windows Inside and Out Plus Window Treatments

    A truly comprehensive deep clean goes beyond surface-level tasks, and nothing brightens a home quite like sparkling, clear windows. This essential step in any deep cleaning house checklist involves a thorough cleaning of all window components, including glass, frames, sills, and tracks, as well as attending to window treatments like blinds, curtains, and drapes which are often magnets for dust and allergens.

    This task requires a systematic approach, addressing both the interior and exterior of the windows to remove built-up grime, dust, and environmental pollutants. It transforms rooms by maximising natural light, improving air quality, and presenting a polished, well-maintained appearance that standard cleaning routines often miss.

    Clean Windows Inside and Out Plus Window Treatments

    Why This Task is Crucial

    Dirty windows not only obstruct views and reduce natural light, which can affect mood and productivity, but they also harbour dust, pollen, and mould that can degrade indoor air quality. Furthermore, neglecting window frames and sills can lead to long-term damage from moisture and dirt accumulation. The Professional Window Cleaners Association highlights that regular, thorough cleaning is a preventative maintenance measure, protecting the seals and integrity of the window units themselves.

    Expert Insight: Historic home preservation protocols always include meticulous window care. Proper cleaning prevents the acidic build-up from pollution that can etch and permanently damage older, more fragile glass, preserving the home's value and character.

    How to Implement a Deep Window Clean

    A methodical process ensures a streak-free finish and properly cleaned treatments.

    • Preparation is Key: Before touching the glass, remove and clean window screens using soapy water and a soft brush. Vacuum the window tracks, frames, and sills to remove loose dust, cobwebs, and debris.
    • Choose the Right Day and Tools: Clean windows on an overcast, cloudy day. Direct sunlight can cause your cleaning solution to dry too quickly, leaving unsightly streaks. For a professional-grade finish popularised by squeegee brands like Ettore, use a high-quality squeegee and a microfibre cloth.
    • Window Treatments: Curtains and drapes should be taken down and laundered or dry-cleaned according to their care labels. For blinds, close them one way and dust with a microfibre duster or cloth, then close them the other way and repeat. A damp cloth can be used for more stubborn grime on vinyl or plastic blinds.
    • Cleaning Solution: A simple solution of one part white vinegar to ten parts water is effective and economical. For exterior windows with heavy dirt, a few drops of washing-up liquid can be added. Apply the solution, use the squeegee with overlapping strokes, and wipe the blade clean after each pass.

    6. Deep Carpet Cleaning and Floor Care

    While regular vacuuming and mopping maintain surface-level cleanliness, they don’t tackle the deeply embedded dirt, allergens, and grime that accumulate in flooring over time. A vital part of any deep cleaning house checklist is intensive floor care, which involves steam cleaning carpets, deep mopping hard floors, and thoroughly cleaning area rugs to restore their appearance and sanitise the surface.

    This process goes beyond daily maintenance to remove stubborn stains and allergens that can affect air quality and hygiene. It might involve hiring professional services or using specialised equipment like a carpet shampooer or steam cleaner to lift dirt from the very base of the fibres and grout lines, achieving a level of clean that standard methods cannot match.

    Why This Task is Crucial

    Floors endure constant foot traffic, accumulating pollutants, bacteria, and allergens that regular cleaning misses. According to the Institute of Inspection, Cleaning and Restoration (IICRC), professional deep cleaning can remove up to 98% of common household allergens from carpets and upholstery. This is particularly important for households with children, pets, or allergy sufferers. Professional services like Stanley Steemer have built their reputation on demonstrating how deep extraction methods can prolong the life of carpets and improve a home's overall environment.

    Expert Insight: When preparing a property for sale, estate agents often recommend professional carpet and floor cleaning. A pristine floor not only looks more appealing to potential buyers but can also eliminate lingering odours, significantly increasing a home's marketability and perceived value.

    How to Implement Deep Floor and Carpet Care

    A methodical approach ensures effective and safe cleaning for different floor types.

    • Preparation is Key: Before any deep cleaning, thoroughly vacuum carpets and rugs to remove loose dirt and debris. For hard floors, sweep or dust mop to clear away surface grit that could scratch the flooring during mopping.
    • Carpet and Rug Shampooing: Rent or purchase a carpet cleaner from a reputable brand like Bissell or Rug Doctor. Always test your cleaning solution on a small, inconspicuous area first, like inside a wardrobe, to check for colour-fastness. Work in sections and avoid over-saturating the carpet to speed up drying time. To tackle specific marks, you can learn more about how to remove stubborn stains.
    • Hard Floor Deep Clean: For tile or vinyl, use a steam mop or a pH-neutral cleaning solution to break down grime without damaging the finish. For wood floors, use a product specifically designed for hardwood and a microfibre mop, ensuring it is only slightly damp to prevent water damage.
    • Ventilation and Drying: After cleaning, open windows and use fans to circulate air and accelerate drying. This is crucial for preventing mould and mildew growth, especially in thick-pile carpets.

    This comprehensive floor treatment, a standard in commercial and hotel maintenance schedules, revitalises your home from the ground up, ensuring a truly deep and lasting clean.

    7. HVAC System Deep Maintenance

    A truly comprehensive deep cleaning house checklist must address the very air you breathe, which means performing deep maintenance on your heating, ventilation, and air conditioning (HVAC) system. While we often focus on visible dust and grime, the air ducts, vents, and internal components of your HVAC system can harbour a significant accumulation of dust, allergens, and debris, circulating them throughout your home.

    This task goes beyond a simple filter change. It involves a thorough cleaning of vents, inspection and cleaning of air ducts, and servicing the core furnace and air conditioning units. By addressing the entire system, you ensure it operates efficiently and contributes to a healthier indoor environment, removing contaminants at their source before they can settle on your newly cleaned surfaces.

    Why This Task is Crucial

    A neglected HVAC system can become a breeding ground for mould, bacteria, and dust mites, which can have a significant impact on indoor air quality. The US Environmental Protection Agency (EPA) highlights the importance of maintaining clean HVAC systems as a key component of reducing indoor air pollutants. Furthermore, according to Energy Star, a properly maintained system can improve efficiency by up to 15%, leading to lower energy bills and a reduced carbon footprint.

    Expert Insight: For households with allergy sufferers or respiratory conditions, professional duct cleaning can lead to a noticeable reduction in symptoms. The National Air Duct Cleaners Association (NADCA) sets standards for this process, ensuring that contaminants are properly removed rather than just dislodged.

    How to Implement HVAC Deep Maintenance

    A combination of DIY tasks and professional servicing ensures your system is in optimal condition.

    • Safety First: Always turn off the power to your HVAC system at the circuit breaker before performing any maintenance, including filter changes or vent cleaning.
    • Filters and Vents: Replace your system’s air filter every 1-3 months, depending on usage and household factors like pets. Remove all vent covers throughout your home, wash them in warm, soapy water, and use a vacuum with a hose attachment to clean as far into the ductwork as you can reach.
    • Outdoor Unit Care: Keep the area around your outdoor air conditioning unit clear of leaves, grass clippings, and other debris. Ensure there is at least two feet of clearance around the unit for proper airflow.
    • Professional Servicing: Schedule an annual inspection and service with a qualified HVAC technician. They can perform deeper cleaning, check refrigerant levels, inspect electrical components, and identify any potential issues before they become costly problems.

    This systematic approach, championed by organisations like the EPA and NADCA, ensures your home's air is as clean as its surfaces.

    7-Point Deep Cleaning Task Comparison

    Task Implementation Complexity 🔄 Resource Requirements ⚡ Expected Outcomes 📊 Ideal Use Cases 💡 Key Advantages ⭐
    Deep Clean Kitchen Appliances and Hidden Areas High – moves heavy appliances, multiple steps Specialized cleaners and time-intensive Improves efficiency, hygiene, odor removal, fire hazard reduction Homes, restaurants, appliance maintenance Extends appliance life, reduces bacteria buildup
    Scrub and Disinfect All Bathroom Surfaces High – detailed scrubbing, chemicals Harsh cleaning products, ventilation needed Eliminates mold/bacteria, improves air quality and cleanliness Hospitals, hotels, rentals, home deep cleaning Reduces allergens, maintains fixtures, controls infection
    Wash Walls, Baseboards, and Light Fixtures Medium-High – ladders, delicate surfaces Time and care with cleaning agents Brightens rooms, removes allergens and scuffs, paint prep Real estate, painting prep, routine deep clean Enhances appearance, removes bacteria on touchpoints
    Deep Clean and Organize All Storage Areas Very High – labor-intensive, emotional decisions Organizational products and time Maximizes storage, reduces clutter, finds forgotten items Closets, pantries, attics, basements Improves functionality and reveals hidden valuables
    Clean Windows Inside and Out Plus Window Treatments Medium – safety risks, technique-sensitive Specialized tools, weather dependent Boosts natural light, curb appeal, allergen removal Residential & commercial, historic homes Extends window/treatment life, improves home value
    Deep Carpet Cleaning and Floor Care High – equipment needed, long drying times Professional equipment or rental Removes deep stains/allergens, extends floor lifespan Homes, offices, real estate staging Improves air quality, deep dirt removal
    HVAC System Deep Maintenance Medium – technical knowledge required Filters, possible professional service Boosts air quality, system efficiency, reduces allergens All homes and commercial buildings Lowers energy costs, extends HVAC lifespan

    Maintaining Your Fresh Start

    Congratulations on completing, or planning to complete, this comprehensive deep cleaning house checklist. Taking on tasks like scrubbing kitchen appliances, washing walls, and deep cleaning floors is a significant achievement that transforms your living space. You've not only removed visible dirt but also tackled the hidden grime in forgotten corners, from inside your HVAC vents to behind the fridge, creating a healthier and more pleasant environment for everyone in your household.

    The true value of this effort extends far beyond a temporarily tidy home. It’s about resetting your environment, reducing allergens, and creating a more organised, stress-free sanctuary. The immediate satisfaction of a sparkling clean home is undeniable, but the long-term benefit comes from establishing a new baseline for cleanliness.

    From a One-Off Project to a Sustainable Habit

    The key takeaway from this extensive guide is that deep cleaning doesn't have to be an overwhelming annual event. The secret to maintaining this fresh start lies in integrating smaller, manageable tasks into your regular cleaning schedule. By doing so, you prevent the slow accumulation of dust and grime that makes deep cleaning such a monumental chore.

    Consider breaking down the maintenance into manageable chunks:

    • Monthly Rotation: Dedicate one weekend a month to a specific "deep clean" zone. For example, tackle window treatments one month, and focus on deep cleaning a single kitchen appliance the next.
    • Weekly Add-Ins: Incorporate one small task from your deep cleaning house checklist into your weekly routine. Wipe down skirting boards in one room this week, and clean light fixtures in another room next week.
    • Seasonal Scheduling: Align bigger tasks with the changing seasons. A deep clean of the HVAC system is perfect before the summer heat or winter chill, and washing all windows is ideal in the spring.

    This strategic approach turns a marathon into a series of short, achievable sprints. You’ll find that your home stays cleaner for longer, and the next time you decide to perform a full deep clean, the job will be significantly faster and less demanding. It's about working smarter, not harder, to preserve the hard-won freshness and order you’ve created. This proactive maintenance transforms cleaning from a reactive chore into a proactive act of home care.

    Remember, a clean home is a foundation for a clear mind and a healthier life. By embracing this checklist and the maintenance strategies that follow, you are investing in your own well-being and the comfort of your family. Enjoy the lasting rewards of your hard work and the simple pleasure of a truly pristine living space.


    Feeling overwhelmed by the sheer scale of a proper deep clean? If your busy schedule makes it difficult to follow this detailed deep cleaning house checklist, let the professionals handle it for you. The experts at Signal Cleaning offer meticulous, top-to-bottom deep cleaning services throughout Oxford, ensuring every item on this list is completed to the highest standard, so you can simply relax and enjoy your immaculate home. Learn more and book your service today.