Blog

  • A Better Property Inspection Report Template Guide

    A Better Property Inspection Report Template Guide

    Let’s be honest, a vague, hastily scribbled inspection report is a dispute just waiting to happen. If you’re a landlord or property manager in the UK, a solid property inspection report template isn't just about ticking boxes—it's your frontline defence against unfair deposit claims and a crucial tool for protecting your asset's value. Think of it as undeniable, time-stamped proof of a property's condition.

    Why a Solid Inspection Template Is a Non-Negotiable

    In the UK’s bustling property market, clarity is everything. A standardised report template shifts you away from subjective notes on a crumpled notepad to an objective, evidence-based system. That consistency is gold, whether you're managing a single flat or a portfolio of a hundred.

    Picture this scenario: a tenant is checking out, and you spot several deep scratches across the laminate flooring that you’re sure weren't there before. The tenant, of course, insists they were there when they moved in. Without a detailed move-in report, complete with photos and specific notes, your claim against their deposit descends into a classic "he said, she said" nightmare.

    Now, imagine that same checkout, but this time you're armed with a proper report. Your move-in document clearly states, "Living room flooring: Good condition, no visible scratches or scuffs," right next to a timestamped photo. The argument simply dissolves. The evidence is right there in black and white, protecting your investment and keeping things fair for everyone involved.

    Navigating a Competitive Market

    The pressure to have this kind of documentation is only increasing in today's competitive rental and sales landscape. A detailed property inspection report template helps manage everyone's expectations right from the start. For would-be tenants or buyers, it offers a transparent, professional look at the property’s real condition, which goes a long way in building trust.

    This is particularly true in a fast-moving market. A recent housing report from Propertymark noted that the number of viewings per available property climbed to three in May 2025, partly driven by shifts in Stamp Duty. With more eyes on every property, a clear, standardised report helps serious applicants get the information they need to make a quick, informed decision. You can read the complete analysis in their Housing Insight Report here.

    A well-structured template isn't just a checklist; it's a communication tool. It sets a clear standard for how the property should be looked after and returned, cutting down on misunderstandings and helping build a better landlord-tenant relationship from day one.

    A good template essentially brings order to what can otherwise be a chaotic process. It makes sure nothing gets missed, from the state of the skirting boards to whether the extractor fan is working correctly. This meticulous approach has some major advantages:

    • Dispute Resolution: It gives you concrete evidence to present to tenancy deposit schemes, which almost always favour the party with detailed records.
    • Maintenance Planning: Using the same template for regular inspections helps you spot small problems before they spiral into expensive repairs.
    • Legal Compliance: It shows you're doing your due diligence to provide a safe and habitable home, which is a core part of your responsibilities as a UK landlord.
    • Professionalism: It sends a clear signal to tenants that you are an organised and professional landlord, which can help you attract better-quality applicants.

    It's clear that a template benefits more than just the landlord. Let's take a quick look at who wins when a clear, consistent report is used.

    Who Benefits from a Property Inspection Template

    Here’s a quick look at the key players in a property transaction and the main advantage a standardised report offers each.

    Stakeholder Primary Benefit
    Landlords Strong evidence to protect their investment and fairly claim for damages from the deposit.
    Property Managers Increased efficiency, consistency across a portfolio, and a professional service for clients.
    Tenants A clear record of the property's initial condition, protecting them from unfair charges for pre-existing issues.
    Letting Agents Streamlined check-in/check-out processes and fewer disputes to mediate between landlords and tenants.
    Deposit Schemes Clear, objective evidence to make fair and quick adjudication decisions when disputes arise.

    Ultimately, a shared, transparent record helps build trust and reduces friction for everyone involved in the rental process, making for a smoother tenancy from start to finish.

    Building Your Template From the Ground Up

    Ditching the generic checklists for a custom-built template is a game-changer. Think of it as creating your own blueprint for clarity, one where every section has a clear purpose: to document a property's condition without leaving any grey areas. A solid template is your best defence against ambiguity, ensuring every inspection you carry out is consistent and airtight.

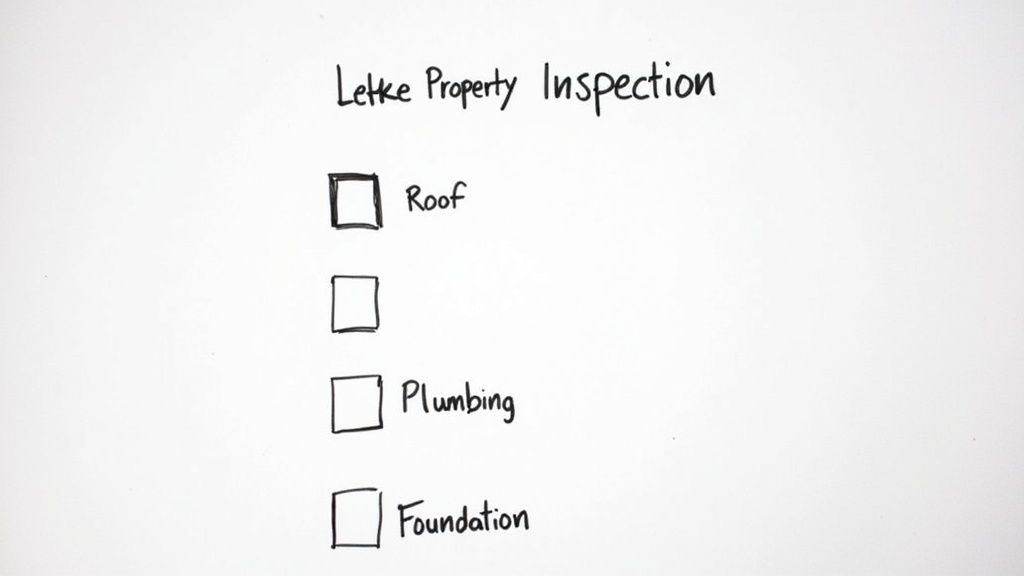
    This visual guide breaks down the essential layout of a strong property inspection report, showing how to organise key information so it’s easy to digest at a glance.

    Image

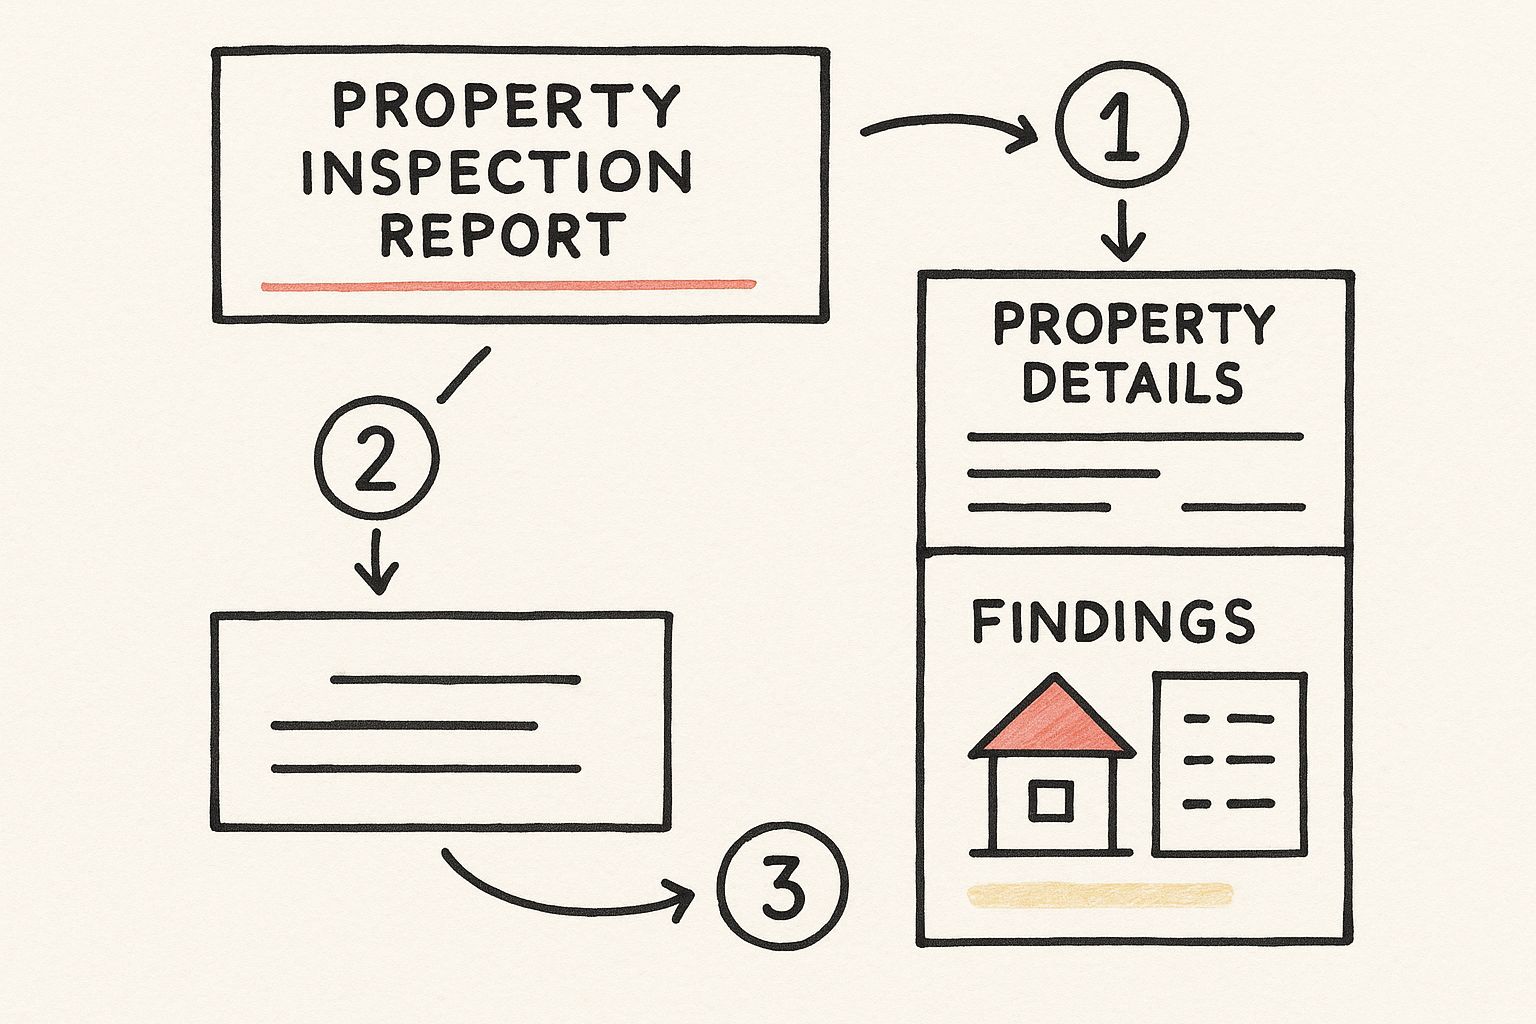
    As you can see, a clean, logical structure is everything. From the header details right down to the itemised findings, the goal is a report that anyone can pick up and understand instantly.

    Laying the Foundation: Property and Tenancy Details

    First things first, every report needs to start with the basics. This is your non-negotiable admin section, the part that gives context to everything else. It might feel like a box-ticking exercise, but getting this wrong—or worse, missing something—can cause huge headaches down the line.

    Your template absolutely must have clear, distinct fields for:

    • Property Address: The full address, including the postcode. No room for confusion here.
    • Inspection Date and Time: This is critical for creating a precise timeline of the property's condition.
    • Inspector's Name: Who is accountable for the report?
    • Tenant(s) Name(s): List everyone on the tenancy agreement.
    • Attendees: A quick note on who was actually there during the inspection (e.g., tenant, agent).

    This section is the official record. Nailing these details every single time establishes a professional, reliable audit trail from the get-go.

    The Heart of the Report: A Room-by-Room Log

    Right, this is where the real work begins. The core of any good property inspection report is a detailed, room-by-room breakdown. Instead of one long, intimidating list, you need to organise your template into logical areas like "Living Room," "Kitchen," "Bedroom 1," and so on. This structure makes the whole process methodical and stops you from accidentally skipping over something important.

    Within each room's section, you'll want to list out every single component and feature. For a bedroom, that means covering:

    • Walls and Ceiling
    • Flooring (Carpet/Wood/Laminate)
    • Windows and Curtains/Blinds
    • Doors and Door Frames
    • Light Fittings and Switches
    • Radiators
    • Skirting Boards
    • Fitted Wardrobes

    This systematic approach is your best friend. Once you get into the habit of following the same flow in every property, your inspections become faster, more consistent, and frankly, far more accurate.

    Implementing a Clear Rating System

    Vague descriptions are the enemy of a useful report. Words like "okay" or "worn" are completely subjective and just invite disputes. The best way to kill that ambiguity is to build a simple, clear condition rating system right into your template.

    A consistent rating system is the most effective way to translate what you see into objective data. It standardises your assessments and makes it incredibly easy to spot any changes in condition over time.

    A common and highly effective system uses just four tiers. It’s simple, but it works.

    1. New/Good: The item is in great shape, with no visible wear or damage.
    2. Fair: You can see signs of light wear and tear consistent with its age, but it's still fully functional.
    3. Poor: The item has significant damage or wear, or it simply isn't working as it should.
    4. Action Required: This flags an item that needs immediate attention, whether that’s a repair or a full replacement.

    Make sure that next to each item on your checklist, you have columns for its rating, a space for descriptive notes, and—this is crucial—a placeholder for a photograph. Pairing a rating like "Poor" with a specific note like "Large crack across top right corner of window pane" and a timestamped photo creates an undeniable record. It’s this powerful trio of rating, description, and visual proof that gives your report its authority and stops disputes before they even start.

    Going Beyond the Basics: Advanced Sections for a Watertight Report

    A standard report will get you by, but a truly professional one anticipates problems before they start. By adding a couple of advanced sections to your property inspection report template, you can turn a simple record-keeping document into a serious tool for managing risk. Think of these additions less as extra paperwork and more as strategic safeguards against some of the most common—and expensive—headaches for UK landlords.

    Image

    This is where seasoned professionals really set themselves apart. Moving past a simple check for scuffs and scratches shows a real commitment to the property's upkeep and the tenant's safety, something that can be a lifesaver if a dispute ever arises.

    Detailed Damp and Mould Assessment

    Damp and mould are the twin spectres that haunt landlords, often spiralling into major tenant complaints and costly repairs. A vague note like "check for damp" on a checklist just won't cut it. Your template needs a dedicated section that prompts a methodical, evidence-based assessment.

    This means getting specific with your prompts for the inspector:

    • Look for visual cues: Are there any tell-tale signs of mould? Note down any black, green, or white spots, peeling wallpaper, or discoloured patches on walls and ceilings.
    • Get a moisture reading: This is crucial. Use a moisture meter to get actual readings in high-risk areas like bathrooms, kitchens, and around window frames. Recording a specific number, like "18% moisture reading on wall adjacent to shower", provides objective data that’s incredibly difficult to argue with.
    • Check the ventilation: How are the extractor fans working? Are the trickle vents in the windows open and clear? Note the condition of all ventilation systems.

    I once worked with a landlord who was dragged into a hefty deposit dispute over a persistent damp problem. The tenant insisted it was a structural issue that was there when they moved in. Luckily, the landlord's move-in report was incredibly thorough. It included moisture meter readings for every single room, all of which were well within the normal range. That simple piece of data proved the problem had developed during the tenancy, saving him thousands.

    Adding a damp assessment section isn't just about spotting problems. It's about establishing a clear, scientific baseline of the property's condition right from day one.

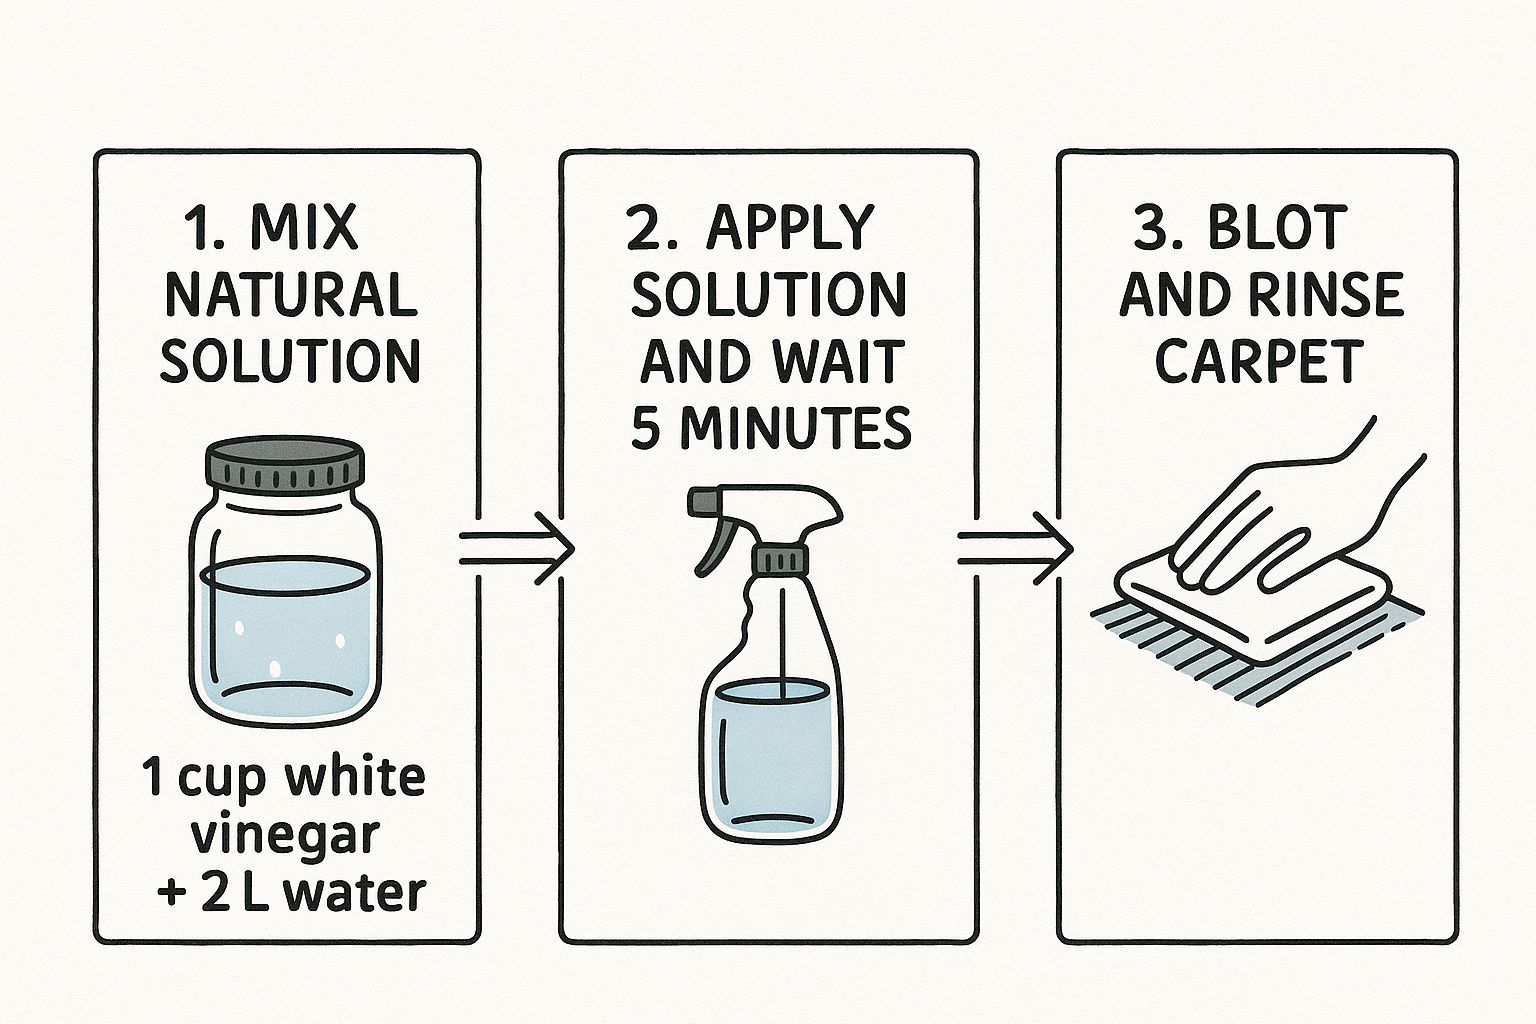
    If you do find that mould has already set in, tackling it properly is essential. You can find practical advice in our guide on how to remove stubborn stains and mould effectively.

    Fire Safety Compliance Checklist

    As a UK landlord, fire safety isn't just a good idea—it's a legal obligation. Your report has to reflect this seriousness. A dedicated checklist ensures every safety measure is systematically checked and verified at each inspection. This is more than just ticking a box to say an alarm is present; it’s about documenting that it actually works.

    Make sure your checklist has fields to confirm the following:

    • Smoke Alarms: Are they installed on every floor of the property? Crucially, you need to document the exact date you tested each alarm and confirm its battery is functional.
    • Carbon Monoxide Alarms: Is there an alarm in any room that has a solid fuel-burning appliance, such as a wood-burning stove or an open fire? Test it and record the result.
    • Fire Exits: Are all escape routes, like hallways and stairwells, completely clear of clutter and obstructions?
    • Furnishings: Have a quick check to ensure all supplied furnishings carry the 1988 fire safety compliance label.

    This kind of detailed record is your proof of due diligence. It shows your commitment to keeping tenants safe, which is fundamental for both legal compliance and your own peace of mind.

    How to Fill Out Your Report Like a Pro

    A well-designed property inspection report template is a great start, but its true value comes alive in how you use it. The real skill is shifting from casual observations to objective, undeniable facts. This is how a simple checklist becomes a professional, evidence-based document that holds up under pressure.

    Image

    It all comes down to training your eye for detail and recording everything with absolute precision. A vague note like 'wall is scuffed' is practically useless if a dispute arises.

    What you need is specifics. For example: "3-inch black scuff mark on living room wall, 12 inches above the skirting board." That level of detail leaves no room for argument.

    Use Objective and Factual Language

    Being consistent with your language is crucial. It’s what allows you to build a reliable history of the property's condition from one inspection to the next. When you stick to the facts, your report can't be brushed off as just your opinion.

    You need to think like a reporter telling a story—document what you can see, touch, and measure. It’s a simple change in approach that makes a world of difference.

    Here’s a quick comparison:

    • Vague Entry: "Carpet has a stain."
    • Pro Entry: "Circular, dark brown stain on carpet, approx. 5cm in diameter, located under the window in Bedroom 2."

    This method doesn't just make your report stronger; it immediately signals your professionalism. In a property market where every detail matters, this is non-negotiable. With the average UK house price hitting £269,079 as of June 2025, according to the UK House Price Index, accurate assessments are more critical than ever. To get a better feel for the market, you can explore the latest property price trends from the Land Registry.

    Master the Art of Strategic Photography

    While your words are important, a picture provides proof that's impossible to ignore. Photography shouldn't be an afterthought; it needs to be a core part of your inspection strategy. Don't just snap a quick, blurry photo of the damage and move on.

    Your photos should tell a complete story. A close-up shows the damage, but a wider shot provides the context, making it impossible to dispute the location or scale of the issue.

    For every single issue you find, you should be taking at least two photos:

    1. The Context Shot: A wider angle that shows the problem area in relation to the rest of the room.
    2. The Close-Up: A detailed shot that clearly highlights the specific issue, whether it’s a crack in a tile or a stain on a worktop.

    I always make sure my photos are timestamped and embedded directly into the report right next to the written note. This creates a solid, unbreakable link between your description and the visual evidence.

    And when you do spot issues with dirt or grime, remember that a professional clean can often sort things out before they become a bigger problem. You can even schedule a professional cleaning service to tackle any cleanliness issues flagged in your report, getting the property ready for its next viewing or tenant.

    The Common Pitfalls That Can Cost You Dearly

    There's no cheaper education than learning from someone else's mistakes. When it comes to your property inspection report, a few common oversights can turn a helpful tool into a major headache, especially when it's time to negotiate the deposit. Getting this right from the start is about protecting your investment.

    One of the biggest—and most costly—mistakes is being vague. A simple note like "Carpet damage" is practically useless if a dispute arises. It just doesn't have the factual weight to hold up under scrutiny. You're basically leaving the door wide open for the tenant to argue the point.

    Don't Overlook the "Minor" Details

    It's so easy to glance past the small stuff. A tiny chip in a skirting board, a slightly loose handle on a kitchen cabinet—they seem trivial. But these little things have a habit of adding up during a tenancy. What's more, if you don't log them, a tenant can easily claim that bigger, more expensive damage was also already there when they moved in.

    Your report has to be thorough. A well-designed template should guide you to be meticulous, building an undeniable record of the property's condition right from day one.

    Your report is only as strong as its weakest link. Every scuff, scratch, and loose fixture you don't record is a potential loophole that could cost you serious time and money down the line.

    Another classic error is forgetting to get signatures. Without the tenant's signature, your report is just your opinion. A signature transforms it into a mutually agreed-upon record of the property's condition at a specific point in time. It’s your proof.

    Let's look at the difference a little detail makes:

    • A Vague Entry: "Carpet damage"
    • A Legally Sound Entry: "Circular burn mark on carpet, approx. 2cm diameter, located by the main doorway."

    That level of precision just shuts down any potential for argument.

    Failing to Evolve Your Template

    Finally, treating your template as a "set it and forget it" document is a mistake. The property world in the UK is always shifting, with new regulations and building standards popping up. Think about new-build properties—they come with different expectations and safety compliance rules.

    Since late 2023, for example, data from the Building Safety Regulator has become much more significant, adding new layers of safety checks to reports for newer homes. Your template has to keep up with these changes to stay effective and compliant. You can find out more about these kinds of shifts in the UK housing market and its regulatory changes.

    Your Questions on Inspection Reports Answered

    Even the most seasoned landlord or agent has questions when it comes to property inspection reports. It’s completely normal. Getting the details right means you can use your template confidently, knowing it's a solid, professional tool that protects everyone involved. Let's dig into some of the most common queries I hear.

    How Often Should I Update My Template?

    Think of your template as a living document, not something you create once and forget about. I recommend giving it a thorough review at least once a year. Why? Because regulations are always shifting, especially around health and safety like smoke alarm requirements or electrical standards. An annual check-in keeps you compliant.

    Beyond that, make small tweaks as you go. If you come across a unique issue during an inspection—say, a specific type of window lock you've never seen before—add a field for it to your template right away. This kind of continuous improvement is what makes a good report a great one over time.

    Are Digital Inspection Reports Better Than Paper?

    In my experience, absolutely. Digital templates have a massive advantage over the old pen-and-paper method. You can embed high-resolution, timestamped photos and even short videos directly into the report. That kind of evidence is incredibly powerful and hard to dispute if a problem comes up later.

    A digital report gives you a professional, searchable PDF that’s easy to email, sign electronically, and store securely. While a paper report can get the job done, digital tools are simply more efficient and create a much stronger audit trail that holds up better under scrutiny.

    Plus, you don't have to worry about losing or damaging a single piece of paper—everything is backed up and safe.

    Can I Just Use a Generic Online Template?

    Grabbing a free template from the internet can be a decent starting point, but it should never be your final version. Many of these generic documents are far too basic for the UK market and often miss out on crucial, legally required checks. For instance, they rarely cover the specific requirements for Houses in Multiple Occupation (HMOs).

    Always take the time to customise a generic template. Tailor it to the specific property and, most importantly, make sure it lines up with current UK landlord-tenant laws. The custom details you add are what transform it from a simple checklist into a genuinely valuable document.

    What's the Difference Between an Inventory and an Inspection Report?

    This is a common point of confusion. An inventory is a highly detailed record of a property's contents and their condition right at the start of a tenancy. It sets the baseline. An inspection report, on the other hand, is what you use for mid-tenancy checks or at the end of the tenancy to compare the property's current state against that original inventory.

    A robust property inspection report template can often be adapted for both uses, but that initial inventory is typically the most exhaustive document of all. For more practical advice on property maintenance and upkeep, you can find some great articles on the Signal Cleaning blog.


    Keeping your property in prime condition is much simpler with a professional team on your side. Signal Cleaning provides reliable, high-quality cleaning services across Oxford, ensuring your property always makes the best impression. You can book your next clean in just a few clicks at https://signalcleaning.co.uk.

  • The Ultimate Guide to One Off Cleaning Services

    The Ultimate Guide to One Off Cleaning Services

    At its heart, a one-off cleaning service is exactly what it sounds like: a single, comprehensive cleaning session you book whenever you need it, with no strings attached. It's not about a recurring schedule. Instead, it’s designed to give your home a deep, thorough refresh, getting into all the nooks and crannies that a regular tidy-up often misses.

    Think of it as hitting the reset button on your living space.

    What a One-Off Cleaning Service Truly Means

    Imagine the difference between a quick drive-through car wash and a full professional detailing. The automated wash gets the surface-level dirt off, sure. But the detailing? That's a whole other level. It restores the car to a near-new condition, cleaning every single vent, polishing every surface, and shampooing the carpets. A one-off clean is the home equivalent of that deep, restorative detailing.

    This isn’t your everyday wipe-down or weekly vacuum. This is an all-hands-on-deck, top-to-bottom blitz meant to tackle a specific need. It's for those times when your home needs more than just a quick tidy – it needs a complete overhaul.

    When Is a One-Off Clean the Perfect Solution?

    This kind of service is incredibly versatile and often feels like a lifesaver in a few common scenarios. You might find yourself booking a one-off clean when you're:

    • Preparing for a Special Event: Got a big party on the horizon? A family gathering? Or maybe guests staying over for the weekend? A one-off clean gets your home looking immaculate, freeing you up to focus on being a great host.
    • Recovering After a Big Mess: This is perfect for the aftermath of a renovation project, a lively party, or even just one of those chaotic periods where life gets in the way of housework.
    • Moving Home: An end-of-tenancy clean is probably the most popular type of one-off service. It's specifically designed to meet the high standards of landlords and letting agents, giving you the best chance of getting your full deposit back.
    • Doing a Seasonal Refresh: A deep spring clean or an autumn reset is the ideal way to prepare your home for the months ahead, clearing out all that accumulated dust and allergens.

    As you can see, a general one-off cleaning service can branch into more specific, goal-oriented tasks.

    Image

    Whether it’s for moving out, a seasonal deep-clean, or getting ready for an event, the core idea is always the same: one single, incredibly thorough cleaning session.

    One-Off Cleaning vs Regular Cleaning at a Glance

    It's easy to confuse a one-off deep clean with a standard weekly or fortnightly service, but they serve very different purposes. This quick table breaks down the main differences.

    Feature One-Off Cleaning Service Regular Cleaning Service
    Frequency A single, standalone booking. Recurring schedule (e.g., weekly, fortnightly).
    Scope Comprehensive, top-to-bottom. Tackles deep grime and build-up. Maintenance-focused. Keeps the home at a consistent standard.
    Intensity High. Involves tasks like cleaning inside appliances and scrubbing grout. Moderate. Covers standard tasks like dusting, vacuuming, and wiping surfaces.
    Use Case Moving, post-renovation, special events, seasonal cleaning. Ongoing upkeep for busy households.

    Ultimately, a one-off clean is your 'heavy lifter' for major resets, while a regular service is all about consistent maintenance.

    Why It's More Than Just Tidying Up

    The demand for professional cleaners has shot up in recent years, which really speaks to how vital these services have become in modern life. The UK cleaning industry was valued at around £59.8 billion back in 2021 and has grown steadily, with the number of cleaning companies climbing to over 75,000 by 2023. This boom shows just how many people now rely on professional help to manage their homes. You can find out more by exploring the latest UK cleaning industry statistics and trends.

    A one-off cleaning service isn't a luxury; it's a practical tool for reclaiming your time and restoring a sense of order to your home precisely when you need it most. It perfectly bridges the gap between your own routine and the intensive work required to truly reset your living environment.

    At the end of the day, this service offers a fresh start. It tackles the jobs you either don't have the time, the right tools, or simply the energy for. It's the perfect way to bring your home back to a brilliant baseline of clean, making all your future tidying feel far easier and less overwhelming.

    The Real Pay-off of a Professional Deep Clean

    Hiring a professional for a one-off clean is about so much more than just a tidy house. The real value is something you feel – it’s about reclaiming your time, boosting your well-being, and getting a level of clean that’s honestly tough to hit on your own. It's an investment in your lifestyle.

    Think about your last few weekends. Were they spent catching up on a mountain of chores? A one-off clean gives you that time back. Imagine a weekend where you're not on your hands and knees scrubbing floors, but instead, you're out with family, lost in a hobby, or just properly switching off. It's a game-changer, especially when life gets hectic, like when you're preparing for a big party or staring down a pile of moving boxes.

    It's like hitting a reset button and letting someone else take the pressure off.

    A Genuinely Healthier Home

    One of the biggest wins is the difference it makes to the health of your home. A quick wipe-down gets the surface dust, but a proper deep clean goes after the hidden nasties that can affect your air quality and general well-being. Professionals are trained to hunt down and eliminate deep-set allergens, dust mites, and bacteria lurking in carpets, sofas, and all those forgotten corners.

    It’s easy to forget that the air inside our homes can be much more polluted than the air outside. A deep clean tackles this problem at the source, which is brilliant news for anyone with kids, elderly relatives, or those who struggle with allergies or asthma. You end up with a home that doesn't just look spotless – it actually feels healthier to breathe in.

    Think of a professional deep clean as an investment in your family's health. It’s a systematic removal of the germs and allergens that regular cleaning often leaves behind, creating a far more comfortable and safer space for everyone.

    The Pro Touch: Quality That Lasts

    Ever spent hours cleaning, only to stand back and feel like it doesn't quite sparkle? That’s where the professionals have the edge. They come armed with two things most of us don't have: professional-grade equipment and years of experience. We're talking about powerful vacuums, steam cleaners, and specialised solutions that are simply in a different league to what you find in the supermarket.

    This expertise delivers a shine that lasts, but more importantly, it protects your home.

    • The Right Product for the Job: They know exactly what to use on different surfaces, so there's no risk of using an acidic cleaner that ruins your marble worktop or a harsh chemical that damages your wooden floors.
    • Tools That Really Work: Their equipment can pull dirt from the very base of your carpet fibres or dissolve stubborn limescale from taps without leaving a single scratch.
    • An Eye for Detail: A professional cleaner is trained to see what we often miss. They'll clean the skirting boards, light fittings, and the greasy tops of kitchen cabinets as standard.

    They know, for example, to use a specific pH-neutral cleaner on natural stone or the right low-moisture technique for a fabric sofa to prevent any chance of mildew. It’s this deep knowledge that not only gets your home gleaming but also helps maintain it for the long run. In the end, a one off cleaning service takes your home from just "tidy" to feeling completely refreshed and cared for.

    Your Complete One-Off Cleaning Checklist

    Image

    So, what actually gets done during a professional one-off cleaning service? The real magic is in the details—those jobs that go way beyond a quick tidy-up to get your home looking its absolute best. Knowing what's on the list helps you set the right expectations and truly appreciate the level of work involved.

    While every cleaning company has its own way of doing things, any quality deep clean will follow a comprehensive, room-by-room checklist. It’s the only way to make sure no corner is missed. Let’s walk through what a proper, thorough clean looks like in the key areas of your home.

    The Kitchen: The Heart of the Home

    The kitchen is almost always the most demanding room. It’s a battleground of grease, food splatters, and daily grime. A professional clean here is nothing short of transformative, focusing on making it hygienic and sparkling.

    • Appliance Exteriors: The outside of your fridge, oven, dishwasher, and microwave will be wiped down, degreased, and polished.
    • Hob and Extractor Fan: Your hob is scrubbed to get rid of any burnt-on food, and the extractor fan is thoroughly degreased.
    • Worktops and Sinks: All surfaces are cleared, sanitised, and polished. The sink and taps are descaled until they shine.
    • Cupboard Fronts: Cabinet and drawer fronts are wiped down to remove fingerprints and smudges.
    • Floors: The floor is meticulously swept, vacuumed, and mopped, with special care given to the edges and corners.

    A key difference in a one-off deep clean is the focus on areas you might not tackle weekly. This includes cleaning the microwave inside and out, wiping down skirting boards, and sanitising bins.

    Bathrooms: A Hygienic Reset

    Bathrooms need a sharp eye for detail to tackle limescale, soap scum, and bacteria. The end goal is a space that isn't just clean, but hygienically so.

    • Toilets: The entire toilet, including the base and the often-missed area behind it, is disinfected and cleaned.
    • Showers and Baths: Shower screens, tiles, grout, and the tub itself are scrubbed to eliminate soap scum and limescale.
    • Sinks and Taps: Basins are cleaned, and taps are descaled and polished to a brilliant shine.
    • Mirrors and Cabinets: Mirrors are left with a streak-free finish, and the outside of any cabinets is wiped down.
    • Floors: Bathroom floors are properly sanitised and mopped.

    For that really stubborn build-up, professionals come armed with specialised cleaning solutions. If you’re struggling with issues between cleans, our guide on how to remove stubborn stains has some great tips.

    Living Areas and Bedrooms: Restoring Comfort

    These are the rooms where you unwind, so the focus shifts to removing dust, freshening the air, and creating a sense of calm and order. A good team will work methodically from the top of the room down to the bottom.

    • Dusting All Surfaces: This covers everything from shelves and tables to picture frames, window sills, and light fittings.
    • Skirting Boards: Wiped down to get rid of dust and scuff marks.
    • Mirrors and Glass: All glass surfaces are cleaned and polished.
    • Vacuuming: Carpets and rugs get a deep vacuum, while hard floors are swept and mopped. They’ll often vacuum under sofa cushions, too.
    • Tidying: A general tidy-up, like straightening cushions, is usually included to finish the job.

    What About Add-On Services?

    Most companies have a standard checklist, but they also let you customise your one-off cleaning service with extra tasks for an additional fee. This is great because it means you only pay for what you actually need.

    Common add-on services include:

    1. Cleaning Inside Appliances: A very popular extra. This involves a deep clean of the inside of your oven, fridge, or kitchen cupboards.
    2. Interior Window Cleaning: Washing the inside of your windows to let more natural light flood in.
    3. Professional Carpet Cleaning: Using specialist equipment for a deep shampoo that pulls out embedded dirt and stains.
    4. Upholstery Cleaning: A deep clean for sofas, armchairs, and other fabric furniture.

    The demand for these specialised services is definitely growing. In the UK, the cleaning services market was worth around $15.4 billion in 2022 and is expected to climb to over $30 billion by 2030. Floor care is a huge part of this, making up nearly 32% of the market's revenue. It just goes to show that homeowners are increasingly looking for professional help with bigger tasks like carpet and upholstery cleaning, not just the standard stuff. You can read more about the UK cleaning services market on Grand View Research.

    By having this checklist in mind, you can have a much clearer conversation about your priorities and make sure your one-off clean leaves your home feeling completely revitalised.

    Decoding the Cost of a One Off Clean in the UK

    Image

    Let's talk numbers. Working out the cost of a one off cleaning service is one of the first things on everyone's mind, but it's rarely a simple, one-size-fits-all figure. The final price tag depends on everything from the size of your home to the level of grime the cleaners will be tackling.

    In the UK, most professional cleaning companies will quote you in one of two ways: an hourly rate or a flat fee for the whole job. Each has its place, and knowing the difference will help you choose what’s right for your situation.

    Hourly Rate vs Flat Fee Pricing

    An hourly rate is just what it sounds like – you pay for the time the cleaners are physically working in your home. This approach is wonderfully transparent and flexible. It’s perfect if you have a specific list of tasks you want done and a set budget for time.

    A flat fee, on the other hand, is an all-in price agreed upon before any work starts. This gives you complete peace of mind, as you know exactly what the final bill will be, no matter how long the job takes. It's the go-to model for bigger, more predictable jobs like an end-of-tenancy clean, where the scope of work is crystal clear.

    When you're comparing quotes, always ask what's included. A flat fee might look higher at first glance, but it often covers all the necessary supplies and equipment, so there are no nasty surprises. An hourly rate gives you control, but you need to communicate your priorities clearly to avoid going over budget.

    Key Factors That Influence the Final Price

    So, what actually determines the final quote for your one off clean? A few key variables come into play, and understanding them will help you see why prices can vary so much from one quote to the next.

    • Property Size: This is the big one. A four-bedroom house will naturally take longer and cost more to clean than a one-bedroom flat. It's a simple matter of square footage.
    • Condition of the Property: There's a world of difference between a home that just needs a light refresh and one that requires a serious deep clean to cut through months of built-up dust, limescale, or pet hair. The more elbow grease needed, the higher the cost.
    • Specific Services Required: A standard deep clean has a baseline cost. If you start adding extras like cleaning the inside of your windows, a professional oven valet, or deep carpet shampooing, the price will naturally go up.
    • Location: Where you are in the UK matters. Labour costs in major cities like London are typically higher than in more rural parts of the country, and this is reflected in the rates.

    The demand for these kinds of services is huge. In fact, the UK's contract cleaning market, which includes one-off jobs, was valued at around £13 billion in 2023 and is projected to climb to nearly £23 billion by 2032. This isn't just a niche service; it's a massive industry built on helping people reclaim their time and enjoy their homes. You can read more about the trends in the UK contract cleaning services market if you're curious.

    Estimated UK One Off Cleaning Costs by Property Size

    To give you a better idea of what to expect, we've put together a table of typical price ranges. Think of this as a ballpark guide – the only way to get a truly accurate figure is to request a personalised quote for your home.

    Property Type Estimated Hourly Rate (£) Estimated Total Cost (£)
    Studio Flat £18 – £25 £120 – £180
    1-Bedroom Flat £18 – £25 £150 – £220
    2-Bedroom House £20 – £28 £180 – £280
    3-Bedroom House £20 – £28 £240 – £350
    4-Bedroom House £22 – £30 £300 – £450+

    When you reach out for a quote, the more detail you can provide, the better. A good, reputable company will give you an itemised breakdown so you can see exactly where your money is going. This kind of transparency is key to avoiding hidden fees and making sure the one off cleaning service delivers the fantastic value you're looking for.

    How to Prepare for a Flawless Cleaning Day

    To get the absolute most out of your **one off cleaning service**, a little bit of prep work can go a surprisingly long way. Think of it like this: you wouldn’t ask a decorator to paint a room filled with furniture and clutter. You’d clear the space so they can get straight to work.

    The same logic applies here. A bit of groundwork means your cleaning team can dedicate their time and skill to the deep-cleaning tasks you’ve actually hired them for, rather than spending precious minutes just tidying up. It’s the key to a smooth day and a truly sparkling finish.

    Declutter Your Surfaces

    If you only do one thing, make it this. When cleaners arrive, they need clear access to worktops, floors, tables, and windowsills. If these surfaces are buried under paperwork, toys, or last night's dishes, the team has to move everything before they can even think about scrubbing.

    A quick 15-minute sweep through each room to put things back where they belong is all it takes. This simple action lets the cleaners be far more efficient, focusing their efforts on getting rid of grime, not just navigating your stuff. You end up with a much deeper, more thorough clean for your money.

    Your goal is to clear the way for the professionals. By decluttering, you are essentially directing their expert attention towards the deep-seated dirt, dust, and grime, ensuring they can achieve the best possible results in the time they have.

    Communicate Your Priorities

    While any good professional will have a detailed checklist, your input is what makes the service personal. Before the team gets started, take a moment to walk them through your main concerns. Is it the stubborn limescale on the shower screen that drives you mad? The greasy film on the kitchen extractor fan? Or maybe the scuff marks along the hallway skirting boards?

    Pointing out your priorities ensures the team focuses its energy exactly where you need it most. Don't just assume they’ll magically know what bothers you. A quick, friendly chat at the start sets everyone up for success and makes sure the final result matches what you had in mind. When you're ready to make your needs clear, you can easily find your perfect slot when you book your one off cleaning service online.

    Secure Your Pets and Valuables

    For everyone’s peace of mind—including your pets'—it's best to have a plan. The new sounds of unfamiliar people and vacuum cleaners can be quite stressful for animals. The kindest thing to do is secure them in a quiet, comfortable room or arrange for them to be out of the house for a few hours.

    It’s also just good practice to put away any particularly valuable or sentimental items. While you should always hire a trustworthy and insured company, tucking these things away prevents any accidental knocks or damage. It gives you peace of mind and allows the team to clean freely without having to be overly cautious.

    Choosing the Right One Off Cleaning Company

    Image

    When you hire a one off cleaning service, you're not just buying a clean house; you're inviting someone into your personal space. That’s a big deal, and it means trust is everything. Picking the right company goes way beyond just finding the cheapest quote – it's about finding a professional, reliable partner who will treat your home with respect and leave it sparkling.

    So, where do you start? The most important thing is to check their credentials. You absolutely must confirm that the company is fully insured. This isn't just a bit of admin; public liability insurance is your safety net, protecting your property against any accidental damage. It's what lets you relax, knowing you're completely covered.

    Don't be shy about asking for proof of their insurance. Any legitimate, professional company will have it ready and will be happy to show you.

    Dig into Reviews and Reputation

    These days, it’s easier than ever to get the real story on a company's reputation. Head over to independent sites like Google or Trustpilot and see what recent customers are saying. A perfect record is rare, but you should be looking for patterns. Are the complaints about the same issue over and over?

    Also, pay close attention to how the company replies to feedback, especially the negative comments. A thoughtful, professional response shows they care about their customers and are willing to take responsibility. It speaks volumes about their commitment to getting the job done right.

    A strong track record of high scores and detailed, positive reviews is a green flag. It tells you that a company consistently meets—or even exceeds—what their clients are hoping for.

    Insist on a Detailed Written Quote

    A vague price given over the phone just won't cut it. Before you commit to anything, always get a detailed, itemised quote in writing. Think of this document as your agreement; it should leave no room for doubt about what's included.

    A proper quote will clearly lay out:

    • Scope of Work: A checklist of all the tasks to be completed in each room.
    • Total Cost: The final price, making it clear if VAT is included.
    • Add-On Services: A breakdown of any extras you've requested and how much they cost.
    • Terms and Conditions: The fine print on their satisfaction guarantee, cancellation policy, and what happens if something gets damaged.

    This transparency is crucial. It protects you from surprise bills and ensures everyone is on the same page before the work even begins.

    Ask the Right Questions

    Before you make your final choice, have a quick chat with the companies you're considering. The way they answer a few key questions can tell you a lot about their standards and professionalism. You might want to ask about how they vet their staff, what kind of training they provide, and what happens if you're not happy with the clean.

    For example, companies like Signal Cleaning build their reputation on having a team of trained, vetted professionals, which sets a high bar for quality. Knowing exactly who is coming into your home and that they are properly trained is fundamental to getting the fantastic one off cleaning service you’re paying for.

    Frequently Asked Questions

    Even after reading a detailed guide, it's completely normal to have a few questions buzzing around your head, especially if it's your first time booking a one off cleaning service. We've pulled together some of the most common ones we hear to give you clear, straight-up answers.

    Do I Need to Be Home for the Cleaning?

    It’s entirely up to you and what you feel comfortable with. Professional cleaning companies (like us!) are fully insured and our teams are thoroughly vetted, so you can absolutely head out and get on with your day. Just arrange to leave a key in a safe place or provide access, and they'll handle the rest.

    That said, many people like to be there for the first clean. It’s a great chance to meet the cleaners, show them any particular areas you want them to focus on, and get a feel for how they work. Either way, a good company will always be flexible and work around what’s best for you.

    How Long Will a One Off Deep Clean Actually Take?

    This is a classic "how long is a piece of string?" question, but we can give you a good idea. The time it takes really boils down to three things: the size of your home, its current condition, and any extra jobs you've added on.

    As a rough guide, a small studio flat might take around 3-4 hours. For a larger, four-bedroom house, you could be looking at a team working for 6-8 hours or more, particularly if it's been a while since its last proper deep clean. Any quote you get should give you a solid time estimate, so there are no surprises on the day.

    Remember, the point of a one off clean is to be thorough, not fast. A quality job isn't about rushing. It's about taking the time needed to get every nook and cranny sparkling.

    Deep Clean vs End of Tenancy Clean: What Is the Difference?

    Good question! They sound similar, but they're for different situations. Think of a deep clean as a reset button for your own home. It’s for homeowners who want to tackle all the built-up dust and grime to make their living space feel fresh and new again.

    An end of tenancy clean is a specialist service for renters who are moving out. Its sole purpose is to get the property back to the high standard that landlords and letting agents demand, helping you get your deposit back in full. These cleans follow a very strict checklist, and things like cleaning inside kitchen cupboards and all appliances are usually included as standard.


    Ready to see your home sparkle without having to lift a finger? The team at Signal Cleaning is here to deliver a flawless one off clean designed just for you.

    You can get an instant, no-obligation quote and book your service in 60 seconds flat right here: https://signalcleaning.co.uk.

  • Find House Cleaning Services Near Me

    Find House Cleaning Services Near Me

    When you find yourself typing "house cleaning services near me" into Google, what you're really looking for is a shortcut to a spotless home and more free time. The trick to finding a great cleaner isn't just about a quick search; it's about combining broad online discovery with a bit of local know-how. This two-pronged approach helps you uncover both the established, well-reviewed companies and the trusted independent cleaners your neighbours already love.

    Where to Start Looking for a Cleaner

    Finding the right person for your home is all about knowing where to cast your net. A simple online search is a solid first step, but the best strategy involves digging into both digital platforms and local community recommendations. This way, you get a complete view of your options, from larger outfits to the solo cleaners who have built their reputation word-of-mouth.

    Get Clever with Your Online Search

    Don't just stick with generic phrases. The more specific you are with your search terms, the better your results will be. Think about what you actually need and tailor your search to match.

    • Be specific about the service: If it's more than a standard spruce-up, try searching for "end of tenancy cleaner in Bristol" or "deep cleaning service for allergies". You'll get results that are a much better fit.
    • Pinpoint your location: Adding your postcode or neighbourhood, like "weekly domestic cleaner SK8", ensures you only see professionals who actually work in your area.
    • Include the frequency: A search for "fortnightly house cleaner Oxford" helps you find services that can accommodate your preferred schedule right from the get-go.

    This focused approach helps you build a solid list of contenders far more quickly. With the UK cleaning industry being a massive £59.8 billion market made up of over 75,000 mostly small, independent businesses, a little bit of search specificity goes a long way.

    My own pro tip? I always keep a simple spreadsheet or a note on my phone to track the companies that catch my eye. I just jot down their name, contact info, and a quick reminder of what I liked about them. It makes the comparison stage so much easier later on. Once you’ve got a shortlist, you can start thinking about how to get an instant quote and book online.

    Vetting Cleaners Like a Pro

    So, you've searched for "house cleaning services near me" and have a shortlist. Brilliant. Now for the most important part: figuring out who you can actually trust to let into your home. This is where you separate the true professionals from the rest.

    Your first port of call, before anything else, is insurance. Don't just tick a box; you need to ask for proof of their public liability insurance. This isn't just a bit of admin – it’s the safety net that protects you if something goes wrong. Imagine a cleaner accidentally knocks over your TV or damages an antique piece of furniture. Without this insurance, you could be left footing a very expensive bill.

    Reading Between the Lines of Reviews

    Next up, it’s time to play detective with online reviews. Star ratings on places like Google or Checkatrade are a starting point, but the real gold is in the comments. Don’t let one bad review put you off entirely; we all have off days. What you're looking for are patterns.

    Do several reviews mention the cleaner always turning up late? Or maybe multiple clients rave about how they leave the bathrooms sparkling every single time? These recurring themes paint a much more realistic picture of the service you’ll actually receive.

    A great tip I've learned over the years is to see how the company responds to negative feedback. A professional, constructive reply that offers a solution speaks volumes. A defensive or rude response? That's a massive red flag.

    The whole process, from realising you need help to booking a service, is a journey.

    Image

    Keeping this flow in mind helps you stay organised and ensures you don't miss a crucial check.

    To make things even easier, I've put together a quick checklist you can use as a reference.

    Essential Checklist for Vetting Cleaning Services

    Use this quick reference to ensure you're covering the most important checks before hiring any cleaner.

    Vetting Step Why It's Crucial What to Look For
    Proof of Insurance Protects you from liability for accidental damage to your property. A valid, up-to-date certificate of Public Liability Insurance.
    Review Analysis Reveals consistent patterns of behaviour (good and bad). Recurring themes in comments, not just the overall star rating.
    Response to Feedback Shows their level of professionalism and customer service. Professional, problem-solving replies to negative reviews.
    Reference Checks Provides unfiltered, honest feedback from current clients. Positive comments on reliability, consistency, and trustworthiness.

    This table covers the fundamentals, making sure you're asking the right questions from the get-go.

    Don't Be Afraid to Ask for References

    Finally, don’t hesitate to ask for a couple of references from their current clients. It might feel a bit old-school in the age of online reviews, but speaking directly to someone gives you an insight you just can't get from a screen. It’s your opportunity for a truly honest opinion.

    When you get them on the phone, ask specific questions:

    • Reliability: "Have they ever been a no-show or cancelled on you last minute?"
    • Consistency: "Is the quality of the clean just as good now as it was on their first visit?"
    • Trustworthiness: "How do you feel about them being in your home when you're not there?"

    Any reputable cleaning service will be more than happy to provide references; it shows they're confident in the quality of their work. Taking the time to do this groundwork is your best defence against a bad experience, ensuring the cleaner you choose is reliable, professional, and trustworthy.

    Getting to Grips with Cleaning Quotes and Services

    Image

    Once you've got a shortlist of promising cleaners, it's time to talk numbers. Getting quotes isn't just about finding the cheapest price; it's about understanding what you're actually getting for your money. To get a realistic figure and sidestep any nasty surprises down the line, you’ll need to be upfront about the specifics of your home.

    When you reach out for a quote, be ready with the key details. They'll almost certainly ask for the number of bedrooms and bathrooms, the approximate size of your place, and whether you have any furry friends running about. Don't hold back on mentioning any particular pain points, either – that stubborn limescale in the shower or the scuff marks in the hallway. The more information you give them, the more accurate their quote will be.

    What's Included in the Price?

    Cleaning services aren't one-size-fits-all, so it’s crucial to know precisely what's covered. Most companies you'll find when searching for "house cleaning services near me" will have a few different packages on offer.

    • A Standard Clean: This is your basic upkeep. Think of it as the regular maintenance that keeps your home ticking over. It'll usually cover dusting, vacuuming, wiping down kitchen surfaces, and giving the bathrooms a once-over. Perfect for a weekly or fortnightly visit.

    • A Deep Clean: This is where they roll up their sleeves and get into the nooks and crannies. It's everything in a standard clean, plus the jobs that get forgotten, like scrubbing skirting boards, cleaning inside the oven, and tackling built-up grime on taps. A lot of people opt for a deep clean for their very first service to get things up to scratch.

    • An End-of-Tenancy Clean: The most thorough service of all. This is designed to get a property back to its original state, ready for new tenants or to satisfy a landlord. It's an exhaustive, top-to-bottom job that covers everything from inside cupboards to light fittings.

    One of the most common mix-ups is about cleaning supplies. Always, always ask who provides them. Most established companies will bring their own professional-grade equipment and products, but some independent cleaners might expect you to have everything on hand. Clarifying this from the start saves a lot of hassle.

    The UK cleaning industry is booming, with the market expected to reach €6.76 billion by 2025. A big part of that growth is the move towards eco-friendly cleaning, as more of us are looking for biodegradable and non-toxic options for our homes. If that's important to you, make sure it’s one of the first things you ask about. You can read more about the latest UK cleaning industry trends to see how the market is changing.

    Getting Ready for Your Cleaner's First Visit

    Image

    You’ve done the hard work of finding and booking your cleaner. Excellent! Now, a little bit of prep work will make all the difference, ensuring you get the most value out of their time and the sparkling results you’re hoping for.

    First things first, it’s always a good idea to confirm the details. Just a quick email or text to nail down the date, arrival window, and the price you agreed on. This tiny step prevents any mix-ups down the line and makes sure everyone is on the same page before they even arrive.

    Helping Your Cleaner Do Their Best Work

    You don’t need to clean before the cleaner comes – that defeats the whole point! However, a quick tidy-up can help them focus on the deep cleaning you're actually paying them for. Think of it as clearing the way for them to work their magic.

    • Clear the decks: Whisk away any clutter like toys, stacks of mail, or dishes from countertops and floors. This means they can get straight to scrubbing, not tidying.
    • Keep pets safe and sound: Even the most well-behaved furry friend can get underfoot. For everyone's safety and comfort, it's best to pop them in a separate room or garden while the cleaner is working.
    • Flag any tricky spots: Got a persistent mark that just won't budge? You can either point it out when they arrive or, if you're feeling adventurous, have a go yourself with these tips on how to remove stubborn stains.

    I always tell my clients this: the best thing you can do on the first visit is a quick 5-minute walkthrough. Point out your absolute priorities. Whether it’s the grimy hob, the limescale in the kids' bathroom, or the dusty skirting boards, this is the single most effective way to ensure you're delighted with the final result.

    This little tour doesn't just set expectations; it starts your relationship off on the right foot. A bit of communication and a few simple prep steps can turn a good clean into a fantastic one, tailored exactly to what your home needs.

    Building a Great Relationship with Your Cleaner

    Image

    Finding a fantastic cleaner is a real game-changer for your home, but the secret to long-term success is keeping them. The best working relationships are always built on clear communication and mutual respect. Get that right, and you'll enjoy consistently great service for years.

    The trick is learning how to give feedback constructively. Nobody likes feeling criticised, so if you need to mention a missed spot, always frame it positively and politely.

    For instance, try saying something like, "You did a brilliant job on the bathrooms! Next time, could you give the skirting boards in the hallway a little extra attention?" This approach feels like teamwork and is far more effective than just pointing out what went wrong.

    Communication and Courtesy

    Simple professional courtesy really does go a long way. Always aim to pay promptly based on your agreement and give as much notice as you can if you need to change or cancel a clean. Respecting your cleaner’s time and business policies is just fundamental.

    Remember, a good, reliable cleaner is an invaluable asset to your home. Treating them with professional respect is the key to building a strong, lasting partnership.

    My best tip is to leave a short note or send a quick text before a clean. Highlight one or two priority areas for that week. It takes thirty seconds but ensures you are always delighted with the results.

    This simple habit keeps the lines of communication open and positive. With the UK cleaning market projected to grow at around 9% annually until 2030, finding and retaining excellent house cleaning services near me has never been more important. You can read more about the expanding cleaning services market in the UK and what it means for homeowners like you.

    Common Questions About Hiring a Cleaner

    Even when you think you've found the perfect cleaner, it's natural for a few questions to pop into your head. Getting these sorted out beforehand is the key to feeling confident about your decision and avoiding any surprises down the line.

    Let's start with the big one: cost. Here in the UK, the going rate for a professional cleaner typically falls somewhere between £15 and £25 per hour. You'll find prices often nudge towards the top of that bracket in London and the South East, while other regions can offer slightly more competitive rates.

    Should I Be at Home for the Clean?

    This really comes down to what you're comfortable with. Many of our clients prefer to be home for the very first clean. It's a great opportunity to walk your cleaner through the house, point out any particular areas you want them to focus on, and just get to know them a bit.

    After that initial visit, it’s completely normal to leave a key or provide an access code for regular appointments. Any professional house cleaning service will haveしっかりした key-holding policies and insurance in place, so you can rest easy. Just be sure to chat about your preference when you make the booking.

    A standard clean is your regular upkeep – the dusting, vacuuming, mopping, and wiping down surfaces in the kitchen and bathroom. A deep clean, on the other hand, is a much bigger job. Think inside the oven, behind the fridge, scrubbing grout, and washing down all the skirting boards.

    Knowing the difference is crucial. It ensures you book the right level of service your home actually needs. If you're looking for a service in a specific part of the UK, you can see where we operate by checking our full list of cleaning service locations. This way, you get exactly what you're paying for, whether it's a quick spruce-up or a total reset.


    Ready for a sparkling clean home without the hassle? Signal Cleaning offers professional, reliable cleaning services with easy online booking. Get your instant quote and book your service in under 60 seconds!

  • How to Clean Mirrors Without Streaks for a Perfect Shine

    How to Clean Mirrors Without Streaks for a Perfect Shine

    The real secret to a perfectly clean, streak-free mirror is surprisingly simple. You just need a solution of equal parts distilled water and white vinegar, along with two microfibre cloths. One cloth is for applying the solution, and the second is your secret weapon for buffing the mirror completely dry. This two-cloth method is what prevents mineral deposits and leftover moisture from creating those annoying smudges.

    Why Your Mirrors Get Streaky and How to Stop It

    Have you ever finished cleaning a mirror, stepped back to admire your work, only to see it looks even worse than before? That frustrating, streaky finish is a common battle, but it's not you—it's your technique and your tools. Figuring out what causes those streaks is the first step to getting a flawless shine every time.

    Image

    It’s no surprise this is such a common source of frustration. A recent survey revealed that 51% of UK adults experience stress related to home cleanliness. And since window washing—a very similar job—is one of the most disliked household chores, it's clear that achieving a perfect, streak-free shine is a major pain point for many. You can discover more insights into UK cleaning habits on litmag.co.uk.

    The Real Reasons for a Streaky Finish

    So, what's actually going on when you see those streaks? The culprit is usually one of these common mistakes:

    • Using Tap Water: The water from your tap is full of minerals like calcium and magnesium. When it evaporates, these minerals get left behind as faint, chalky deposits on the glass.
    • Residue from Commercial Cleaners: Many shop-bought glass cleaners contain soaps, waxes, or fragrances. Instead of evaporating cleanly, these additives leave a thin film that you end up just smearing around.
    • The Wrong Type of Cloth: Paper towels and old cotton rags are the worst offenders for leaving tiny fibres behind. This lint gets trapped on the surface and ruins all your hard work.

    The key takeaway is this: streaks are caused by residue. Whether it's minerals from tap water, additives from a cleaning product, or lint from a cloth, anything left on the surface will spoil the finish.

    Think about cleaning a mirror in direct sunlight. The cleaning solution evaporates almost instantly, which doesn't give you nearly enough time to wipe it away properly. This practically guarantees a smudged result. By getting to the root of these issues, you can finally stop fighting with your reflection.

    Getting Your Streak-Free Cleaning Kit Together

    The secret to a mirror so clean it looks invisible isn't some expensive, shop-bought spray. It all comes down to a few simple tools, most of which are probably hiding in your cupboards right now. Before you even think about tackling those smudges, let's get your kit in order.

    Image

    Trust me, a little prep work makes all the difference. We’re not after fancy chemicals here; we’re aiming for a professional finish using the basics.

    Your Go-To Cleaning Solution

    Put down that bottle of blue stuff. The most powerful mirror cleaner I've ever used is one you can whip up yourself in under a minute. It cuts through grime brilliantly and, most importantly, doesn't leave behind the residue that causes those frustrating streaks.

    All you need is two simple ingredients:

    • Distilled Water: This is the game-changer. Tap water is full of minerals that leave behind chalky spots when they dry. Distilled water is pure, so it evaporates without a trace.
    • White Vinegar: The gentle acetic acid in vinegar is a natural powerhouse, dissolving everything from greasy fingerprints to dried-on toothpaste splatters with ease.

    Just mix equal parts distilled water and white vinegar in a clean spray bottle. That’s the entire recipe. This DIY solution often works better than commercial cleaners because it has no soaps or fragrances—the very things that usually cause a streaky finish.

    Your Essential Tools

    Here’s a quick look at the simple supplies that will guarantee a flawless result every time.

    Essential Tools for a Streak-Free Shine

    Tool Why It's Essential Top Tip
    Two Microfibre Cloths One cloth cleans, the other buffs. This two-step process is crucial for lifting all moisture and preventing streaks from forming as the surface dries. Always use a completely dry cloth for the final buffing stage. Even a slightly damp cloth can leave marks.
    DIY Vinegar Solution The 50/50 mix of distilled water and white vinegar cleans effectively without leaving behind the soapy, filmy residue that commercial cleaners often do. Label your spray bottle so you don't mix it up with other cleaners. It’s also great for windows!
    Clean Spray Bottle A dedicated, clean bottle prevents contamination from old cleaning products, which could sabotage your streak-free efforts from the start. Rinse the bottle thoroughly with hot water before mixing your solution to ensure it's completely clean.

    Having these specific items ready to go is the first real step towards that perfect, invisible-glass look.

    The Non-Negotiable Wiping Tools

    What you wipe with matters just as much as what you spray with. It’s tempting to grab a paper towel, but they just disintegrate and leave a blanket of linty fluff all over your freshly cleaned mirror. A standard cotton cloth? It often just smears the dirt around.

    For a truly professional finish, the only tool for the job is a high-quality microfibre cloth. The magic is in its incredibly dense weave, which is designed to grab and hold onto dirt, dust, and moisture, lifting it cleanly off the surface.

    You’ll want two clean, dry microfibre cloths at the ready. You'll use the first one to apply your solution and wipe away the initial layer of grime. The second, completely dry cloth is for the final buff. This is where you polish the mirror, erasing every last bit of moisture and revealing that perfect, streak-free shine. This two-cloth method is the secret I swear by.

    The Pro Method for a Flawless Mirror Finish

    Forget everything you’ve been told about cleaning mirrors. The real secret to getting that perfect, streak-free shine isn't about harsh chemicals or endless scrubbing. It’s all about technique. Professional cleaners have a simple, repeatable process that gets flawless results every time, and it’s surprisingly easy to learn.

    This method transforms a frustrating chore into a quick, satisfying task. The goal is to work smarter, not harder, by controlling the amount of cleaning solution and getting it off the glass before it can dry and leave those annoying streaks. Get this right, and you'll nail it on the first try.

    Master the Two-Cloth System

    The heart of this professional technique is the two-cloth system. One cloth is for applying the cleaner, and the second is solely for drying and buffing. If you're serious about a streak-free finish, this separation is non-negotiable.

    Your first microfibre cloth will be slightly damp with your cleaning solution. The second cloth needs to be completely clean and bone-dry. Think of this dry cloth as your secret weapon—it whisks away every last bit of moisture, leaving nothing but a crystal-clear reflection.

    This visual guide breaks down the essential prep work to get you started on the right foot.

    Image

    It's all about checking what you’re up against and grabbing the right supplies before you even touch the glass.

    One of the most common mistakes people make is spraying cleaner directly onto the mirror. This not only leads to drips that can seep behind the glass and damage the silvering or the frame, but it also puts way too much liquid on the surface. That excess moisture is the number one cause of streaks.

    Always lightly mist your cleaning cloth, not the mirror. Just a few spritzes are plenty. This gives you total control over the moisture, which is the absolute key to preventing streaks.

    Execute the S-Pattern Wipe-Down

    Now for the action. To avoid just smearing dirt around, you need a methodical approach. Random circles are out. Professionals use a specific technique called the ‘S-Pattern’ to ensure every square inch is covered efficiently.

    Start in one of the top corners and wipe your damp cloth straight across to the opposite corner. Drop down just enough to overlap your last stroke and wipe back across. Continue this back-and-forth, S-shaped motion all the way down to the bottom of the mirror.

    It’s a simple but brilliant pattern that systematically moves dirt down and off the surface, instead of just pushing it into areas you’ve already cleaned.

    The moment you finish with the damp cloth, grab your second, dry microfibre cloth. Don't hesitate! Following the same top-to-bottom S-pattern, immediately buff the entire surface. This final pass polishes the glass and removes any lingering moisture before it can evaporate into a streak. The result? A perfectly clear mirror, every single time.

    How To Remove Hairspray And Other Stubborn Spots

    Let's be honest, sometimes a quick spray and wipe just won't cut it. Bathroom mirrors, in particular, face a daily assault from dried toothpaste flecks, greasy fingerprints, and that notoriously stubborn, sticky film from hairspray. If you don't deal with these first, you're just going to smear them around.

    Tackling these problem areas before you do your main clean is the secret to getting that perfect, streak-free finish.

    Image

    A little pre-treatment makes a world of difference. It stops you from turning a small spot into a giant, greasy smear across the entire mirror.

    Spot-Treating Sticky Residues

    For anything sticky or greasy, your best friend is rubbing alcohol (also known as isopropyl alcohol). It’s brilliant at cutting through residues that normal cleaners just can't handle, and it evaporates in a flash without leaving any film behind.

    I've found this works wonders on hairspray build-up and those waxy smudges from fingerprints.

    • Just pop a small amount of rubbing alcohol onto a cotton pad or ball.
    • Gently work on the spot using small, circular motions.
    • You'll see the alcohol dissolve the gunk, making it easy to wipe away completely.

    This targeted trick isolates the problem right at the source, saving you a massive headache later on.

    By pre-treating sticky spots with rubbing alcohol, you're not just cleaning; you're preventing streaks before they even have a chance to form. It’s the key to a flawless final wipe-down.

    Dealing With Dried-On Splatters

    We’ve all seen it: those rock-hard splatters of toothpaste that seem almost fused to the glass. Whatever you do, don't reach for an abrasive scourer—you'll end up with permanent scratches.

    Instead, take your alcohol-dampened cotton pad and hold it against the mark for a few seconds. This helps soften it up. Then, a gentle rub should be enough to lift it away without any force.

    Pre-treating these little annoyances ensures they won't get dragged across the mirror when you do your final clean, which is a classic rookie error that causes ghosting and streaks. For more tips on tackling tough marks, you can find extra advice in our guide on how to remove stubborn stains.

    Right, your mirror is gleaming. The last thing you want is for it to get grubby again straight away. The secret isn't more elbow grease; it's about a few clever habits to stop the build-up in its tracks.

    The simplest trick I've learned is to just keep a dry microfibre cloth hanging near the mirror. Give it a quick once-over each day to catch any fresh water splashes or fingerprints before they dry into stubborn marks. It takes seconds, but it makes a world of difference and pushes your next proper clean way down the line.

    Good ventilation is another game-changer, especially in the bathroom. Pop the extractor fan on when you’re showering and leave it running for a bit afterwards. This pulls the steam out of the air before it can settle on the glass and create that annoying cloudy film.

    Small Tweaks, Big Results

    Often, it’s the little things that keep a mirror looking its best. Think about the products you're using around it.

    • Watch Out for Aerosols: When you’re using hairspray or dry shampoo, just turn away from the mirror. A fine mist can leave a sticky residue that’s a magnet for dust.
    • Tackle Splatters Instantly: Toothpaste and soap splashes happen. The key is to wipe them off with your dedicated cloth while they’re still wet, before they have a chance to set.

    It's really about shifting your mindset from doing a big cleaning chore to just simple, daily maintenance. These tiny actions save you so much time in the long run.

    This idea of using gentler, more thoughtful methods is catching on. In fact, about 60% of UK consumers now say they'd pay more for eco-friendly cleaning supplies, partly because they want to avoid the harsh chemical residues that often cause streaks. You can dive into the details by checking out the full YouGov survey findings.

    Frequently Asked Questions About Cleaning Mirrors

    Even with the best approach, you might still have a few nagging questions when you're chasing that perfect, streak-free finish. Let's tackle some of the most common ones we hear, so you can get your mirrors looking flawless.

    Is It a Good Idea to Use Newspaper?

    This is a classic tip that many of us heard growing up, but it’s a bit outdated now. Years ago, it worked reasonably well, but modern newspapers often use soy-based inks. These can leave behind a faint, oily residue on the glass – the very thing you're trying to remove.

    On top of that, the paper itself can shed tiny fibres, leaving your mirror covered in lint. A good quality microfibre cloth is a much better bet for a truly clean and streak-free shine every time.

    Why does a simple mix of distilled water and white vinegar work so well? It's because it cuts through grease and grime and then evaporates completely, leaving nothing behind. Many commercial cleaners, on the other hand, contain soaps and additives that leave a film, which is a major cause of streaks.

    Why Are There Streaks After My Mirror Dries?

    Ah, the classic post-cleaning frustration. This almost always comes down to one of two things. Either there was some leftover residue on the mirror that your cloth just spread around, or your cloth was simply too wet. Any excess moisture left on the surface will just create new marks as it dries.

    The solution is all in the finish. Immediately after you've wiped the mirror clean, grab a second, completely dry microfibre cloth and buff the entire surface. This crucial step removes every last bit of moisture before it has a chance to evaporate and form new streaks.

    How Often Should I Be Cleaning My Bathroom Mirror?

    For a mirror that sees a lot of action, like the one in the main bathroom, giving it a quick wipe-down with a dry cloth each day can work wonders. This little bit of upkeep stops water spots and toothpaste splatters from building up.

    A proper, deep clean using the methods we've covered is really only needed about once every week or two. It all depends on how quickly it gets splashed. For more handy cleaning tips for every room in your house, feel free to have a look at our Signal Cleaning blog.

  • 7 Surprising Window Cleaning Hacks for a Streak-Free Shine

    7 Surprising Window Cleaning Hacks for a Streak-Free Shine

    Achieving perfectly clear, streak-free windows can often feel like an impossible task. Smudges, lint, and stubborn water spots seem to reappear moments after you have finished, leaving you frustrated and questioning your technique. What if the secret to a flawless finish isn't found in expensive, specialised products, but in clever, time-tested methods? This guide reveals seven surprising yet highly effective window cleaning hacks that professionals and savvy homeowners use to get that coveted invisible-glass look.

    From common kitchen staples like cornstarch to unconventional tools such as coffee filters, these methods are designed to cut through grime, save you time, and deliver brilliant, long-lasting results. We will explore each hack in detail, providing clear step-by-step instructions, practical tips for implementation, and the simple science behind why they work so well. By mastering these techniques, you can finally conquer streaks and smudges for good.

    This article is your definitive resource for transforming a tedious chore into a simple, satisfying task. Forget the frustration and get ready to enjoy crystal-clear views that let the sunshine in like never before. Each tip is actionable, easy to follow, and leverages items you likely already have around the house.

    1. Coffee Filter Window Cleaning

    While paper towels or old newspapers are common choices for wiping windows, they often leave behind lint and streaks. For a truly professional, lint-free shine, one of the most effective window cleaning hacks involves an everyday item from your kitchen cupboard: the humble coffee filter. Their tightly woven paper fibres are designed to be highly absorbent without disintegrating, making them perfect for wiping glass surfaces clean without leaving any residue behind.

    This method’s strength lies in the material itself. Unlike paper towels, which can shed tiny fibres, coffee filters are manufactured to be lint-free. This ensures that as you wipe, you are only removing dirt and cleaning solution, not depositing a new layer of fuzzy particles onto the glass.

    Coffee Filter Window Cleaning

    Why It Works and Where It Shines

    This technique has been popularised by professional cleaners and car detailers who demand a flawless finish on glass. Car detailers, for instance, frequently use coffee filters on windscreens to ensure perfect clarity without any distracting lint. At home, this hack is especially useful for large picture windows, glass doors, and mirrors where streaks and fibres are most noticeable. The result is a crystal-clear finish that rivals professional services.

    Key Insight: The secret to a streak-free window is not just the cleaning solution but the material used for the final wipe. Coffee filters provide a lint-free, absorbent surface that buffs glass to a perfect shine.

    How to Implement This Hack

    For the best results, follow a simple but specific process. First, clean the window with your preferred solution, perhaps a homemade mix of equal parts white vinegar and water, using a squeegee or a microfibre cloth to remove the initial layer of grime. The coffee filter comes in for the final, crucial step.

    • Final Polish: Use a dry coffee filter to buff the glass after the main cleaning. This will remove any remaining moisture and prevent streaks from forming as the window dries.
    • Application Technique: For optimal results, use a circular motion to polish the main surface of the window, then finish with straight vertical and horizontal strokes to catch any final drips or lines.
    • Choose Wisely: Opt for unbleached coffee filters to avoid transferring any trace chemicals from the bleaching process onto your windows.
    • More Than Windows: This hack is also excellent for cleaning other glass surfaces around the home, including television screens, shower doors, and glass tabletops.

    2. Newspaper and Vinegar Method

    Before microfibre cloths became a household staple, one of the most trusted window cleaning hacks relied on two simple, low-cost items: newspaper and vinegar. This traditional technique, passed down through generations, is celebrated for its ability to deliver a streak-free shine using materials you likely already have. The unique composition of newsprint, combined with the acidic cleaning power of vinegar, makes for a surprisingly effective duo.

    The logic behind this old-school method is sound. The dense fibres of newspaper are highly absorbent and don't leave lint behind like paper towels can. Furthermore, the ink used in traditional black-and-white print has a mild abrasive quality that helps to scrub away stubborn grime and buff the glass to a brilliant finish without scratching it.

    Newspaper and Vinegar Method

    Why It Works and Where It Shines

    This hack’s enduring popularity stems from its frugal roots during the Depression era and its perfection by traditional European window cleaners. It’s an economical and environmentally friendly alternative to chemical-laden sprays and disposable wipes. The method is particularly effective for cutting through the greasy film that can build up on kitchen windows or the hazy residue on the inside of car windscreens, leaving behind nothing but crystal-clear glass.

    Key Insight: The combination of vinegar's natural degreasing properties and the newspaper's lint-free, slightly abrasive texture creates a powerful cleaning system that dissolves dirt and polishes the glass simultaneously.

    How to Implement This Hack

    To get the most out of this classic technique, a few specific steps should be followed. The key is in the preparation of both the solution and the newspaper itself. Start by mixing a simple cleaning solution of one part white vinegar to four parts water in a spray bottle.

    • Choose the Right Paper: Only use traditional black-and-white newsprint. The glossy, coloured sections or magazine-style inserts often use different inks and paper that can smear or leave residue.
    • Application Technique: Crumple the newspaper into loose balls, which are easier to grip and provide a good surface area for wiping. Spray the vinegar solution directly onto the glass and use one ball of newspaper to scrub away the dirt.
    • The Final Buff: Use a second, dry ball of crumpled newspaper to wipe the window dry, polishing it to a streak-free shine. Work in a shaded area to prevent the solution from evaporating too quickly and causing spots.
    • Protect Your Hands: The ink can transfer to your hands, so it's a good idea to wear gloves while you work.

    3. Squeegee with Dish Soap Technique

    To achieve the truly flawless, streak-free finish seen on commercial buildings and high-rise flats, you need to adopt the methods of the professionals. One of the most effective window cleaning hacks relies on two simple tools: a quality squeegee and a few drops of washing-up liquid. This combination creates a powerful cleaning solution that allows the squeegee to glide smoothly across the glass, lifting dirt and grime without leaving any streaks behind.

    The magic of this technique lies in its simplicity and efficiency. The washing-up liquid acts as a surfactant, breaking the surface tension of the water and helping to dissolve dirt, while the squeegee blade pulls the dirty water away in a single, clean motion. This method is far superior to using cloths or paper towels alone, which often just push dirty water around the pane.

    The following infographic illustrates the simple yet crucial process for mastering this professional technique.

    Infographic showing key data about Squeegee with Dish Soap Technique

    As the diagram shows, success depends on the correct solution ratio and a methodical, clean-wiping process.

    Why It Works and Where It Shines

    This method has long been the industry standard for professional window cleaners, popularised by companies like Ettore who perfected the modern squeegee. Its effectiveness is most apparent on large glass surfaces like sliding patio doors, picture windows, and glass conservatories, where streaks and smears are highly visible. By mimicking the professionals, you can achieve a superior level of clarity that is difficult to replicate with other household methods.

    Key Insight: A professional finish comes from technique, not complex solutions. A squeegee combined with a minimal amount of washing-up liquid provides the perfect slip, allowing you to remove water and dirt completely before streaks can form.

    How to Implement This Hack

    Proper execution is vital for streak-free results. Start by preparing your cleaning solution and ensuring your squeegee blade is clean and sharp. Apply the soapy water to the window with a sponge or microfibre cloth, covering the entire surface.

    • Start at the Top: Place your squeegee at the top corner of the pane, angled slightly downwards, and pull it across horizontally. Overlap each stroke by about an inch.
    • Wipe the Blade: After every single stroke, use a clean, lint-free cloth to wipe the rubber blade. This crucial step prevents you from transferring dirt back onto the clean glass.
    • Less Is More: Use only two to three drops of washing-up liquid per gallon of water. Too much soap will create excess suds and leave a film on the glass, leading to streaks.
    • Maintain Pressure: Apply light, even pressure as you pull the squeegee. Let the tool do the work to avoid pressing too hard, which can cause the blade to skip or leave lines.

    4. Cornstarch Glass Cleaner

    For a powerful, eco-friendly window cleaner made from simple pantry staples, cornstarch offers a surprisingly effective solution. When mixed with water and vinegar, this common kitchen ingredient creates a homemade cleaner that cuts through grime and leaves a streak-free shine. The cornstarch acts as a very gentle abrasive, helping to lift stubborn dirt and film without scratching the glass.

    The strength of this method lies in its dual-action formula. The vinegar works to dissolve dirt and hard water stains, while the fine cornstarch particles provide a gentle scrubbing power. This combination is particularly effective for windows with a hazy film or built-up residue that regular cleaners might struggle with, making it one of the most resourceful window cleaning hacks available.

    Why It Works and Where It Shines

    Popularised by the green cleaning movement and DIY home care communities, this hack is a favourite among eco-conscious homeowners and those with sensitivities to harsh chemicals. The formula’s gentle abrasive quality makes it ideal for tackling grime on kitchen windows that are prone to greasy film, or for cleaning glass that hasn't been washed in a long time. It’s also a cost-effective and accessible option for anyone looking to reduce their reliance on commercial cleaning products.

    Key Insight: Cornstarch provides a mild abrasive action that lifts stubborn grime and film from glass, while its fine particles help to absorb oils and prevent streaks as the window dries, resulting in a superior clean.

    How to Implement This Hack

    Creating and using this cleaner is straightforward, but correct preparation is key to avoiding a lumpy mixture. Start by gathering your ingredients: cornstarch, white vinegar, and warm water. For particularly tough marks, understanding how to tackle different types of blemishes can be beneficial; you can learn more about how to remove stubborn stains for advanced techniques.

    • Create the Solution: In a spray bottle, combine one tablespoon of cornstarch, 1/4 cup of white vinegar, and two cups of warm water.
    • Mix Thoroughly: Shake the bottle vigorously until the cornstarch is completely dissolved. To prevent lumps, you can first make a paste with the cornstarch and a small amount of water before adding the rest of the ingredients.
    • Shake Before Use: The cornstarch will settle at the bottom, so it is essential to shake the bottle well before each use to ensure the mixture is properly combined.
    • Application Method: Spray the solution onto the window, wipe clean with a microfibre cloth, and then buff to a streak-free shine with a dry cloth or squeegee.

    5. Rain-X and Water Repellent Treatment

    To keep windows cleaner for longer, one of the most proactive window cleaning hacks involves borrowing a trick from the automotive world: applying a water repellent treatment. Products like Rain-X create an invisible, super-slick hydrophobic coating on the glass. This technology causes rain, sleet, and grime to bead up and roll right off, drastically reducing the build-up of water spots and dirt between cleans.

    This method’s power lies in its preventative nature. Instead of just cleaning your windows, you are actively treating them to resist future soiling. The polymer-based formula bonds with the glass, creating a non-stick surface that makes subsequent cleaning significantly easier and less frequent, saving you time and effort in the long run.

    Rain-X and Water Repellent Treatment

    Why It Works and Where It Shines

    Originally popularised by car enthusiasts for perfect windscreen visibility, this hack has been adopted by homeowners and commercial property managers for its impressive results. It is especially beneficial for hard-to-reach windows, such as those on upper floors, where reducing cleaning frequency is a major advantage. Coastal homeowners also find it invaluable for combating the constant build-up of salt spray, while commercial buildings use it to lower maintenance costs and maintain a pristine appearance.

    Key Insight: Treating your windows with a hydrophobic coating is a preventative measure that transforms glass into a self-cleaning surface, minimising the adhesion of water and dirt.

    How to Implement This Hack

    Proper application is essential to achieve a clear, durable, and streak-free finish. Start with a window that is immaculately clean and completely dry, as the treatment needs to bond directly with the glass, not with any lingering dirt or residue.

    • Thorough Preparation: Ensure the window is spotless before you begin. Any trapped dirt will be sealed under the coating.
    • Application Technique: Apply a small amount of the product to a clean, dry microfibre cloth. Wipe it onto the glass using firm, circular, overlapping motions to ensure even coverage.
    • Haze and Buff: Allow the treatment to dry to a light haze, which usually takes a few minutes. Then, use a separate clean, dry cloth to buff the haze away until the glass is crystal clear.
    • Maintenance: You will know it is time to reapply when you notice water is no longer beading up and rolling off the glass effectively. Depending on weather exposure, a single application can last for several months.

    6. Dryer Sheet Window Cleaning

    While commonly used for laundry, fabric dryer sheets offer a surprisingly effective solution for cleaning glass, going beyond a simple wipe-down. This is one of the more ingenious window cleaning hacks because dryer sheets not only clean but also leave behind an anti-static coating. This invisible barrier actively repels dust, lint, and pet hair, helping your windows stay cleaner for much longer.

    The magic lies in the fabric softener agents embedded in the sheets. When lightly dampened, these agents help break down grime and smudges. More importantly, they neutralise the static charge on the glass surface that naturally attracts airborne particles, making this method a preventative measure as well as a cleaning one.

    Why It Works and Where It Shines

    This hack has gained popularity on cleaning blogs and social media for its dual-action benefit. It is particularly valuable for pet owners struggling with dander and hair clinging to glass doors and low windows. Similarly, homes in dusty environments or near busy roads will see a noticeable difference, as the anti-static properties keep grime from settling as quickly. For allergy sufferers, reducing the amount of dust and pollen that collects on windows can be a significant advantage.

    Key Insight: The true value of using a dryer sheet is its preventative power. By creating an anti-static surface, it tackles the root cause of dirty windows – the attraction of dust and debris – keeping them pristine for longer.

    How to Implement This Hack

    To get the most out of this method, the dryer sheet should be used as a final cleaning or touch-up tool. It is not designed to handle heavy, caked-on dirt but excels at removing light films of dust and preventing future build-up.

    • Prep the Sheet: Lightly dampen a new dryer sheet with a small amount of water. It should be moist, not saturated, to activate the cleaning agents without leaving excess residue.
    • Application Technique: Wipe the glass using broad, circular motions to lift dust and grime. Finish with straight vertical and horizontal strokes to ensure even coverage and a streak-free finish.
    • Final Buff: After wiping with the damp dryer sheet, use a clean, dry microfibre cloth to buff away any faint residue, revealing a clear, polished surface.
    • Choose Wisely: For households with sensitivities to fragrances, opt for unscented dryer sheets to avoid leaving a strong smell in the room.

    7. Microfibre and Distilled Water Method

    For those seeking an effective, chemical-free cleaning solution, one of the most powerful window cleaning hacks pairs a high-quality microfibre cloth with simple distilled water. This minimalist approach leverages advanced textile technology and pure water to deliver a streak-free shine without a single drop of cleaner, making it ideal for households with children, pets, or chemical sensitivities.

    The method’s effectiveness comes from two key components. First, the ultra-fine fibres of a microfibre cloth are designed to mechanically scrub and trap dust, grime, and oils. Second, using distilled water, which is free from the minerals found in tap water, ensures that no residue or hard water spots are left behind as the surface dries. This combination cleans and polishes simultaneously.

    Why It Works and Where It Shines

    This technique is a cornerstone of the green cleaning movement and is frequently used by professional services and facilities that prioritise a non-toxic environment, such as hospitals and schools. Companies like Norwex have popularised the concept, demonstrating that a superior clean can be achieved without harsh chemicals. It is particularly effective for interior windows, mirrors, and glass doors where heavy-duty cleaning is not required but a perfect, fingerprint-free finish is desired.

    Key Insight: A truly flawless window doesn't always require chemicals. The physical cleaning power of microfibre combined with the purity of distilled water can remove dirt and prevent mineral deposits for an impeccably clear result.

    How to Implement This Hack

    Success with this method depends on using the right materials and a specific two-cloth technique. You will need one microfibre cloth for cleaning and a second, separate one for polishing. This ensures you are not simply moving dirty water around the glass but are actively removing it.

    • The Two-Cloth System: Lightly dampen the first microfibre cloth with distilled water, ensuring it is moist but not dripping wet. Use this to wipe down the window and lift away all the dirt.
    • Immediate Polishing: Immediately follow with the second, completely dry microfibre cloth. Use this polishing cloth to buff the glass until it is dry and streak-free.
    • Maintain Your Tools: To preserve their effectiveness, wash your microfibre cloths separately without fabric softener, which clogs the fibres and reduces their cleaning power.
    • Pure Water is Key: In areas with hard water, using distilled water is non-negotiable. It is the secret to preventing the frustrating mineral spots that tap water leaves behind.

    7 Window Cleaning Hacks Comparison

    Method Implementation Complexity 🔄 Resource Requirements ⚡ Expected Outcomes 📊 Ideal Use Cases 💡 Key Advantages ⭐
    Coffee Filter Window Cleaning Low – Simple to use, minimal skill Low – Coffee filters, vinegar Streak-free, lint-free windows Final polishing, small to medium windows Cost-effective, lint-free, reusable multiple times
    Newspaper and Vinegar Method Medium – Requires technique mastery Very low – Newspaper, vinegar Streak-free, effective on grime Heavily soiled windows, traditional cleaning Cost-effective, natural ingredients, no lint
    Squeegee with Dish Soap Medium to High – Skill and practice required Medium – Squeegee, dish soap, cloth Professional-grade streak-free finish Large windows, commercial or frequent cleaning Fast, efficient, reusable tools
    Cornstarch Glass Cleaner Medium – Requires mixing & prep Low – Cornstarch, vinegar, water Removes stubborn film, leaves protective film Eco-conscious users, safe for kids and pets Natural, environmentally friendly, protective coating
    Rain-X and Water Repellent Medium – Clean prep & careful application Medium to High – Rain repellent products Hydrophobic coating, reduces water spots Automotive glass, coastal homes, commercial buildings Long-lasting, reduces cleaning frequency
    Dryer Sheet Window Cleaning Low – Easy to use Low – Dryer sheets Anti-static, reduces dust and pet hair Pet owners, dusty environments, allergy-friendly spaces Reduces static, leaves pleasant scent
    Microfiber and Distilled Water Low to Medium – Simple but needs proper cloths Medium – Microfiber cloths, distilled water Chemical-free, streak-free cleaning Chemical-sensitive environments, hospitals, green cleaning Safe, reusable cloths, no chemicals needed

    From Hazy to Heavenly: Your Next Step to Sparkling Windows

    You've now explored a full spectrum of clever and effective window cleaning hacks, moving far beyond the simple spray-and-wipe routine. We’ve journeyed from the surprisingly effective, lint-free magic of coffee filters to the tried-and-true combination of vinegar and newspaper. Each method offers a unique solution to the common problem of dirty, streaky glass, proving that a professional finish is well within your reach without resorting to expensive, chemical-laden products.

    The true value of these techniques lies in their adaptability. By understanding the principles behind them, you can arm yourself with the right approach for any situation. Whether you're tackling greasy kitchen window smudges with the cornstarch solution or preparing your exterior glass for a rainy spell with a water-repellent treatment, you are now equipped with the knowledge to achieve a crystal-clear view. The days of frustrating streaks and hazy films are officially over.

    Key Takeaways for a Streak-Free Finish

    Mastering these window cleaning hacks is not just about cleanliness; it's about reclaiming the natural light in your home and enhancing your living space. Let’s recap the most crucial insights:

    • The Right Tool is Half the Battle: The success of any cleaning task often depends on the tools you use. From a high-quality squeegee to a simple microfiber cloth or even a humble coffee filter, choosing the appropriate applicator is essential for avoiding lint and streaks.
    • DIY Solutions are Powerful: You don't need a cupboard full of commercial cleaners. Simple, household ingredients like white vinegar, cornstarch, and even dish soap can be combined to create potent cleaning solutions that cut through grime effectively and economically.
    • Technique Matters Most: Whether you're using an ‘S’ pattern with your squeegee or wiping in a consistent direction, your technique is paramount. Methodical, deliberate movements prevent the redistribution of dirt and ensure a uniform, streak-free shine across the entire pane.

    Embracing these principles will transform window cleaning from a dreaded chore into a satisfying task. The impact of immaculately clean windows is immediate and profound. It brightens your rooms, makes your home feel more spacious and organised, and offers an unobstructed view of the world outside. You've learned not just how to clean, but how to clean intelligently. This newfound expertise allows you to maintain a pristine home with less effort and more pride, letting the sunshine pour in and illuminate your space. Now, it's time to choose your favourite hack, gather your supplies, and let there be light.


    For those times when your schedule is simply too demanding, or for large-scale jobs that require a professional touch, consider letting the experts handle it. Signal Cleaning offers exceptional window cleaning services across Oxfordshire, delivering guaranteed, streak-free results with the convenience of an easy online booking system. Let us bring the sparkle to your windows so you can focus on enjoying the view.

  • The Ultimate Deep Cleaning House Checklist for 2025

    The Ultimate Deep Cleaning House Checklist for 2025

    Welcome to the ultimate guide for transforming your living space. A standard tidy-up is one thing, but a deep clean is a reset button for your entire home. It reaches the forgotten corners, banishes built-up grime, and revitalises your environment, which can improve air quality and overall well-being. This comprehensive deep cleaning house checklist is designed to guide you systematically through every room, ensuring no surface is overlooked. Forget vague advice; we provide specific, actionable tasks that deliver a truly spotless result.

    Whether you're preparing for a new season, getting ready for guests, or simply craving a pristine home, this room-by-room plan has you covered. Our guide breaks down this monumental task into seven manageable, high-impact stages, from deep cleaning kitchen appliances to performing essential HVAC maintenance. Following this structured approach will turn an overwhelming project into a satisfying and organised achievement. By focusing on areas often missed during regular cleaning, you will not only make your home look immaculate but also prolong the life of your appliances and furnishings. Let's get started on creating a healthier, cleaner home environment.

    1. Deep Clean Kitchen Appliances and Hidden Areas

    A standard kitchen wipe-down often misses the areas where grease, dust, and food debris accumulate, impacting both hygiene and appliance performance. A cornerstone of any effective deep cleaning house checklist involves tackling these hidden areas and giving your appliances a thorough, inside-and-out service. This means moving beyond the visible surfaces to address the components that keep your kitchen running efficiently.

    This task involves carefully pulling appliances like your refrigerator and oven away from the wall to clean the floors and walls behind them. It also includes detailed internal cleaning, such as degreasing the oven interior, descaling the dishwasher, and clearing refrigerator coils, which are essential for maintaining your appliances and preventing potential hazards.

    Why This Task is Crucial

    Neglecting these areas can lead to reduced appliance efficiency, unpleasant odours, and even fire risks from grease build-up. The Good Housekeeping Institute's rigorous testing protocols have long emphasised that regular deep cleaning extends appliance lifespan. Professional kitchen cleaning services often report that cleaning refrigerator coils alone can improve energy efficiency by up to 30%, saving you money on electricity bills.

    Expert Insight: Regularly deep cleaning your appliances not only improves their function but can also be vital for home warranty claims. Many policies require proof of proper maintenance, and a clean, well-serviced appliance is less likely to break down due to neglect.

    How to Implement a Deep Appliance Clean

    Follow a systematic approach for each appliance to ensure nothing is missed.

    • Safety First: Always unplug appliances before you begin cleaning. If you have just used an oven or hob, allow it ample time to cool down completely.
    • Oven and Hob: For stubborn, baked-on food in the oven, create a paste using baking soda and water. Apply it to the interior surfaces, let it sit for several hours or overnight, and then wipe it away. Remove and soak oven racks and hob grates in hot, soapy water.
    • Refrigerator and Freezer: Empty the contents and remove all shelves and drawers, washing them in warm, soapy water. Use a vacuum with a brush attachment to gently clean the dust and debris from the condenser coils, typically located at the back or bottom of the unit. This should be done every six months for optimal performance.
    • Dishwasher: Clean the filter, usually found at the bottom of the unit, to remove trapped food particles. Run an empty cycle with a specialised dishwasher cleaner or a bowl of white vinegar placed on the top rack to descale the interior and remove soap scum.

    This focused cleaning, popularised by guides from sources like Martha Stewart Living, transforms your kitchen from superficially tidy to truly sanitised and functional.

    2. Scrub and Disinfect All Bathroom Surfaces

    A quick wipe of the bathroom sink and mirror barely scratches the surface of the germs and grime lurking within. A proper bathroom deep clean, a vital component of any deep cleaning house checklist, requires a meticulous approach to sanitisation, tackling everything from tile grout and shower doors to hidden areas like the toilet base and exhaust fan vent. This process is about eliminating soap scum, mildew, and hard water stains while thoroughly disinfecting the high-touch and often-neglected spots where bacteria and mould thrive.

    This task involves more than just surface-level cleaning; it's a systematic effort to restore hygiene and freshness to one of the most used rooms in the house. It means descaling shower heads, scrubbing grout lines, and cleaning behind the toilet, ensuring every corner is addressed according to professional standards.

    Scrub and Disinfect All Bathroom Surfaces

    Why This Task is Crucial

    A superficially clean bathroom can still harbour harmful pathogens. The damp environment is an ideal breeding ground for mould and mildew, which can trigger allergies and respiratory issues. The CDC’s cleaning and disinfection guidelines emphasise the importance of sanitising surfaces to prevent the spread of illness. Following these protocols is standard practice in medical facilities and high-end hotels to ensure a safe and hygienic environment for everyone.

    Expert Insight: Professional cleaning services, like those detailed on many blogs, often adopt a top-to-bottom, left-to-right cleaning method in bathrooms. This ensures that dust and dirty water from higher surfaces don't contaminate already cleaned lower areas, maximising efficiency and effectiveness. Explore additional professional cleaning strategies on the Signal Cleaning blog.

    How to Implement a Deep Bathroom Clean

    For a truly sanitised bathroom, address each area with the right tools and techniques.

    • Safety First: Ensure proper ventilation by opening a window or turning on the exhaust fan, especially when using strong cleaning agents like bleach or ammonia-based products. Always wear protective gloves.
    • Tackle Grime Build-up: For stubborn soap scum on shower doors and tiles, apply a dedicated bathroom cleaner or a mixture of white vinegar and water and let it sit for 10-15 minutes before scrubbing. This allows the product to break down the grime, making it easier to remove.
    • Grout and Details: Use an old toothbrush or a small grout brush dipped in a paste of baking soda and hydrogen peroxide to scrub grout lines. This is highly effective for lifting stains and killing mildew. Clean around the base of the toilet and taps with the same detailed approach.
    • Exhaust Fan and Fixtures: Carefully remove the cover of your bathroom exhaust fan and wash it in warm, soapy water. Use a vacuum with a brush attachment to remove dust from the fan itself. Wipe down light fixtures to remove accumulated dust and grime.

    This thorough method, championed by home maintenance experts like This Old House, ensures your bathroom is not just visually clean but hygienically sound, protecting your family’s health and well-being.

    3. Wash Walls, Baseboards, and Light Fixtures

    While floors and surfaces get regular attention, the vertical planes of your home, like walls and baseboards, often go unnoticed until they are visibly grimy. An essential component of a comprehensive deep cleaning house checklist is the systematic washing of walls, baseboards, and light fixtures. This process removes the slow accumulation of dust, fingerprints, scuff marks, and airborne grime that can make a room feel dull and dirty.

    This task involves more than just a quick wipe; it requires a top-to-bottom approach, addressing everything from crown moulding and light fixtures down to the skirting boards and light switches. It’s a methodical process that brightens the entire home, similar to the preparation professional painters undertake before applying a fresh coat of paint to ensure a flawless finish.

    Wash Walls, Baseboards, and Light Fixtures

    Why This Task is Crucial

    Washing walls and fixtures dramatically brightens a space and improves indoor air quality by removing settled dust and allergens. Real estate staging companies prioritise this task before a viewing, as clean walls and sparkling fixtures make a property appear larger, better maintained, and more inviting. For homeowners, it’s a restorative task that revitalises the appearance of a room without the cost of redecorating.

    Expert Insight: According to Benjamin Moore's paint experts, cleaning walls correctly is crucial for paint longevity. Grime can break down the paint finish over time, leading to premature fading and deterioration. Regular gentle washing can extend the life of your paintwork significantly.

    How to Implement a Wall and Fixture Clean

    A systematic approach ensures an even, streak-free result and protects your home's surfaces.

    • Safety First: Before cleaning any light fixtures, light switches, or plug sockets, always turn off the electricity at the circuit breaker to eliminate the risk of electric shock.
    • Work Top to Bottom: Begin with light fixtures, then move to the walls, and finish with the baseboards. This ensures that any dislodged dust or drips fall onto areas you have yet to clean, preventing rework.
    • Use the Right Solution: For most painted walls (latex or acrylic), a simple solution of mild washing-up liquid and warm water is effective. Use a soft sponge or microfibre cloth. For stubborn scuffs, a magic eraser can be used gently. Avoid harsh chemicals on delicate paint finishes.
    • Prevent Streaks: Use two buckets: one with your cleaning solution and one with clean rinse water. Wring your sponge or cloth out thoroughly to avoid oversaturating the wall, and change the rinse water frequently to prevent spreading dirt around.

    This detailed cleaning, often highlighted in professional painting contractor guides, is a high-impact task that elevates your home from simply clean to immaculately maintained.

    4. Deep Clean and Organise All Storage Areas

    A standard tidy-up rarely addresses the clutter and grime that accumulates in storage spaces like closets, pantries, and attics. A vital component of any comprehensive deep cleaning house checklist is to systematically declutter, clean, and reorganise these often-neglected areas. This process transforms them from chaotic dumping grounds into functional, accessible spaces.

    This task involves more than just reshuffling items. It requires emptying the space entirely, cleaning every surface from shelves to floors, and making conscious decisions about what to keep, donate, or discard. It’s an opportunity to assess for issues like pests or dampness and implement lasting organisational systems that maintain order.

    Why This Task is Crucial

    Neglected storage areas can become breeding grounds for dust, mould, and pests, which can affect your home's air quality and overall hygiene. The principles popularised by Marie Kondo highlight how a disorganised space contributes to mental clutter and stress. Furthermore, professional organisers consistently demonstrate that a well-organised home saves time and reduces waste, as you can easily find what you need and avoid buying duplicates.

    Expert Insight: Decluttering before organising is non-negotiable. Trying to organise clutter is a futile exercise. By removing items you no longer need, you create the physical and mental space required to build a system that works for you long-term, preventing the rapid return of chaos.

    How to Implement a Deep Storage Clean

    To avoid feeling overwhelmed, tackle one storage area at a time with a clear, methodical approach.

    • Empty and Sort: Remove every single item from the space. Create three distinct piles: keep, donate/sell, and discard. Be ruthless; a good rule of thumb is the "one-year rule" – if you haven't used it in the past year, it's likely time to let it go.
    • Clean Thoroughly: With the space empty, vacuum all dust and debris, paying special attention to corners and crevices. Wipe down all shelves, walls, and flooring with an appropriate cleaning solution. This is the perfect time to check for any signs of damp, mould, or pest activity.
    • Organise and Contain: Group the "keep" items into logical categories. Invest in clear, labelled storage containers to protect items from dust and make them easy to identify. Utilise vertical space with shelving units and use dividers to keep smaller items neat.
    • Sentimental Items: For items with sentimental value that you cannot keep, take a high-quality photograph. This allows you to preserve the memory without sacrificing valuable storage space.

    This focused approach, championed by shows on HGTV and organisational giants like The Container Store, ensures every square inch of your home is clean and functional. To explore professional services that cover every nook and cranny of your property, you can learn more about our comprehensive cleaning services.

    5. Clean Windows Inside and Out Plus Window Treatments

    A truly comprehensive deep clean goes beyond surface-level tasks, and nothing brightens a home quite like sparkling, clear windows. This essential step in any deep cleaning house checklist involves a thorough cleaning of all window components, including glass, frames, sills, and tracks, as well as attending to window treatments like blinds, curtains, and drapes which are often magnets for dust and allergens.

    This task requires a systematic approach, addressing both the interior and exterior of the windows to remove built-up grime, dust, and environmental pollutants. It transforms rooms by maximising natural light, improving air quality, and presenting a polished, well-maintained appearance that standard cleaning routines often miss.

    Clean Windows Inside and Out Plus Window Treatments

    Why This Task is Crucial

    Dirty windows not only obstruct views and reduce natural light, which can affect mood and productivity, but they also harbour dust, pollen, and mould that can degrade indoor air quality. Furthermore, neglecting window frames and sills can lead to long-term damage from moisture and dirt accumulation. The Professional Window Cleaners Association highlights that regular, thorough cleaning is a preventative maintenance measure, protecting the seals and integrity of the window units themselves.

    Expert Insight: Historic home preservation protocols always include meticulous window care. Proper cleaning prevents the acidic build-up from pollution that can etch and permanently damage older, more fragile glass, preserving the home's value and character.

    How to Implement a Deep Window Clean

    A methodical process ensures a streak-free finish and properly cleaned treatments.

    • Preparation is Key: Before touching the glass, remove and clean window screens using soapy water and a soft brush. Vacuum the window tracks, frames, and sills to remove loose dust, cobwebs, and debris.
    • Choose the Right Day and Tools: Clean windows on an overcast, cloudy day. Direct sunlight can cause your cleaning solution to dry too quickly, leaving unsightly streaks. For a professional-grade finish popularised by squeegee brands like Ettore, use a high-quality squeegee and a microfibre cloth.
    • Window Treatments: Curtains and drapes should be taken down and laundered or dry-cleaned according to their care labels. For blinds, close them one way and dust with a microfibre duster or cloth, then close them the other way and repeat. A damp cloth can be used for more stubborn grime on vinyl or plastic blinds.
    • Cleaning Solution: A simple solution of one part white vinegar to ten parts water is effective and economical. For exterior windows with heavy dirt, a few drops of washing-up liquid can be added. Apply the solution, use the squeegee with overlapping strokes, and wipe the blade clean after each pass.

    6. Deep Carpet Cleaning and Floor Care

    While regular vacuuming and mopping maintain surface-level cleanliness, they don’t tackle the deeply embedded dirt, allergens, and grime that accumulate in flooring over time. A vital part of any deep cleaning house checklist is intensive floor care, which involves steam cleaning carpets, deep mopping hard floors, and thoroughly cleaning area rugs to restore their appearance and sanitise the surface.

    This process goes beyond daily maintenance to remove stubborn stains and allergens that can affect air quality and hygiene. It might involve hiring professional services or using specialised equipment like a carpet shampooer or steam cleaner to lift dirt from the very base of the fibres and grout lines, achieving a level of clean that standard methods cannot match.

    Why This Task is Crucial

    Floors endure constant foot traffic, accumulating pollutants, bacteria, and allergens that regular cleaning misses. According to the Institute of Inspection, Cleaning and Restoration (IICRC), professional deep cleaning can remove up to 98% of common household allergens from carpets and upholstery. This is particularly important for households with children, pets, or allergy sufferers. Professional services like Stanley Steemer have built their reputation on demonstrating how deep extraction methods can prolong the life of carpets and improve a home's overall environment.

    Expert Insight: When preparing a property for sale, estate agents often recommend professional carpet and floor cleaning. A pristine floor not only looks more appealing to potential buyers but can also eliminate lingering odours, significantly increasing a home's marketability and perceived value.

    How to Implement Deep Floor and Carpet Care

    A methodical approach ensures effective and safe cleaning for different floor types.

    • Preparation is Key: Before any deep cleaning, thoroughly vacuum carpets and rugs to remove loose dirt and debris. For hard floors, sweep or dust mop to clear away surface grit that could scratch the flooring during mopping.
    • Carpet and Rug Shampooing: Rent or purchase a carpet cleaner from a reputable brand like Bissell or Rug Doctor. Always test your cleaning solution on a small, inconspicuous area first, like inside a wardrobe, to check for colour-fastness. Work in sections and avoid over-saturating the carpet to speed up drying time. To tackle specific marks, you can learn more about how to remove stubborn stains.
    • Hard Floor Deep Clean: For tile or vinyl, use a steam mop or a pH-neutral cleaning solution to break down grime without damaging the finish. For wood floors, use a product specifically designed for hardwood and a microfibre mop, ensuring it is only slightly damp to prevent water damage.
    • Ventilation and Drying: After cleaning, open windows and use fans to circulate air and accelerate drying. This is crucial for preventing mould and mildew growth, especially in thick-pile carpets.

    This comprehensive floor treatment, a standard in commercial and hotel maintenance schedules, revitalises your home from the ground up, ensuring a truly deep and lasting clean.

    7. HVAC System Deep Maintenance

    A truly comprehensive deep cleaning house checklist must address the very air you breathe, which means performing deep maintenance on your heating, ventilation, and air conditioning (HVAC) system. While we often focus on visible dust and grime, the air ducts, vents, and internal components of your HVAC system can harbour a significant accumulation of dust, allergens, and debris, circulating them throughout your home.

    This task goes beyond a simple filter change. It involves a thorough cleaning of vents, inspection and cleaning of air ducts, and servicing the core furnace and air conditioning units. By addressing the entire system, you ensure it operates efficiently and contributes to a healthier indoor environment, removing contaminants at their source before they can settle on your newly cleaned surfaces.

    Why This Task is Crucial

    A neglected HVAC system can become a breeding ground for mould, bacteria, and dust mites, which can have a significant impact on indoor air quality. The US Environmental Protection Agency (EPA) highlights the importance of maintaining clean HVAC systems as a key component of reducing indoor air pollutants. Furthermore, according to Energy Star, a properly maintained system can improve efficiency by up to 15%, leading to lower energy bills and a reduced carbon footprint.

    Expert Insight: For households with allergy sufferers or respiratory conditions, professional duct cleaning can lead to a noticeable reduction in symptoms. The National Air Duct Cleaners Association (NADCA) sets standards for this process, ensuring that contaminants are properly removed rather than just dislodged.

    How to Implement HVAC Deep Maintenance

    A combination of DIY tasks and professional servicing ensures your system is in optimal condition.

    • Safety First: Always turn off the power to your HVAC system at the circuit breaker before performing any maintenance, including filter changes or vent cleaning.
    • Filters and Vents: Replace your system’s air filter every 1-3 months, depending on usage and household factors like pets. Remove all vent covers throughout your home, wash them in warm, soapy water, and use a vacuum with a hose attachment to clean as far into the ductwork as you can reach.
    • Outdoor Unit Care: Keep the area around your outdoor air conditioning unit clear of leaves, grass clippings, and other debris. Ensure there is at least two feet of clearance around the unit for proper airflow.
    • Professional Servicing: Schedule an annual inspection and service with a qualified HVAC technician. They can perform deeper cleaning, check refrigerant levels, inspect electrical components, and identify any potential issues before they become costly problems.

    This systematic approach, championed by organisations like the EPA and NADCA, ensures your home's air is as clean as its surfaces.

    7-Point Deep Cleaning Task Comparison

    Task Implementation Complexity 🔄 Resource Requirements ⚡ Expected Outcomes 📊 Ideal Use Cases 💡 Key Advantages ⭐
    Deep Clean Kitchen Appliances and Hidden Areas High – moves heavy appliances, multiple steps Specialized cleaners and time-intensive Improves efficiency, hygiene, odor removal, fire hazard reduction Homes, restaurants, appliance maintenance Extends appliance life, reduces bacteria buildup
    Scrub and Disinfect All Bathroom Surfaces High – detailed scrubbing, chemicals Harsh cleaning products, ventilation needed Eliminates mold/bacteria, improves air quality and cleanliness Hospitals, hotels, rentals, home deep cleaning Reduces allergens, maintains fixtures, controls infection
    Wash Walls, Baseboards, and Light Fixtures Medium-High – ladders, delicate surfaces Time and care with cleaning agents Brightens rooms, removes allergens and scuffs, paint prep Real estate, painting prep, routine deep clean Enhances appearance, removes bacteria on touchpoints
    Deep Clean and Organize All Storage Areas Very High – labor-intensive, emotional decisions Organizational products and time Maximizes storage, reduces clutter, finds forgotten items Closets, pantries, attics, basements Improves functionality and reveals hidden valuables
    Clean Windows Inside and Out Plus Window Treatments Medium – safety risks, technique-sensitive Specialized tools, weather dependent Boosts natural light, curb appeal, allergen removal Residential & commercial, historic homes Extends window/treatment life, improves home value
    Deep Carpet Cleaning and Floor Care High – equipment needed, long drying times Professional equipment or rental Removes deep stains/allergens, extends floor lifespan Homes, offices, real estate staging Improves air quality, deep dirt removal
    HVAC System Deep Maintenance Medium – technical knowledge required Filters, possible professional service Boosts air quality, system efficiency, reduces allergens All homes and commercial buildings Lowers energy costs, extends HVAC lifespan

    Maintaining Your Fresh Start

    Congratulations on completing, or planning to complete, this comprehensive deep cleaning house checklist. Taking on tasks like scrubbing kitchen appliances, washing walls, and deep cleaning floors is a significant achievement that transforms your living space. You've not only removed visible dirt but also tackled the hidden grime in forgotten corners, from inside your HVAC vents to behind the fridge, creating a healthier and more pleasant environment for everyone in your household.

    The true value of this effort extends far beyond a temporarily tidy home. It’s about resetting your environment, reducing allergens, and creating a more organised, stress-free sanctuary. The immediate satisfaction of a sparkling clean home is undeniable, but the long-term benefit comes from establishing a new baseline for cleanliness.

    From a One-Off Project to a Sustainable Habit

    The key takeaway from this extensive guide is that deep cleaning doesn't have to be an overwhelming annual event. The secret to maintaining this fresh start lies in integrating smaller, manageable tasks into your regular cleaning schedule. By doing so, you prevent the slow accumulation of dust and grime that makes deep cleaning such a monumental chore.

    Consider breaking down the maintenance into manageable chunks:

    • Monthly Rotation: Dedicate one weekend a month to a specific "deep clean" zone. For example, tackle window treatments one month, and focus on deep cleaning a single kitchen appliance the next.
    • Weekly Add-Ins: Incorporate one small task from your deep cleaning house checklist into your weekly routine. Wipe down skirting boards in one room this week, and clean light fixtures in another room next week.
    • Seasonal Scheduling: Align bigger tasks with the changing seasons. A deep clean of the HVAC system is perfect before the summer heat or winter chill, and washing all windows is ideal in the spring.

    This strategic approach turns a marathon into a series of short, achievable sprints. You’ll find that your home stays cleaner for longer, and the next time you decide to perform a full deep clean, the job will be significantly faster and less demanding. It's about working smarter, not harder, to preserve the hard-won freshness and order you’ve created. This proactive maintenance transforms cleaning from a reactive chore into a proactive act of home care.

    Remember, a clean home is a foundation for a clear mind and a healthier life. By embracing this checklist and the maintenance strategies that follow, you are investing in your own well-being and the comfort of your family. Enjoy the lasting rewards of your hard work and the simple pleasure of a truly pristine living space.


    Feeling overwhelmed by the sheer scale of a proper deep clean? If your busy schedule makes it difficult to follow this detailed deep cleaning house checklist, let the professionals handle it for you. The experts at Signal Cleaning offer meticulous, top-to-bottom deep cleaning services throughout Oxford, ensuring every item on this list is completed to the highest standard, so you can simply relax and enjoy your immaculate home. Learn more and book your service today.

  • Your Guide to Nontoxic Carpet Cleaner Solutions

    Your Guide to Nontoxic Carpet Cleaner Solutions

    So, what exactly is a nontoxic carpet cleaner? Simply put, it’s a cleaning solution that gets the job done using safe, natural ingredients instead of the harsh chemicals you’ll often find in conventional products.

    These cleaners work their magic with plant-derived or mineral-based workhorses like vinegar, baking soda, and natural enzymes. They’re brilliant at lifting dirt and knocking out odours without leaving nasty residues behind. This makes them a fantastic choice for any home, but especially those with children, pets, or anyone sensitive to strong chemicals.

    Why Choose a Nontoxic Carpet Cleaner

    Choosing a nontoxic carpet cleaner is a bit like opting for whole, natural foods over heavily processed ones for your family. Both might solve an immediate problem, but one actively supports well-being, while the other can introduce unwanted, and potentially harmful, elements into your home.

    Many standard carpet cleaners rely on powerful synthetic chemicals for a quick fix, but that performance can come at a cost to your indoor air quality and your family’s health.

    Think of your carpet as the biggest filter in your house. It’s constantly trapping dust, pollen, pet dander, and, of course, any chemicals you spray on it. When you use traditional cleaners, substances known as volatile organic compounds (VOCs) can be released into the air long after the carpet feels dry, contributing to indoor air pollution.

    The Benefits for Your Home and Family

    Switching to a nontoxic carpet cleaner doesn’t mean you have to compromise on cleaning power. It’s about choosing a smarter, healthier way to look after your space. The advantages are clear and genuinely make a difference.

    • Better Indoor Air Quality: Nontoxic solutions don't pump harmful fumes into your home, which means a safer breathing environment for everyone, particularly those with asthma or allergies.
    • Safety for Kids and Pets: Little ones and furry friends spend a lot of their time on the floor. Using natural cleaners means they aren’t coming into direct contact with harsh chemical residues.
    • Kinder to Carpet Fibres: Abrasive chemicals can strip natural oils from carpet fibres (especially wool), making them brittle over time. Nontoxic options clean effectively while helping to maintain your carpet’s texture and lifespan.
    • Real Peace of Mind: There’s a genuine comfort in knowing you aren’t introducing potentially hazardous substances into your living space.

    This shift in awareness is starting to show in market trends. In fact, the UK carpet and upholstery cleaning services market was valued at around £3.3 billion in 2022 and is expected to hit nearly £4.9 billion by 2030, largely driven by a growing focus on indoor hygiene and safer cleaning.

    Choosing a nontoxic carpet cleaner is an active step toward creating a healthier sanctuary. You're consciously reducing your family’s daily chemical load, making sure your home isn’t just visibly clean, but fundamentally safe.

    Ultimately, it’s a choice that benefits everyone under your roof. Whether it’s hiring a professional service that champions green cleaning or mixing up a simple DIY recipe, there are plenty of ways to get a spotless home. For those looking for professional results without the fuss, exploring expert services is a great route. You can find more tips on keeping your home pristine in our comprehensive guides at https://signalcleaning.co.uk.

    The Hidden Dangers in Conventional Carpet Cleaners

    Ever take a moment to read the label on a standard carpet cleaner? It can be a real eye-opener. While they promise pristine, spotless floors, many of these products are packed with a cocktail of aggressive chemicals. They might get the stain out, sure, but they can introduce a whole host of less visible problems into your home's environment.

    It’s a bit like using a sledgehammer to crack a nut. Yes, the job gets done, but the collateral damage can be pretty significant. A conventional cleaner might lift that stubborn wine spill, but it can also release Volatile Organic Compounds (VOCs) into the air you breathe. These are gases that can have some nasty short- and long-term effects on your health.

    Your carpet is essentially a giant sponge. It soaks up not just dirt and dust, but also any chemicals you use on it. This means your family and pets are constantly exposed to these residues, either by walking on the carpet or simply by breathing the air in the room.

    Unmasking the Common Culprits

    Let’s pull back the curtain on some of these ingredients. Many of the chemicals found in household carpet cleaners are powerful enough for industrial use, which should tell you something about their strength. You wouldn't want to bring industrial solvents home, would you?

    Here are a few of the main offenders to watch out for:

    • Perchloroethylene (PERC): You’ll often find this in dry cleaning fluids. It's a fantastic solvent for grease, but it's also flagged as a probable carcinogen. Even short-term exposure can cause dizziness and irritate your respiratory system.
    • Naphthalene: This chemical comes from coal tar and is used to dissolve stains and mask odours – you might recognise its distinctive mothball smell. It's a registered toxic air pollutant and has been linked to potential damage to the central nervous system.
    • Ammonia: Known for its potent smell, ammonia is a common but harsh cleaning agent. It's a severe irritant that can trigger asthma attacks and cause burning sensations in the eyes, nose, and throat, particularly in rooms without good airflow.

    To give you a clearer picture of the difference between these harsh chemicals and their safer counterparts, have a look at this quick comparison.

    Common Chemicals in Traditional vs Nontoxic Cleaners

    Harmful Chemical (Traditional) Potential Health Risk Safe Alternative (Nontoxic)
    Perchloroethylene (PERC) Probable carcinogen, respiratory irritant Plant-based solvents (e.g., from corn or coconut)
    Naphthalene Toxic air pollutant, nervous system damage Essential oils (e.g., lemon, tea tree) for scent
    Ammonia Severe irritant to eyes, lungs, skin White vinegar (acetic acid) for deodorising
    Butoxyethanol Can cause liver and kidney damage Enzyme cleaners (break down organic stains)
    Phthalates (in "Fragrance") Endocrine disruptor, allergen Unscented formulas or natural scents

    This table really highlights the simple, effective swaps that nontoxic cleaners make to protect your health without compromising on cleaning power.

    Image

    As you can see, the building blocks of a great nontoxic cleaner are often things you already have in your pantry, like vinegar and baking soda.

    The Problem with "Fragrance"

    One of the most deceptive words you'll find on a cleaning product label is "fragrance". It sounds harmless, but this single term can conceal a mixture of dozens, or even hundreds, of undisclosed chemicals. These synthetic scents are designed to give you the impression of a clean home, but they often just cover up odours while pumping more pollutants into your air.

    Many of these fragrance chemicals are known allergens and endocrine disruptors. When you smell that powerful "clean" scent, you're often just inhaling a complex chemical blend that has no place in a healthy home.

    This is precisely why choosing a genuinely nontoxic carpet cleaner matters so much. It's not about avoiding one or two specific ingredients; it's about adopting a whole new approach to cleaning—one that puts your family’s health first without giving up on results. By knowing what to look out for, you can become an informed consumer who can confidently read a label and know exactly what you're bringing into your home.

    How to Choose a Truly Safe Commercial Cleaner

    Image

    Stepping into the cleaning aisle can feel a bit much. With bottle after bottle claiming to be "green," "natural," or "eco-friendly," it’s incredibly easy to fall for clever marketing. This tactic even has a name: "greenwashing." It’s when companies use fuzzy, feel-good terms to make their products seem much safer and more environmentally sound than they really are.

    But cutting through the noise isn't as daunting as it looks. The best way to think about it is like reading a food label—once you know what you’re looking for, you can quickly tell the healthy stuff from the junk food in disguise. A genuinely nontoxic carpet cleaner will be open and honest about its ingredients, not hide them behind confusing jargon.

    This shift in consumer awareness has really changed the game. The UK cleaning industry was valued at nearly £60 billion back in 2021, and the number of cleaning companies shot up to over 75,500 by 2023. This boom isn't just about general cleaning; it shows a real demand for specialised, safer services like nontoxic carpet care. You can find out more about the growth of the UK cleaning sector from policybee.co.uk.

    Decode the Ingredient Label

    Your first and most important move is to flip that bottle around and actually read the ingredients list. Think about it: manufacturers of truly safe products are proud of what's inside and want you to know about it.

    It's time to become an ingredient detective. You don’t need a chemistry degree, just a sharp eye for a few key terms—both the good and the bad.

    Here are some signs you’re looking at a genuinely good nontoxic carpet cleaner:

    • Plant-Derived Surfactants: These are the cleaning agents that do the heavy lifting, and they’re sourced from things like coconuts or corn. They create the suds that lift away dirt and are a brilliant alternative to harsh, petroleum-based chemicals.
    • Enzymatic Cleaners: These clever cleaners use natural enzymes to literally break down specific types of stains, like pet accidents or spilt food. They're incredibly effective and completely biodegradable.
    • Essential Oils for Scent: Look for products scented with pure oils like lemon, lavender, or tea tree instead of the vague, catch-all term "fragrance."

    On the other hand, here are the red flags to watch out for:

    • "Fragrance" or "Parfum": As we've mentioned, this one little word can hide a cocktail of hundreds of undisclosed chemicals, many of which are known irritants.
    • Vague Terms like "Cleaning Agents": This is a classic non-answer. It tells you absolutely nothing about what’s in the bottle. Transparency is everything.
    • Dyes or Optical Brighteners: These add zero cleaning power. Dyes are just for looks, and optical brighteners are even sneakier—they coat fibres to make them appear cleaner without actually removing any more dirt.

    Look for Trustworthy Certifications

    While reading labels is a powerful skill, third-party certifications are a fantastic shortcut. These seals of approval are given out by independent organisations that have rigorously tested a product to make sure it meets strict health and environmental standards.

    Think of them as a "seal of safety" from an unbiased expert. They've done all the detailed homework for you.

    When you see a credible certification on a bottle, it means the product has passed stringent tests for ingredient safety, performance, and eco-friendliness. It's one of the fastest ways to confirm you're choosing a genuinely nontoxic carpet cleaner.

    Some of the most reputable certifications to look for in the UK and Europe include:

    • EU Ecolabel: This is the official environmental label of the European Union. Products carrying this flower logo have a proven reduced environmental impact throughout their entire life cycle.
    • Ecocert: A globally recognised certification that guarantees products are made with ingredients from renewable resources and manufactured using environmentally friendly processes.
    • Leaping Bunny: While its main focus is on animal welfare, this logo also speaks volumes about a company's ethical commitment, which often goes hand-in-hand with using safer, more natural ingredients.

    Your Quick Shopping Checklist

    To make things even simpler, here is a mental checklist you can run through next time you're shopping for a nontoxic carpet cleaner. Just ask yourself these quick questions.

    1. Check for "Fragrance-Free": Is the product unscented, or is it scented only with pure essential oils?
    2. Scan for Plant-Based Ingredients: Does the label proudly mention plant-derived surfactants or enzymes?
    3. Look for a Certification Seal: Can you spot a trusted logo like the EU Ecolabel on the packaging?
    4. Read the Full Ingredients List: Are the ingredients clearly and specifically named, or are they vague?
    5. Avoid Dyes and Brighteners: Does the liquid have an artificial colour?

    By using these simple filters, you can easily get past the marketing hype and confidently choose a product that is genuinely safe and effective for your home, your family, and your pets.

    Powerful DIY Nontoxic Cleaner Recipes

    You don’t need a cupboard overflowing with harsh, expensive chemicals to get a truly deep clean. Believe it or not, some of the most powerful and safest cleaning agents are probably already in your kitchen pantry. Mixing your own nontoxic carpet cleaner is not just a great way to save money; it gives you total control over what you bring into your home.

    It’s a bit like cooking from scratch instead of ordering a takeaway. When you make your own meal, you know exactly what’s in it—fresh, healthy ingredients chosen by you. DIY cleaners work on the same principle. It’s a simple, back-to-basics approach that gets brilliant results without any hidden nasties.

    The science behind it is surprisingly straightforward. Ingredients like white vinegar, with its natural acidity, are fantastic at cutting through grime and neutralising odours. At the same time, baking soda acts as a gentle abrasive to lift dirt and is an absolute champion at absorbing nasty smells.

    Simple All-Purpose Carpet Cleaner Solution

    For a general, top-to-bottom clean with a carpet cleaning machine, this recipe is the perfect place to start. It combines gentle cleaning power with deodorising properties to give any room a new lease of life. Think of it as your go-to for routine maintenance and for perking up tired, well-trodden carpets.

    What You'll Need:

    • A large jug or bucket (at least 4 litres)
    • Hot water (or room temperature water if your machine heats it)
    • Distilled white vinegar
    • A gentle, natural dish soap

    Step-by-Step Instructions:

    1. Start with the Base: Pour about 3.5 litres of hot water into your jug, leaving a bit of space at the top.
    2. Add the Cleaners: Carefully pour in half a cup of distilled white vinegar and just one tablespoon of natural dish soap. It’s crucial not to overdo the soap, as too much can leave a sticky residue behind that attracts more dirt.
    3. Mix Gently: Give the jug a gentle swirl to combine everything. Try not to shake it, or you’ll end up with a bucket full of foam.
    4. Ready to Go: Pour the solution into your carpet cleaner’s tank and use it as you normally would, following the machine’s instructions.

    This simple mix does a brilliant job on everyday dirt and grime, leaving your carpets looking brighter and feeling fresher, all without that overpowering chemical smell.

    Potent Spot and Stain Remover

    When a sudden spill happens, you need something that acts fast. This DIY spot cleaner is perfect for tackling everything from muddy paw prints to a knocked-over glass of juice. Keeping a pre-mixed bottle ready to go means you can deal with accidents before they have a chance to set in.

    To make your own powerful stain remover, just mix one cup of distilled water with one cup of white vinegar and one teaspoon of natural dish soap in a spray bottle. Give it a gentle shake, and you're all set.

    Pro Tip: Always test your solution on a small, hidden patch of carpet first—think inside a wardrobe or under the sofa. This quick check ensures it won’t affect your carpet’s colour or texture before you tackle a more visible spot.

    When a stain strikes, spray the solution directly onto it and let it sit for about five minutes. Then, gently work at the spot with a soft brush or cloth until the stain lifts. For more expert tips on fighting really tough marks, check out our guide on how to remove stubborn stains.

    Natural Carpet Deodoriser with Baking Soda

    Carpets are brilliant at trapping odours from pets, food, and just day-to-day life. Instead of masking them with synthetic air fresheners, you can get rid of them at the source with one of the best natural deodorisers out there: baking soda. This method couldn’t be simpler, and it’s perfectly safe for homes with children and pets.

    Here’s how to completely refresh your carpets:

    1. Get a Clean Start: First, give your carpet a good vacuum to pick up any loose dirt, dust, and hair. A vacuum with a HEPA filter is even better for trapping tiny particles.
    2. Sprinkle Away: Lightly sprinkle an even layer of baking soda all over the carpet. Using a fine-mesh sieve can help you get a more controlled, even coating.
    3. Let It Work Its Magic: Leave the baking soda to sit for at least a few hours. For really stubborn smells, leaving it overnight will give you the best results.
    4. Vacuum It All Up: Finally, vacuum the carpet again thoroughly, making sure you suck up all the powder. As you lift the baking soda, you’ll be lifting the odours it has absorbed right along with it.

    This process leaves your carpet smelling genuinely clean and neutral, not just covered up with a fake fragrance. It's a fantastic example of how a simple, single-ingredient nontoxic carpet cleaner can often outperform a bottle full of complex chemicals.

    Effective Nontoxic Cleaning Techniques

    Choosing a brilliant nontoxic carpet cleaner is a great first step, but how you use it is what truly brings your floors back to life. The right technique makes all the difference, turning a simple clean-up into something that looks and feels professionally done. Knowing how to react to a sudden spill versus tackling an old, stubborn stain will get you the best possible results every single time.

    This isn't about needing complicated procedures or expensive gear. It’s simply about working smarter. By adopting a few key methods, you can easily avoid common cleaning mistakes, like accidentally making a stain worse or leaving behind a sticky residue that just attracts more dirt later.

    The First Rule: Blot, Never Rub

    When a spill happens, our first instinct is usually to grab a cloth and start scrubbing like mad. This is honestly one of the worst things you can do. Rubbing a fresh stain doesn't lift it out; it just grinds the particles deeper into the carpet fibres and spreads the mess outwards, creating an even bigger problem to solve.

    The correct approach is to blot.

    1. Act Fast: Gently place a clean, dry cloth or a bit of kitchen roll over the spill.
    2. Apply Pressure: Press down firmly to soak up as much of the liquid as you can.
    3. Lift and Repeat: Lift the cloth, find a clean, dry section, and press down again. Keep doing this until you’ve pulled out most of the moisture.

    This gentle blotting action lifts the stain upwards and out of the carpet, rather than pushing it further in. Once you've blotted up the excess, you can then treat what’s left with your chosen nontoxic spot cleaner.

    Think of it this way: rubbing a stain is like trying to erase a pencil mark with a dirty rubber—it just smudges the problem around. Blotting, on the other hand, is like carefully lifting the graphite off the page, leaving a much cleaner surface behind.

    Treating Different Types of Stains

    Not all stains are created equal, and knowing what you’re dealing with helps you choose the right game plan. While a good all-purpose nontoxic cleaner will handle most everyday spills, some tougher marks need a slightly different approach.

    • For Fresh Spills: After blotting, give the area a light spray with your DIY vinegar solution or commercial cleaner. Let it sit for 5-10 minutes to get to work, then blot again with a clean, damp cloth.
    • For Set-In Stains: Older, dried-on stains need a bit more persuasion. Start by gently scraping off any solid bits. Apply your cleaner and let it dwell for at least 15 minutes. Then, use a soft brush to gently agitate the fibres in different directions before blotting.
    • For Oily or Greasy Marks: For these tricky stains, sprinkle baking soda or cornflour over the spot first. Let it sit for a few hours to absorb the oil, then vacuum it all up. Now you can treat what’s left of the mark with your cleaner.

    This targeted approach means you’re always using the most effective method for the job, saving you time and a lot of elbow grease. For more in-depth advice on professional cleaning methods, our Signal Cleaning blog is packed with industry tips.

    Using Nontoxic Solutions in a Carpet Machine

    If you're gearing up for a deep clean with a carpet cleaning machine, getting the dilution right is absolutely crucial. Using too much of any solution—even a nontoxic one—can leave a sticky residue that makes your carpet feel stiff and attract dirt like a magnet. Always follow the recipe or the product instructions to the letter.

    A very common mistake is adding extra soap, thinking it’ll deliver more cleaning power. In reality, a little goes a long, long way.

    General Dilution Guideline:
    As a rule of thumb for homemade solutions, use no more than one tablespoon of natural dish soap for every 3.5 litres of water. The vinegar in your mix provides most of the cleaning muscle; the soap is just there to help break surface tension and lift grime. Sticking to this ensures a powerful clean without leaving anything behind in your carpet fibres.

    Long-Term Benefits of Nontoxic Carpet Care

    Image

    Choosing a nontoxic carpet cleaner isn’t just about getting a stain out today; it’s a genuine investment in the long-term health and feel of your home. The benefits ripple outwards, moving far beyond a clean floor to create positive changes that you’ll appreciate for years to come.

    Think of your carpet as the biggest fabric filter in your house. By consistently using gentle, nontoxic cleaners, you’re not just cleaning it—you're looking after your indoor air quality. This simple swap helps cut down on airborne irritants, creating a healthier breathing space for everyone, especially for family members with asthma or allergies.

    Extending Your Carpet’s Life and Quality

    It turns out that a gentle approach is also what’s best for your carpet’s lifespan. Many standard cleaners use aggressive chemicals that can strip the natural oils from fibres like wool, leaving them dry, brittle, and more susceptible to wear and tear. Nontoxic solutions clean just as effectively but without causing that kind of damage.

    • Preserves Fibre Integrity: Natural ingredients work in harmony with your carpet’s texture, not against it.
    • Maintains Softness: You get to keep that plush, soft feel for much longer because you’re not using harsh stripping agents.
    • Reduces Fading: Strong chemicals can bleach or dull carpet dyes over time, whereas gentler alternatives protect the vibrancy of your carpet’s colour.

    This kinder cleaning method means your carpet doesn't just look better; it physically lasts longer. That saves you from the hefty cost and hassle of replacing it prematurely. It’s a small change in your routine that protects a major investment in your home.

    Choosing a nontoxic carpet cleaner is a proactive step toward a healthier home and a more sustainable lifestyle. It is a powerful reminder that the small, conscious choices we make can have a profound and lasting positive impact on our daily lives.

    This shift isn't just happening in our homes, either. As more and more of us demand greener solutions, it's pushing the entire professional cleaning industry to evolve. The growing preference for nontoxic products is sparking real innovation in the UK carpet cleaning market, with more services adopting eco-friendly methods and sophisticated low-moisture equipment. You can read more about the evolution of the carpet cleaning service market from datahorizzonresearch.com.

    Your Top Nontoxic Cleaning Questions, Answered

    Deciding to switch to a nontoxic carpet cleaner is a brilliant move for your home, but it's completely normal to have a few questions. When you're used to those strong, chemical smells, shifting to something gentler can feel a bit uncertain. Let's clear up some of the most common queries so you can feel totally confident in your new cleaning routine.

    The biggest question we hear is about performance. Can natural solutions really stand up to the heavy-duty chemical cleaners? Absolutely. Think of it this way: harsh chemicals often rely on brute force, which can be tough on your carpet fibres. A good nontoxic carpet cleaner works much smarter, using things like plant-based surfactants and enzymes to gently break down stains and lift them away without causing any collateral damage.

    Worries About DIY Solutions

    Another common area of concern is homemade cleaners, especially when you’re dealing with certain types of carpet or a manufacturer's warranty. It’s smart to be a little cautious here, because not every natural ingredient is a good match for every material.

    Can I Safely Use Vinegar on Wool Carpets?
    This is a really important one. Vinegar is a fantastic all-round cleaner, but its acidity can be too much for delicate natural fibres like wool or silk. Using it could lead to damage or even discolouration. For these carpets, you’re much better off sticking with a pH-neutral cleaner or just plain water. And whatever you use, always, always do a little spot test on a hidden area first.

    Will a Homemade Solution Void My Carpet Warranty?
    That's a very valid point. A lot of carpet manufacturers have specific guidelines on approved cleaning solutions, and going off-piste with a DIY mixture could potentially void your warranty. If your carpet is still covered, it's always best to check the care guide or choose a certified nontoxic commercial cleaner that you know meets their standards.

    The whole point of nontoxic cleaning is to get fantastic results without risking your family’s health or the condition of your carpet. Knowing which ingredients work—and which to avoid—is the secret to getting it right.

    How Often Should I Clean?

    Finally, people often wonder if their cleaning schedule needs to change once they ditch the conventional products. The good news is that the core principles of great carpet care stay exactly the same, no matter what cleaner you’re using.

    For most households, a proper deep clean with a carpet machine once or twice a year is perfect. If you have busy hallways or a house full of kids and pets, you might want to do it every few months. For everything in between, weekly vacuuming and tackling spills the moment they happen are still the best ways to keep your floors looking fresh.


    Ready for a professional clean without the harsh chemicals? The expert team at Signal Cleaning uses safe and effective methods to restore your carpets. You can book your service online in minutes.

  • A Guide to Natural Carpet Cleaning for Your Home

    A Guide to Natural Carpet Cleaning for Your Home

    When you hear “natural carpet cleaning,” what comes to mind? For many, it’s about ditching harsh chemicals for simple, non-toxic household staples like baking soda and vinegar. It’s a brilliant way to refresh your carpets, lift out stubborn odours, and deal with everyday stains, all without filling your home with questionable fumes.

    Why Choose Natural Carpet Cleaning

    Image

    Making the move to natural carpet cleaning is about so much more than just getting the dirt out. It’s a conscious choice for a healthier, safer home. Think about it: traditional carpet cleaners are often packed with synthetic chemicals that can hang around long after you’ve finished, affecting your indoor air quality.

    This is a big deal, especially if you have young children or pets. They’re the ones spending the most time playing, crawling, and napping on the floor, putting them in direct contact with any chemical residues. Shifting to natural alternatives completely removes that worry.

    A Healthier Home Environment

    The single biggest win with natural ingredients is the noticeable improvement in your home’s air quality. Many off-the-shelf cleaners release volatile organic compounds (VOCs), which have been linked to everything from respiratory issues and headaches to skin irritation.

    By choosing natural methods, you’re taking a proactive step to shield your family from that unnecessary exposure. It’s a simple change that makes your living space not just look clean, but feel genuinely healthier. You can find more tips for creating a healthier home over on our Signal Cleaning blog.

    Protecting Our Planet

    The ripple effect of our cleaning choices goes far beyond our own four walls. Those chemicals in conventional products often get washed down the drain, making their way into our waterways and causing real harm to aquatic life.

    Natural ingredients, however, are biodegradable and much kinder to the environment. When you use things like vinegar, baking soda, and salt, you can be confident you’re not adding to water pollution. It’s a small way to help preserve our local wildlife and natural resources.

    This eco-conscious approach is part of a much bigger picture. The global demand for professional, green cleaning services is booming. The carpet cleaning market was valued at USD 7.5 billion in 2024 and is expected to more than double by 2033, with UK homeowners playing a huge part in driving this change.

    Cost-Effective and Accessible

    Let’s not forget the financial benefits. Natural carpet cleaning is incredibly kind to your wallet. The main ingredients are things you probably already have in your kitchen cupboards. A big bottle of white vinegar and a box of baking soda cost pennies compared to a single bottle of specialised carpet shampoo.

    This accessibility is empowering. It means you can stay on top of regular cleaning and tackle spills as they happen without having to think about the cost. You get to maintain a beautiful home without relying on expensive, chemical-laden products, making clean living something everyone can achieve.

    Gathering Your Eco-Friendly Cleaning Toolkit

    Image

    Before you can tackle any mess, you need the right supplies. Building an effective, all-natural cleaning arsenal is simpler and cheaper than you might think. In fact, most of the essentials for a proper natural carpet cleaning are probably already hiding in your kitchen cupboards.

    That’s the real beauty of this approach. You don’t need a dozen specialised, chemical-laden products. A few powerful, multi-purpose ingredients are all it takes to handle everything from a general freshen-up to a sudden, dreaded spill. This isn’t just about cleaning; it’s about being prepared for life’s little accidents in a way that’s safe for your family and surprisingly effective.

    Your Core Cleaning Ingredients

    At the heart of any DIY cleaning kit are a few key players. Knowing what each one does is the first step to using them like a pro.

    • Baking Soda (Bicarbonate of Soda): This is your ultimate deodoriser. Its alkaline nature is brilliant for neutralising acidic odours from things like pet urine or spilt milk, absorbing them directly from the carpet fibres.
    • White Vinegar: Don’t let the smell fool you (it disappears as it dries!). The acetic acid in vinegar is a fantastic cleaning agent. It effortlessly cuts through grease and grime and acts as a mild disinfectant, all without leaving nasty residues behind.
    • Table Salt: Never underestimate this humble seasoning. When you have a fresh spill—especially something like red wine—salt is your first line of defence. It works by drawing the liquid out of the carpet fibres before the stain has a chance to set.
    • Essential Oils (Optional): If you want to add a pleasant scent, a few drops of lavender, lemon, or tea tree oil can be mixed into your cleaning solutions. They also offer some extra antibacterial muscle.

    Before we move on to the tools, here’s a quick shopping list to help you get everything you need in one go.

    Your Natural Carpet Cleaning Shopping List

    This simple table breaks down the must-have items for your eco-friendly cleaning caddy.

    Item Primary Use Where to Find
    Baking Soda Deodorising, light scrubbing Baking aisle in any supermarket
    White Vinegar Stain removal, disinfecting Supermarket, usually with oils/condiments
    Table Salt Absorbing fresh liquid spills Supermarket
    Spray Bottles Applying homemade solutions Garden centre, hardware shop, or large supermarkets
    Microfibre Cloths Blotting and drying Cleaning aisle in any supermarket
    Stiff-bristled Brush Working solution into tough stains Hardware shop or cleaning aisle
    Essential Oils Adding fragrance, antibacterial boost Health food shops, pharmacies, or online

    With these items on hand, you’re well-equipped to handle most common carpet cleaning tasks without reaching for harsh chemicals.

    Essential Tools for the Job

    Having the right ingredients is only half the battle; the right tools make all the difference. They ensure your cleaning is not only effective but also safe for your carpet.

    One of the most common mistakes I see is people completely soaking their carpet with a cleaning solution. Remember, the goal is to clean the fibres, not the underlay. A good quality spray bottle that creates a fine, even mist is one of the most important tools you can own.

    Your basic toolkit should start with a sturdy vacuum cleaner that has good suction. You’ll also need a couple of spray bottles for your homemade solutions and a stack of clean, absorbent microfibre cloths for blotting up stains and moisture.

    A stiff-bristled brush can also be a lifesaver for working solutions into stubborn spots, but always be gentle! Scrubbing too hard can damage the carpet pile. I recommend keeping everything together in a caddy or bucket so it’s ready to grab the moment you need it.

    Your Guide to a Deep Natural Clean

    Right, let’s get our hands dirty. We’ve talked about the what and why of natural cleaning; now it’s time to put our simple, eco-friendly ingredients to work. Getting a truly deep clean is all about the right technique, not blasting your carpets with harsh chemicals.

    Forget complicated routines. I’ll walk you through a straightforward process that actually works, from the prep work right through to the final rinse. We’ll cover the little details that prevent common mistakes, like soaking your carpet or leaving behind a sticky film that just attracts more dirt.

    Laying the Groundwork with a Thorough Vacuum

    Before you even think about mixing a cleaning solution, your vacuum cleaner is your best friend. And I don’t mean a quick whizz around the room. You need to be methodical here to pull up all the dry soil, dust, and pet hair that gets trodden deep into the fibres.

    Think of that grit as tiny bits of sandpaper. Every time you walk on it, it grinds away at your carpet, dulling its colour and causing premature wear. For a really effective vacuum, slow right down. Go over the entire carpet in overlapping rows, first in one direction, and then do it all again at a 90-degree angle. This simple trick agitates the pile from all sides, lifting out stubborn debris that a single pass always misses.

    Mixing and Applying Your Homemade Solution

    With the loose dirt gone, it’s time for the cleaning solution. For a general, all-purpose clean, you can’t beat a simple mix of white vinegar and water. The acetic acid in the vinegar is fantastic at breaking down everyday grime without being harsh on your carpet.

    • For a standard clean: Mix one part white vinegar with ten parts warm water in a spray bottle. It’s a gentle dilution that’s perfect for a regular refresh.
    • For high-traffic areas: Up the concentration to one part white vinegar and five parts warm water. This gives you a bit more oomph for those well-trodden paths through the living room or down the hall.

    Now, when you start spraying, remember the golden rule: less is more. You want to lightly mist the carpet, working in small, manageable sections. The aim is to dampen the fibres, not to soak the backing and underlay. Getting it too wet is a recipe for mould and mildew problems.

    A classic mistake is drenching the carpet, thinking more solution equals a better clean. It doesn’t. It just makes it a nightmare to rinse and often leaves a residue that acts like a magnet for new dirt. A fine, even mist is all you need.

    This visual breaks down the basic process into three simple parts.

    Image

    As you can see, a great result comes from a simple mix, a short dwell time, and proper blotting—no fancy machines or aggressive chemicals required.

    The Art of Agitation and Rinsing

    Once you’ve misted a section, let the solution sit for about five to ten minutes. This “dwell time” is crucial. It gives the vinegar a chance to get to work, breaking down the oils and dirt clinging to the fibres.

    Next, you’ll want to gently agitate the area with a soft-bristled brush. I find small, circular motions work best. The key here is gentle—you’re not trying to scrub a stain off a patio. You’re just helping the solution work its way in and loosen the grime. Scrubbing too hard can fray the carpet pile.

    Finally, the rinse. This is the step that guarantees you won’t be left with a sticky residue. Grab a new spray bottle filled with plain, clean water and lightly mist the area you just cleaned. Straight away, take a clean, dry microfibre cloth and blot the area firmly. Press down hard to soak up the moisture and the dirt with it. Keep blotting with a fresh part of the cloth until it comes up clean, then you’re ready to move on to the next section.

    Tackling Tough Stains the Natural Way

    Let’s face it, spills happen. That heart-sinking moment when red wine splashes onto your cream carpet or muddy paws leave a trail doesn’t have to mean reaching for harsh chemicals. The good news is your kitchen cupboards are likely already stocked with everything you need to tackle almost any stain emergency.

    The trick to successful natural carpet cleaning is to act fast and tailor your approach to the type of spill. Above all, remember the golden rule of stain removal: always blot, never rub. Rubbing just grinds the stain deeper into the carpet fibres and can even damage them, making a bad situation much worse.

    Your Go-To Recipes for Common Stains

    Different messes call for different measures. You wouldn’t treat a greasy pizza mark the same way you’d tackle a coffee spill. Here are a few battle-tested recipes for some of the most common culprits I’ve seen over the years.

    • Red Wine and Coffee Spills: As soon as the spill happens, grab a clean cloth and blot up as much of the liquid as you can. Then, pour a generous amount of table salt or baking soda directly onto the stain to draw out the remaining moisture. Let it sit for a few hours, or until completely dry, then just vacuum it up.
    • Greasy Food Stains: For oily marks from things like butter, pizza, or salad dressing, your first step is to sprinkle cornflour or baking soda all over it. This works wonders to absorb the grease. Give it at least 15 minutes to work its magic before you vacuum it away.
    • Pet Accidents: To deal with both the stain and the lingering odour, start by blotting the area thoroughly. Next, spray it with a simple solution of equal parts white vinegar and water. While the spot is still damp, sprinkle a good layer of baking soda over the top. You’ll see it start to fizz – that’s the cleaning power in action! Let it dry completely, then vacuum.

    For those extra-tricky spots, our guide on how to remove stubborn stains has some more advanced tips.

    Before you go all-in on a visible stain, always do a quick patch test. Find a hidden spot, like under the sofa or in a corner, and apply a small amount of your cleaning mixture. This simple check ensures the solution won’t cause any discolouration on your carpet.

    The Science Behind the Simplicity

    These natural remedies aren’t just old wives’ tales; their effectiveness is rooted in simple chemistry. That fizzing you see when vinegar (an acid) meets baking soda (an alkali) is carbon dioxide gas being released. This reaction helps to lift dirt and neutralise odours from deep within the carpet pile. Salt, with its crystalline structure, is brilliant at absorbing liquids through osmosis.

    Understanding why these ingredients work makes you much more confident in tackling messes yourself. It’s this growing awareness of safer, effective cleaning that’s changing the professional industry, too. The UK’s carpet and upholstery cleaning market was valued at around £3.1 billion in 2022, and carpet services accounted for almost 73% of that.

    Experts predict this sector will grow to nearly £4.7 billion by 2030, driven largely by people wanting healthier, more hygienic homes. It’s clear that a fresh, clean living space is more important than ever.

    Keeping Your Carpets Fresh Between Cleans

    Image

    A deep, natural clean can work wonders, but the real secret to keeping that just-cleaned feeling is what you do in the days and weeks that follow. Consistent, simple habits make all the difference, preventing dirt and odours from getting a foothold in the first place.

    Think of it as proactive care. These small routines drastically cut down on how often you need to do a full-on deep clean, keeping your carpets looking and feeling fantastic for much longer. It’s a low-effort, high-reward strategy for maintaining your home.

    It’s no surprise that people value a pristine living space. The UK cleaning industry was valued at roughly £59.8 billion in 2021, and the number of cleaning businesses shot up to over 75,500 by 2023. These UK cleaning industry statistics show a clear trend: we’re all looking for ways to keep our homes beautifully clean, whether through our own efforts or with expert help.

    Smart Daily Habits for Fresher Carpets

    Often, the most effective defence is the simplest one. A good-quality doormat at every entrance is a must-have. It’s your front line, catching the worst of the mud, grit, and moisture before it even has a chance to get trampled into your carpets.

    Another game-changer is having a “shoes off at the door” rule. It might feel like a small thing, but it’s one of the best ways to protect your carpet fibres from the abrasive dirt and pollutants we bring in from outside.

    And, of course, there’s the vacuum cleaner. Regular vacuuming—at least twice a week for hallways and living rooms—is non-negotiable. It lifts all that surface-level dust and debris before it has time to get ground deep into the pile.

    A Simple DIY Carpet Deodoriser

    For a quick refresh that leaves your room smelling wonderful, you can whip up your own natural carpet deodoriser in minutes. It’s incredibly easy and a much healthier alternative to chemical-laden air fresheners.

    Here’s how you do it:

    • Get your supplies: Grab a clean jar, about 200g of bicarbonate of soda (baking soda), and 10-15 drops of your preferred essential oil. Lavender, lemon, and peppermint are all brilliant choices for a fresh scent.
    • Mix it all together: Pop the bicarb and essential oils into the jar, screw on the lid, and give it a really good shake to distribute the oil evenly.
    • Sprinkle and wait: Lightly scatter the scented powder over your carpets. You don’t need a thick layer. Leave it to work its magic for at least 15-30 minutes—this gives the bicarb time to absorb any musty smells.
    • Vacuum it up: Run the vacuum over the area thoroughly to suck up all the powder. You’ll be left with a lovely, subtle fragrance.

    This simple trick does more than just cover up smells. Bicarbonate of soda actively neutralises the acidic molecules that cause odours, leaving your carpet genuinely fresher.

    These little habits are perfect for day-to-day upkeep. But for those times when your carpets need a truly professional revival, you can always book a convenient cleaning service online to get them back to their absolute best.

    Got Questions About Natural Carpet Cleaning? Let’s Clear Things Up

    It’s only natural to have a few questions when you’re about to ditch the harsh chemical cleaners you’ve used for years. I get it. Making the switch to natural carpet cleaning is a fantastic decision, but it’s wise to go in with your eyes open. Let’s walk through some of the most common things people ask me.

    First up, the big one: “Will my house smell like a chip shop?” A very valid question! White vinegar definitely has a strong, sharp scent when you first apply it. But here’s the good news—that smell completely vanishes as it dries. Once your carpet is dry to the touch, all you’ll be left with is a fresh, neutral scent. If you want a bit of fragrance while you work, just add a few drops of your favourite essential oil, like lavender or lemon, to the mix.

    Another common worry is whether these homemade solutions are actually powerful enough to do the job. We’ve been conditioned to think that a strong chemical smell equals a deep clean. In reality, ingredients like vinegar and bicarbonate of soda are cleaning powerhouses. They work through simple but effective chemical reactions—the acid in vinegar breaks down dirt and stains, while the alkaline nature of bicarb is brilliant for neutralising stubborn odours. No harsh synthetics needed.

    Are These Methods Safe for All Carpet Types?

    This is a really important point, especially if you’ve invested in delicate wool rugs or natural fibre carpets. The gentle solutions we’ve covered are perfectly safe for most common synthetic carpets, like nylon and polyester. With natural fibres, however, you need to be a bit more careful.

    • Wool Carpets: Wool is sensitive to anything too alkaline (like bicarb) and doesn’t respond well to high heat. Using bicarbonate of soda can lead to yellowing over time. A heavily diluted white vinegar and water solution is generally okay, but you absolutely must test it first.
    • Sisal or Jute: These plant-based carpets are like sponges and can get water stains very easily. For these, it’s best to stick to dry cleaning methods. Using a powder like bicarbonate of soda to absorb dirt and odours is a much safer approach. Steer clear of wet cleaning entirely.

    Always, always do a patch test before you start. Find a hidden spot, maybe under the sofa or in a closet, apply a tiny amount of your cleaning mixture, and let it dry completely. This one simple check can prevent a whole lot of heartache.

    How Often Should I Be Deep Cleaning My Carpets?

    For the average home, giving your carpets a deep natural carpet cleaning every 12 to 18 months is a good rule of thumb. Of course, your home isn’t “average.” If you’ve got pets, small children, or anyone with allergies, you’ll probably want to do it more often, perhaps every six months.

    The real key to keeping your carpets looking great is consistent maintenance. Regular vacuuming and tackling spills the moment they happen will make the biggest difference. The deep clean is for getting rid of that deep-seated grime that a quick vacuum just can’t touch, ensuring your home stays healthy and your carpets last for years.


    When life gets too busy for DIY, Signal Cleaning offers professional, high-quality cleaning services to get your home looking its absolute best. Book your cleaning service online today

  • A Guide to Eco Friendly Cleaning Products

    A Guide to Eco Friendly Cleaning Products

    So, what exactly are eco-friendly cleaning products? At their core, they are cleaning solutions made from plant-derived, biodegradable ingredients. They also come in sustainable packaging, offering an effective way to clean your home without causing harm to the environment. Think of it as a conscious move away from harsh, synthetic chemicals towards a healthier, greener way of life.

    The Shift to Green Cleaning in Your Home

    Image

    Choosing green cleaning solutions isn’t a niche interest anymore; it’s becoming a mainstream approach to household chores. For families across the UK, this change is sparked by a growing awareness of what’s actually inside conventional cleaners and how those ingredients might affect our health and the planet.

    This isn’t just a passing trend. It’s a real response to genuine concerns about indoor air quality, the damage chemical runoff does to our local waterways, and the mountains of single-use plastic waste from traditional cleaning supplies.

    Why Households Are Making the Switch

    The reasons for this shift are often quite personal. Many of us are simply looking for ways to create a safer space for our children and pets, free from the strong fumes and chemical residues that many standard products leave behind. This kind of conscious consumer choice is really starting to reshape the entire cleaning industry.

    You can see this change reflected in the market. The UK’s natural household cleaners segment was valued at around USD 678.7 million in 2024 and is expected to nearly double by 2030. It’s a clear signal that people want products that are both effective and kind to the environment. You can learn more about the growth of the natural cleaners market and the trends driving it.

    By choosing eco-friendly cleaning products, you are not just cleaning your home. You are casting a vote for a healthier planet, safer living spaces, and a more sustainable future for everyone.

    It’s amazing how such a simple switch can have such a big ripple effect. When you opt for a biodegradable all-purpose spray or a plant-based laundry detergent, you’re supporting a wider movement. Each purchase backs companies committed to ethical sourcing, smaller carbon footprints, and genuinely earth-friendly solutions.

    So, what’s really pushing this transition?

    • Improved Health and Wellbeing: Cutting down on exposure to volatile organic compounds (VOCs) and allergens found in many conventional cleaners means better indoor air quality and fewer respiratory irritations.
    • Environmental Protection: Biodegradable formulas break down safely in the environment, which stops toxic chemicals from polluting our rivers and harming aquatic life.
    • Sustainable Packaging: A lot of eco-friendly brands are championing refillable containers, recycled materials, and plastic-free options, tackling the packaging waste problem head-on.

    Ultimately, bringing green cleaning into your home is about realising that the small choices we make every day can add up to a huge positive impact. It’s a practical, powerful way to make our daily routines reflect our values.

    How to Read Labels and Avoid Greenwashing

    Image

    Walking down the cleaning aisle can feel overwhelming. You’re hit with a barrage of buzzwords—‘natural’, ‘green’, ‘eco’—plastered across every bottle. But what do these labels really mean? Learning to read them properly is your best defence against marketing tricks.

    It’s an important skill to have, because not all “green” claims are genuine. Some bottles represent a real commitment to sustainability, while others are just marketing fluff. This practice is known as greenwashing, and spotting the difference empowers you to make choices that are genuinely better for your home and the planet.

    Decoding Common Eco-Friendly Terms

    To become a more informed shopper, it helps to get to grips with the language you’ll find on the packaging. Let’s break down a few of the most common terms.

    Think of a biodegradable product like an apple core you’d toss in a compost bin. Microorganisms will naturally break it down into simple elements like water and carbon dioxide, leaving nothing harmful behind. In contrast, a conventional cleaner is more like a plastic bottle; it can stick around for hundreds of years, causing potential harm to wildlife and ecosystems.

    Another term you’ll see everywhere is non-toxic. At its core, this just means the product isn’t expected to cause harm or illness when you use it as intended. While that’s great, it’s a very broad claim. Always look for a clear ingredient list to back it up.

    Finally, sustainably sourced tells you about where the raw materials came from. It’s a promise that the ingredients were harvested in a way that doesn’t drain our natural resources and minimises damage to the environment.

    The Trap of Greenwashing

    So, what is greenwashing? It’s when a company puts more effort and money into appearing environmentally friendly than it does into actually being environmentally friendly. It often relies on vague, unproven claims to mislead well-intentioned customers.

    Greenwashing preys on our desire to do the right thing. It uses earthy colours, nature-themed packaging, and feel-good words without any real proof, making it tough to separate genuine eco-friendly cleaning products from clever imitations.

    The easiest way to spot it is to look for vague claims that lack detail. Phrases like “earth-friendly” or “all-natural” are red flags if they aren’t supported by a certification or a full list of ingredients. Genuinely green brands are transparent and proud of what goes into their bottles.

    Trustworthy Certifications to Look For

    Third-party certifications are your most reliable guide. When you see one of these logos, it means an independent organisation has checked the product against strict environmental and performance standards. They cut right through the marketing noise.

    Here’s a quick guide to some of the most common and trustworthy certifications you’ll find on products sold here in the UK.

    Common Eco-Friendly Certifications and What They Mean

    Certification Logo/Name What It Guarantees Commonly Found On
    EU Ecolabel (The Flower Logo) The product has a reduced environmental impact throughout its entire life cycle, from sourcing to disposal. All-purpose cleaners, laundry detergents, and dishwashing liquids.
    Ecocert Guarantees that at least 95% of ingredients are from natural origins and are processed in an eco-friendly way. Natural detergents, surface sprays, and organic home care products.
    Cruelty-Free International (Leaping Bunny) The gold standard for animal welfare, confirming no animal testing occurred at any stage of product development. A wide range of cleaning products, from bathroom cleaners to air fresheners.

    These logos are a fantastic shortcut to making a good choice, but their absence doesn’t automatically mean a product is bad. Smaller, local companies might not have the budget for official certification but still operate with high ethical standards. In that case, look for clear ingredient lists and a company mission you can get behind.

    Of course, choosing products that actually work is just as important—after all, a powerful cleaner saves you from dealing with tougher jobs later. For advice on those really tricky messes, our guide on how to remove stubborn stains might come in handy. By arming yourself with label knowledge, you can confidently choose the best eco-friendly cleaning products for your home.

    The Real Benefits of Making the Switch

    Image

    Choosing eco-friendly cleaning products goes far beyond just a good feeling. It brings tangible, practical benefits to your home, your family’s health, and the wider environment. This isn’t some abstract concept; the positive changes begin the moment you swap a conventional cleaner for a plant-based one, setting off a chain reaction that reaches well beyond your front door.

    Take a moment to think about the air inside your home. Many standard cleaners are packed with Volatile Organic Compounds (VOCs), which are chemicals that turn into gases at room temperature. Every time you spray that bleach-based bathroom cleaner or a strong air freshener, these VOCs hang in the air, creating that all-too-familiar harsh chemical smell and potentially irritating your lungs.

    A Healthier Home Environment

    Making the switch to eco-friendly options can seriously improve your indoor air quality. These products are generally made without harsh solvents, ammonia, or chlorine bleach, which immediately cuts down on the airborne nasties floating around your living space. This is a game-changer for households with young children, pets, or anyone dealing with allergies or asthma.

    For them, a cleaner home environment can mean fewer triggers and simply breathing easier. It’s a small change that helps turn your home into a true sanctuary.

    This move toward greener, healthier alternatives is really shaking up the market. In the UK, the household cleaners sector, which includes eco-friendly laundry and surface cleaners, is expected to pull in revenues of around US$1.60 billion in 2025. This isn’t a fluke; it’s driven by everyday people demanding products that work without compromising on safety or sustainability. You can explore more about these UK household cleaner market trends on Statista.com.

    So, what does this mean for you?

    • For Your Family: Less exposure to potentially harsh chemicals, which can reduce the risk of skin irritation and respiratory issues.
    • For Your Home: Fresher indoor air and no chemical residues left on the surfaces where kids and pets eat and play.

    Protecting Our Waterways and Wildlife

    The story doesn’t end once you’ve wiped down the counters. When a conventional cleaner goes down the drain, its non-biodegradable chemicals enter the water system. Things like phosphates and aggressive surfactants are tough for water treatment plants to filter out completely.

    Sooner or later, these chemicals can find their way into our rivers and oceans. Phosphates, for instance, act like a super-fertiliser for algae, causing massive blooms that suck all the oxygen out of the water. This process, called eutrophication, creates “dead zones” where fish and other aquatic life simply can’t survive.

    Choosing a biodegradable cleaner is like giving nature a helping hand. Its ingredients are designed to break down harmlessly into simple elements, just like a fallen leaf on a forest floor, leaving no toxic trace behind.

    This simple decision helps protect fragile aquatic ecosystems. Every time you choose plant-based eco friendly cleaning products, you are actively stopping harmful pollutants from poisoning our shared environment. It’s about making sure our cleaning routines help the planet, not harm it.

    By making this conscious switch, you’re doing more than just cleaning your home. You’re taking a real, practical step towards protecting the natural world for years to come. The positive effects are clear, both inside your walls and out in the wider world, proving that small choices can add up to big, lasting change.

    Understanding Powerful Plant-Based Ingredients

    The secret to truly effective eco-friendly cleaning isn’t some complex chemical formula; it’s all about the ingredients. Instead of relying on harsh, lab-made synthetics, these products tap into the power of plants and minerals to get the job done. It’s like switching from a pharmacist to an apothecary—you’re using nature’s own toolkit to achieve a sparkling clean.

    This isn’t about sacrificing strength for safety. It’s about smart science that combines traditional wisdom with modern know-how to create formulas that are both gentle and genuinely effective against everyday dirt and grime.

    Nature’s Cleaning Champions

    So, what are these natural workhorses? You’d be surprised how many are probably sitting in your kitchen right now. Take simple white vinegar, for instance. Its natural acidity is fantastic for cutting through grease and breaking down mineral deposits like limescale. It just works.

    Then there’s citric acid, which, as the name suggests, comes from citrus fruits like lemons. It’s a natural whizz at removing limescale and softening hard water because it binds to mineral ions, making them simple to wipe away. That’s why you’ll often find it in bathroom and kitchen cleaners, leaving taps gleaming without any harsh scrubbing.

    The image below gives a great snapshot of why making this switch has such a positive ripple effect.

    Image

    It really shows how choosing better ingredients directly helps the planet by reducing plastic waste, cutting carbon emissions, and conserving precious water.

    The Science Behind the Suds

    Every cleaner needs a surfactant—that’s the key ingredient that actually lifts dirt from a surface so it can be washed away. In conventional products, these are typically petroleum-based. Green cleaners, on the other hand, use plant-derived surfactants, often from coconuts, corn, or even sugar.

    They function in the exact same way. Think of a surfactant molecule as a tiny magnet with two different ends: one end sticks to water, and the other sticks to dirt and oil. When you clean, these molecules surround the grime, pull it off the surface, and let the water rinse it all away. The crucial difference is that plant-based versions are biodegradable and much kinder to our waterways.

    Essential oils also pull double duty. They’re not just in there for a lovely, natural scent. Many oils—like tea tree, lavender, and eucalyptus—have potent antibacterial and antifungal properties. This means they can gently disinfect surfaces, offering a much safer alternative to overpowering synthetic disinfectants.

    The power of eco-friendly products isn’t a compromise. It comes from smartly applying the cleaning properties already found in nature. From acidic fruits to coconut-based soaps, these ingredients prove you don’t need harsh chemicals for a powerful clean.

    To really see the difference, let’s compare some of these natural heroes with their conventional chemical counterparts. This side-by-side view makes it clear why so many are making the change.

    Eco-Friendly Ingredients vs. Conventional Chemicals

    This table breaks down how common eco-friendly ingredients stack up against the chemicals you’d find in traditional cleaners for the same jobs.

    Cleaning Task Eco-Friendly Ingredient Conventional Chemical Key Difference
    Degreasing Plant-based surfactants (from coconuts/corn) Petroleum-based surfactants Derived from renewable resources and biodegrade safely, unlike petroleum which is a finite resource and can harm aquatic life.
    Disinfecting Tea tree oil or eucalyptus oil Chlorine bleach or quaternary ammonium compounds Provides natural antibacterial properties without the harsh fumes or corrosive effects of bleach, making it safer for indoor air.
    Removing Limescale Citric acid or acetic acid (vinegar) Phosphoric acid or hydrochloric acid Highly effective at dissolving mineral deposits but are far less corrosive and toxic, posing minimal risk to skin and surfaces.
    General Scrubbing Bicarbonate of soda (baking soda) Abrasive powders with synthetic particles Acts as a gentle, non-scratching abrasive that deodorises naturally and is completely biodegradable and food-safe.

    By getting to know these core ingredients, you can see that green cleaning is about choosing smarter, safer options that deliver brilliant results. It’s not about giving up on performance; it’s about protecting your home and the planet. This knowledge empowers you to pick your products with confidence, knowing exactly what makes them work so well.

    Taking Green Cleaning Pro: A Guide for Cleaning Services

    The move towards eco-friendly cleaning isn’t just happening in people’s homes; it’s a huge opportunity for professional cleaning services. For any cleaning business out there, going green is no longer a niche gimmick. It’s a savvy business decision that meets a growing demand from clients and gives you a real edge over the competition. This is about building a business that’s not just profitable, but also responsible and resilient.

    And let’s be clear, this is about more than just marketing. Think about your own team. They’re the ones on the front line, working with cleaning chemicals day in and day out. Switching to non-toxic, plant-based formulas means less exposure to harsh fumes and skin irritants. That can lead to fewer sick days and a happier, healthier crew.

    The Business Case for Going Green

    Across the UK, the demand for sustainable services is really taking off. It’s not just residential clients, either. Big corporate sectors like healthcare and hospitality are increasingly required—or at least strongly encouraged—to use green-certified products. If you’re running a cleaning service, you can’t afford to ignore this shift.

    The numbers back this up, too. The professional cleaning products market in the UK is expected to hit around USD 4.9 billion by 2033, growing at a rate of 12.9% a year from 2025. A massive chunk of that growth is being driven by the demand for sustainable options. You can discover more insights about the UK professional cleaning market to get the full picture.

    When a cleaning company markets its services as ‘eco-friendly,’ it’s not just trying to attract a small group of eco-warriors. It’s about positioning the brand as a premium, forward-thinking provider that cares about health, safety, and the environment. These are qualities that more and more clients—both commercial and residential—are actively looking for and are often willing to pay more for.

    Putting It Into Practice

    Making the switch to green cleaning needs a solid plan. It’s not just a matter of swapping out a few bottles; it’s about weaving sustainability into the very fabric of your business operations.

    Here are a few practical steps to get you started:

    1. Buy Smart: Find suppliers who can give you bulk discounts on certified eco-friendly products. Look for concentrated formulas and refillable systems—they’re a fantastic way to cut down on costs and slash your packaging waste at the same time.
    2. Train Your Team: Your staff are your biggest advocates. Give them proper training on how to use the new products, covering everything from the right dilution ratios for concentrates to which cleaners work best on which surfaces. Make sure they understand the health benefits for themselves, not just for the clients.
    3. Shout About It: Update your website, flyers, and social media to show off your commitment to green cleaning. Be clear about the benefits: a healthier office or home, better indoor air quality, and a smaller environmental footprint. Being transparent builds trust and helps you attract the right kind of customers.
    4. Explain the Value: When you’re quoting for a new job, don’t just list your prices. Explain why you use eco-friendly products. Frame it as part of the premium, responsible service you offer, not as an extra cost.

    By making sustainability a core part of what you do, your business becomes more than just a cleaning service. You become a partner in creating healthier spaces for people to live and work.

    Your Practical Plan for a Greener Home

    Getting inspired to go green is one thing, but turning that spark of motivation into a lasting habit is where the real magic happens. The good news? Switching to eco-friendly cleaning products doesn’t have to be a massive, expensive project. It’s really just about taking small, smart steps that add up over time.

    Think of it like learning any new skill. You wouldn’t expect to become an expert overnight. You start with the fundamentals and build from there. That same mindset is perfect for creating a cleaning routine that’s kinder to your family and the planet.

    Start with a Single Swap

    The simplest way to get started is to pick just one product to replace. There’s no need to raid your cupboards and throw everything out. Just wait until your current all-purpose cleaner or washing-up liquid is empty, then choose a plant-based, eco-friendly version to take its place. This “one-in, one-out” strategy is easy on the wallet and avoids unnecessary waste.

    A multi-purpose cleaner is a fantastic first choice. Because you use it for so many different jobs around the house, making this one change can have a surprisingly big impact on your home’s chemical footprint straight away.

    Adopting a greener cleaning routine is a journey, not a race. The goal is to build sustainable habits that last, and that starts with small, intentional changes you can stick with. Every single swap is a victory for your home and the planet.

    This gradual approach makes the whole process feel less like a chore and more like a natural evolution. Before you know it, you’ll have built a full eco-friendly cleaning toolkit without feeling the strain.

    Smart Strategies for a Greener Clean

    Once you’ve made that first swap and feel comfortable, you can start weaving in a few other simple yet effective habits. These little changes not only help the environment but can often save you a bit of money, too.

    Here are a few ideas to get you on your way:

    • Choose Concentrates: Lots of eco-conscious brands now sell their cleaners in a concentrated form. You get a small bottle of the powerful stuff, which you then dilute with water at home. This seriously cuts down on packaging and transport emissions, and it’s usually cheaper in the long run.
    • Embrace Refillable Options: Keep an eye out for local zero-waste shops or brands that sell refill pouches. By simply reusing your original spray bottle again and again, you can massively reduce your plastic waste. Just one refillable bottle can save dozens of single-use plastic bottles from ever reaching a landfill.
    • Make Your Own: You’d be surprised what you can clean with basic ingredients you already have. A simple mix of equal parts white vinegar and water in a spray bottle is a brilliant, streak-free cleaner for glass and many other surfaces. Just remember to keep it away from natural stone like marble or granite

    Your Green Cleaning Questions Answered

    Diving into the world of eco-friendly cleaning naturally brings up a few questions. It’s completely normal to wonder if a plant-based spray can really tackle that stubborn grime on the hob, or whether going green will stretch your budget.

    Let’s clear up some of the most common queries. Think of this as the final piece of the puzzle, giving you the confidence to make the switch for good.

    Are Eco-Friendly Cleaners Actually as Good as the Chemical Stuff?

    Yes, they absolutely are. Don’t let the gentle ingredients fool you; modern green cleaners are powerhouses. They’ve moved far beyond the simple vinegar-and-bicarb solutions of the past.

    Today’s best formulas use clever plant-based science—things like citric acid, natural enzymes, and plant-derived surfactants—that are specifically designed to break down grease and kill germs just as well as their harsh chemical counterparts. The trick is to stick with trusted brands that have really invested in their research. You don’t have to compromise on a sparkling finish.

    Will I End Up Spending More on Green Products?

    It’s a common concern, but the answer is usually no, not in the long run. While the initial bottle might seem a bit pricier on the shelf, many eco-friendly cleaners are highly concentrated. This means you dilute them at home, so a single bottle lasts ages and the cost per clean plummets.

    Plus, with the rise of refill stations and subscription services, you’re not constantly paying for new plastic bottles. When you add up the savings and factor in the benefits for your health and the planet, eco-friendly cleaning products quickly become the more sensible financial choice.

    The true value of green cleaning isn’t just on the price tag. It’s in breathing cleaner air at home, cutting down on plastic waste, and the peace of mind you get from using products that are safe for your family and the planet.

    Where’s the Best Place to Buy Green Cleaning Products in the UK?

    Thankfully, it’s easier than ever. You can find fantastic options right in your local supermarket. Big names like Tesco, Sainsbury’s, and Waitrose all have dedicated sections with popular brands like Ecover and Method.

    If you want to explore a bit more, health food shops like Holland & Barrett are a great bet. For refillables, check out your local zero-waste shop—they’re brilliant for reducing packaging. And for the biggest selection, online stores like The Ethical Superstore or Big Green Smile stock everything from big brands to smaller, independent gems.


    Ready to enjoy a sparkling clean home without the harsh chemicals? Let the professionals at Signal Cleaning handle the hard work for you. Our expert team uses high-quality, effective cleaning methods to ensure your home is spotless. Book your professional home cleaning service in Oxford today.

  • How to Remove Stubborn Stains Like a Pro

    How to Remove Stubborn Stains Like a Pro

    When it comes to shifting stubborn stains, it all comes down to two things: speed and substance. Getting to a spill before it has a chance to settle is half the battle, but knowing what you’re up against—whether it’s oil, protein, or something else entirely—is what really wins the war. This guide will walk you through the strategies I’ve learned over the years to tackle even the most daunting marks.

    Why Some Stains Just Won’t Budge

    Have you ever wondered why a splash of red wine seems to become one with your carpet, while a bit of mud can often be brushed off once it’s dry? It’s all down to a mix of chemistry and the type of fabric involved. No two stains are the same, and their staying power depends on their molecular makeup and the surface they’ve landed on.

    Think of fabric fibres as either being slick and resistant or porous and absorbent. Natural fibres like cotton and wool are full of tiny, microscopic pockets that are fantastic at trapping stain molecules. On the other hand, synthetics like polyester often have smoother fibres, which is why they tend to be more stain-resistant from the get-go.

    Getting to Grips with the Main Culprits

    Knowing your enemy is the first step to victory. Most household stains fall into one of a few categories, and each one needs a different game plan.

    • Tannin Stains: These come from plants. We’re talking coffee, tea, red wine, and fruit juice. They usually respond well to something acidic or a dedicated detergent.
    • Oil-Based Stains: This group includes grease, cooking oil, butter, and a lot of makeup. Since oil and water don’t mix, you need a solvent or a good washing-up liquid that can break down the grease.
    • Protein-Based Stains: Think blood, sweat, or a dropped egg. The golden rule here is to always use cold water. Hot water will literally cook the protein, bonding it to the fabric for good.

    The real secret to how to remove stubborn stains isn’t about scrubbing harder; it’s about working smarter. When you match the right cleaning agent to the right type of stain, you’re not just moving the mess around—you’re actually dissolving the chemical bonds holding it to the fabric.

    The Growing Demand for Better Solutions

    It’s hardly surprising that effective stain removal is a hot topic in UK homes. Our lives are busier than ever, which means spills and accidents are just a part of daily life. This has led to huge growth in the market for fabric stain removers; in Western Europe alone, it’s expected to jump from USD 1.8 billion in 2025 to USD 2.5 billion by 2035.

    This isn’t just about cleaning anymore. People want quick, reliable products that also sanitise fabrics and get rid of odours, showing a real shift towards better home hygiene overall. You can find more detailed insights on fabric care from various market analyses. While you don’t need a professional qualification to clean your own home, understanding the basics can make you feel just as capable. For those looking into professional credentials in different areas, you might find our guide on how to get Microsoft certified interesting.

    Building Your Stain-Fighting Toolkit

    When a glass of red wine tips over or a pen explodes, the last thing you want is to be scrambling for a solution. Being prepared can turn a full-blown panic into a minor inconvenience. Knowing how to remove stubborn stains really begins with having the right tools ready to go. The good news? You don’t need an entire cupboard full of products; a small, curated arsenal will tackle most emergencies.

    Interestingly, many of the most effective stain-busters are probably already in your kitchen. These household staples are often your first and best line of defence, saving you time, money, and a lot of stress.

    The Everyday Essentials

    For a huge number of common stains, you can get the job done with simple, everyday products. These are what I consider the absolute non-negotiables for any home cleaning kit.

    • White Vinegar: Its mild acidity is a secret weapon against tannin stains—think coffee, tea, and some fruit juices. It gently breaks them down.
    • Baking Soda: This is a brilliant natural abrasive and deodoriser. You can mix it into a paste to lift greasy marks or just sprinkle it on a carpet spill to absorb the moisture.
    • Washing-Up Liquid: A decent washing-up liquid is designed to cut through grease on your plates, and it does the exact same thing for oily food stains on clothes.
    • An Old Toothbrush: Perfect for gently working a cleaning solution into the fabric without causing damage. A soft-bristled one is best.
    • Microfibre Cloths: These are essential for blotting and dabbing. They’re incredibly absorbent and, unlike paper towels, won’t leave little bits of lint behind.

    Stepping Up to Commercial Cleaners

    While DIY remedies are fantastic, some stains just won’t budge without a bit more oomph. That’s when it’s time to reach for a specialised commercial product.

    The market for these is definitely growing. In fact, liquid stain removers are set to grow by 5.3% annually in the UK over the next decade. Their popularity is down to pure convenience and effectiveness, especially for renters or smaller households who just need a quick, reliable fix. Online shopping has made getting the right product easier than ever, which you can read more about in this analysis of consumer habits shaping the fabric care market.

    They come in all sorts of formats, like the spray bottle you see below, but also gels, sticks, and even pens for on-the-go treatment.

    Image

    This image shows a typical pre-wash stain remover, designed to be sprayed directly onto a mark before the item goes into the laundry.

    If you’re only going to buy one commercial product, make it an enzyme cleaner. These contain specific enzymes that are absolute masters at breaking down protein-based stains like blood, grass, or sweat—the kind that can be notoriously difficult to shift.

    My Top Tip: If you have pets or children, an enzyme-based cleaner is non-negotiable. It’s incredibly effective on all sorts of organic stains and the odours that come with them, making it a true lifesaver for life’s messiest moments.

    A Field Guide to Conquering Common Stains

    Right, let’s get down to the practical side of things. Knowing the theory is all well and good, but the real test comes when a fresh spill is threatening your favourite shirt or brand-new sofa. This is your battle plan for some of the most common and frustrating stains you’ll encounter at home.

    Every stain has a weakness. The secret to learning how to remove stubborn stains is hitting that weakness with the right tools and techniques. Whether it’s something from your kitchen cupboard or a specialised cleaner, matching the solution to the problem is what gets the job done. Let’s walk through a few everyday scenarios.

    The Dreaded Red Wine Spill

    It’s a classic for a reason. A splash of red wine on a light-coloured carpet can feel like a disaster, but if you act fast, it’s surprisingly manageable. The moment it happens, grab a clean, dry cloth and blot the area immediately. Whatever you do, don’t rub—that just pushes the wine deeper into the fibres.

    Once you’ve soaked up the excess, pile salt generously over the entire stain. The salt crystals will literally start to pull the wine out of the fabric. Give it a few minutes, or even an hour if you can spare it, then vacuum or scrape the salt away. For any faint colour that’s left, a gentle dab with some club soda can often lift the final traces.

    The real trick here is speed. A fresh tannin stain from red wine is far easier to lift before it has a chance to fully bond with the fabric. Procrastination is the stain’s best friend.

    Tackling Greasy Food Stains

    From a dropped slice of pizza to a splash of salad dressing, oil-based stains are a constant pain. Water on its own will just roll right off, which is why a good-quality washing-up liquid is your best bet. Its grease-cutting agents are literally designed to break down fats.

    Just apply a small amount directly onto the stain and gently work it in with your fingers or an old, soft toothbrush. You should see the greasy mark start to break up. Let it sit for 10-15 minutes to give the soap time to do its thing, then rinse the area with warm water before putting it through a normal wash.

    The idea of pre-treating a stain is absolutely central to success, as this sketch shows.

    Image

    It’s a simple concept: applying a targeted solution right on the spot is the most efficient way to start breaking down the stain before it ever sees the washing machine.

    Defeating Coffee and Tea Marks

    Much like red wine, coffee and tea are tannin stains. If the spill is on your clothes, your first move should be to run cold water through the back of the stain. This helps to flush the pigment out of the fabric instead of pushing it deeper.

    After that, you can mix up a simple but powerful solution that’s safe for most fabrics.

    • Start by mixing equal parts white vinegar and cold water.
    • Gently sponge this mixture onto the stain. Always work from the outside in to stop the stain from spreading.
    • Let it soak for about 15 minutes before rinsing it out thoroughly.

    This works so well because the mild acid in the vinegar is fantastic at breaking down tannins without being harsh on the material. It just goes to show how a simple household item can often beat aggressive chemicals when you know how to use it. And it seems many people agree; a 2023 UK survey showed a huge portion of its 24,000 respondents regularly buy specialist laundry products for these exact spots. You can see the data on UK consumer preferences in stain removal products on Statista.com.

    For a quick reference, here’s a look at some go-to first responses for other common stains you might run into.

    Quick Guide to Common Stain Treatments

    Stain Type Recommended First Action Key Ingredient
    Ink (Ballpoint) Dab with rubbing alcohol or hand sanitiser on a cotton ball. Isopropyl Alcohol
    Grass Pre-treat with a mix of white vinegar and water before washing. White Vinegar
    Blood Soak immediately in cold salt water. Never use hot water. Cold Water & Salt
    Makeup (Foundation) Gently rub with washing-up liquid or micellar water. Surfactants
    Sweat (Yellowing) Make a paste of bicarbonate of soda and water; apply and let sit. Bicarbonate of Soda

    Think of this table as your emergency cheat sheet. While dedicated stain removers are great, knowing what you have in the cupboard that can work in a pinch is invaluable.

    Advanced Tactics for Set-In Stains

    Image

    We’ve all had that sinking feeling: discovering a mystery stain on a favourite blouse or pair of trousers days after it happened. These are the marks that have had time to dry, oxidise, and properly weave themselves into the fabric fibres. While speed is always your best friend in the fight against stains, a set-in one doesn’t automatically mean the garment is ruined. It just means you need to get a bit more strategic.

    Learning how to tackle stubborn stains that are old and set is more about patience than brute force. Frantic scrubbing is one of the worst things you can do, as it just damages the fibres. Instead, your goal is to coax the stain out, often using methods that work slowly to draw the staining particles up and away from the material.

    Drawing Out Old Oily Marks

    An old oil or grease stain is one of the most persistent culprits. Once it sets, it can look like a permanent part of the garment. This is where a baking soda poultice can be a real game-changer. A poultice is essentially a thick paste you apply to a stain, and as it dries, it pulls the deep-set grease right out of the fabric.

    It’s easy to make your own. Just mix bicarbonate of soda with a few drops of water until you have a thick, spreadable paste. Slather it generously over the entire oily mark, making sure it’s completely covered. Now, you wait. Let it sit for at least an hour, or even overnight for a really tough spot. As the paste dries and becomes cakey, it’s literally absorbing the oil. Once it’s fully dry, just scrape it off and wash the item as normal.

    Handling Delicate Fabrics with Care

    Your approach has to be even more careful when dealing with delicates like silk or wool. These fabrics simply can’t handle harsh chemicals or vigorous scrubbing. Get it wrong, and you could be left with faded colour, weakened fibres, or a permanent watermark.

    For these materials, less is definitely more.

    • For Silk: If you’re up against a non-oily stain, a diluted solution of white vinegar and water can work wonders. The key is to dab gently with a clean, white cloth – never, ever rub.
    • For Wool: A gentle, wool-safe detergent applied directly to the stain with a very light touch is your best bet. Avoid anything with bleach, as it can literally dissolve wool fibres.

    The golden rule for delicates is to always test your cleaning solution on a hidden area first, like an inside seam or hem. This simple five-second check can save you from a very costly mistake and is a true cornerstone of responsible stain removal.

    The Power of Solvents for Tough Cases

    Some set-in stains, like a dried-on ballpoint ink mark, won’t respond to detergents. For these, you need a solvent to actually dissolve the pigment. Rubbing alcohol (isopropyl alcohol) is a fantastic and readily available tool for this exact job.

    Just apply a small amount to a cotton ball or the corner of a clean cloth and start dabbing gently at the ink. You should see the ink start to lift from the fabric and transfer onto your cloth. Keep dabbing with a clean section of the cloth until the stain is gone, then give the area a thorough rinse with cold water before washing the whole garment. It’s a technique that requires a careful hand, but it’s remarkably effective on a stain that soap and water won’t even touch.

    Knowing When to Call a Professional

    There comes a point where even the most determined DIY effort isn’t enough. If you’re faced with a very old, unidentifiable stain on an expensive or cherished item, sometimes the smartest move is to just step away. Continuing to experiment with different home remedies can accidentally set the stain even further or cause irreversible damage.

    This is the time to call in a professional dry cleaner. They have access to specialised solvents and equipment that can safely deal with problems household remedies can’t. Knowing when to admit defeat and seek an expert’s help is just as important a skill as knowing how to treat a fresh spill.

    How to Prevent Stains from Happening in the First Place

    While it’s great to know how to tackle a stubborn stain, wouldn’t it be better if it never happened at all? Prevention is always the best cure. A few smart habits and choices can save you a world of scrubbing, blotting, and stress.

    Think of it as setting up a defence system for your home. On furniture, this could be as simple as using a quality fabric protector spray. These sprays create an invisible shield that makes liquids bead up on the surface instead of instantly soaking in. That gives you a crucial window to grab a cloth and sort it out before it becomes a real problem.

    Adopt Simple Daily Habits

    It’s the small, consistent actions that truly make a difference over time. You just need to build a few mindful routines until they become second nature. It’s a bit like building a strong memory—it all comes down to consistent practice. If you’re curious about that, our guide on how to improve memory retention has some brilliant tips.

    These habits don’t need a massive overhaul of your life, just a little bit of forethought.

    • Coasters and Placemats are Your Friends: This is the easiest win by far. Protecting your tables from drink rings and food spills keeps them looking new with almost no effort.
    • Create “Messy Zones”: If you’ve got kids, this is a game-changer. Designate a specific spot for messy activities like painting or eating snacks.
    • Act Fast: The moment a spill happens, blot it. Don’t rub! Even if you can’t treat it properly right away, getting the excess liquid up is half the battle.

    A simple rule I live by is “deal with it now.” Leaving a small spill for later is an open invitation for it to become a permanent, set-in stain that demands far more of your time and energy to fix.

    Make Strategic Fabric Choices

    The materials you choose can be your secret weapon against stains. When you’re buying new furniture, rugs, or even clothes, think about where and how they’ll be used.

    For instance, fabrics with a subtle pattern or a darker colour are fantastic for hiding minor marks. Synthetic fibres like polyester and nylon also tend to be more stain-resistant than natural ones like cotton because their fibres aren’t as porous.

    When shopping for a new sofa, keep an eye out for “performance fabrics,” which are designed to withstand spills and heavy use. A great tip for light-coloured clothing is to give it a quick spray with a stain guard before its first wear. It adds an extra layer of protection to keep it looking fresh for longer.

    Common Questions About Stain Removal

    When you’re trying to figure out how to get rid of a stubborn stain, you’ll find a mountain of advice online, and a lot of it clashes. It’s completely normal to feel hesitant, especially when you’re dealing with a favourite piece of clothing or a brand-new carpet. Let’s walk through some of the most common questions and get you some clear, reliable answers.

    Cutting through the noise and separating solid advice from old myths is the first step. Getting this wrong can turn a small spill into a permanent disaster.

    Can I Use Bleach on Any Type of Stain?

    This is a question I hear all the time, and the assumption can be a dangerous one. While chlorine bleach is a powerhouse for whitening, it’s really only safe for tough, white fabrics like cotton. If you use it on anything with colour, you’re not removing a stain – you’re stripping the dye right out, leaving a permanent white or yellowish patch.

    It’s even worse for delicate materials. On wool or silk, bleach doesn’t just discolour; it actually weakens and can dissolve the fibres themselves. If you need to brighten coloured fabrics or treat delicates, look for an oxygen-based bleach. It’s much gentler. But the golden rule is always this: check the care label and do a spot test on a hidden seam first.

    Does Hot Water Really Set Stains?

    For certain stains, absolutely. In fact, hot water can be your worst nightmare. It’s particularly bad for anything protein-based – think blood, egg, dairy, or grass stains. The heat essentially “cooks” the protein, causing it to bind tightly to the fabric’s fibres. Once that happens, the stain is practically locked in for good.

    That’s why you should always start with cold water for any unknown stain or one you know is protein-based. While warm water has its place, like helping to dissolve greasy or oily marks later in the wash, your first response should always be cool. Getting these details right is as important as any learning technique; if you’re interested in memory methods, our article on how to use flashcards for studying shares some great strategies.

    The single biggest mistake I see in laundry is throwing a still-stained item into the tumble dryer. The intense heat will permanently set just about any mark that’s left. If a stain is still there after a wash, let the item air-dry and have another go at treating it.

    What Is the Single Most Important Step?

    Without question, it’s acting fast. Time is your biggest enemy when a spill happens. The longer a substance sits, the deeper it soaks into the fibres and the stronger its bond becomes.

    Even if you don’t have time for a full treatment, just blotting the spill immediately with a clean, dry cloth can work wonders. This simple step soaks up the excess before it can spread, meaning there’s much less of a stain to deal with later. Whatever you do, don’t let a fresh spill dry. It’s the difference between a minor cleanup and a lost cause.


    At Signal Cleaning, we know that some stains are just too tough for DIY methods. If you’re in Oxford and staring down a cleaning challenge that seems impossible, our professional team is here to bring your home back to its sparkling best. You can book our services easily online at signalcleaning.co.uk and let us take care of the hard work.