Blog

  • How to Find a Housekeeper UK: Your Complete Guide

    How to Find a Housekeeper UK: Your Complete Guide

    Before you even think about posting an ad or calling an agency, the first step is to get crystal clear on what you actually need. Finding a good housekeeper in the UK starts with figuring out the specific jobs you want them to do, because the role often goes far beyond a simple clean.

    Defining Your Actual Housekeeping Needs

    Image

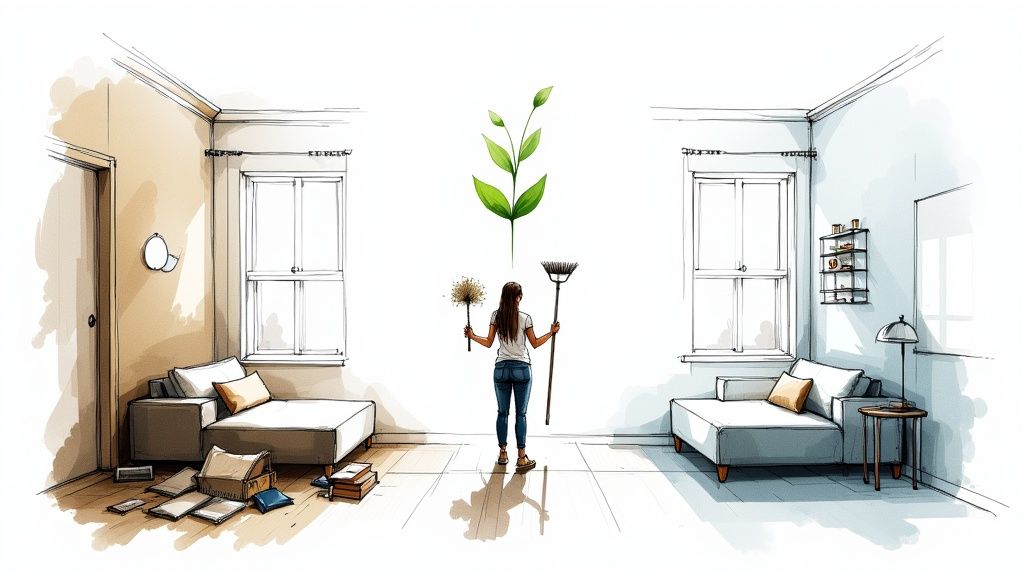
    It’s easy to use "cleaner" and "housekeeper" as if they mean the same thing, but they really don't. A cleaner handles the surface-level stuff, while a true housekeeper helps manage the home itself. Getting this distinction right from the get-go is the most important part of the process.

    Nailing down your requirements prevents a world of misunderstanding down the line. It ensures you attract people with the right skills and saves you from hiring someone who's either overqualified and pricey or underqualified and unable to keep up.

    Moving Beyond Basic Cleaning

    Take a moment to think about the real rhythm of your home. Are you constantly buried under a mountain of laundry? Do you need a hand with the weekly food shop or someone to be in for deliveries? These are classic housekeeping tasks, not standard cleaning.

    I always recommend making a detailed checklist. It’s a simple exercise, but it forces you to visualise the role properly and helps you write a much better job description.

    Your list might include things like:

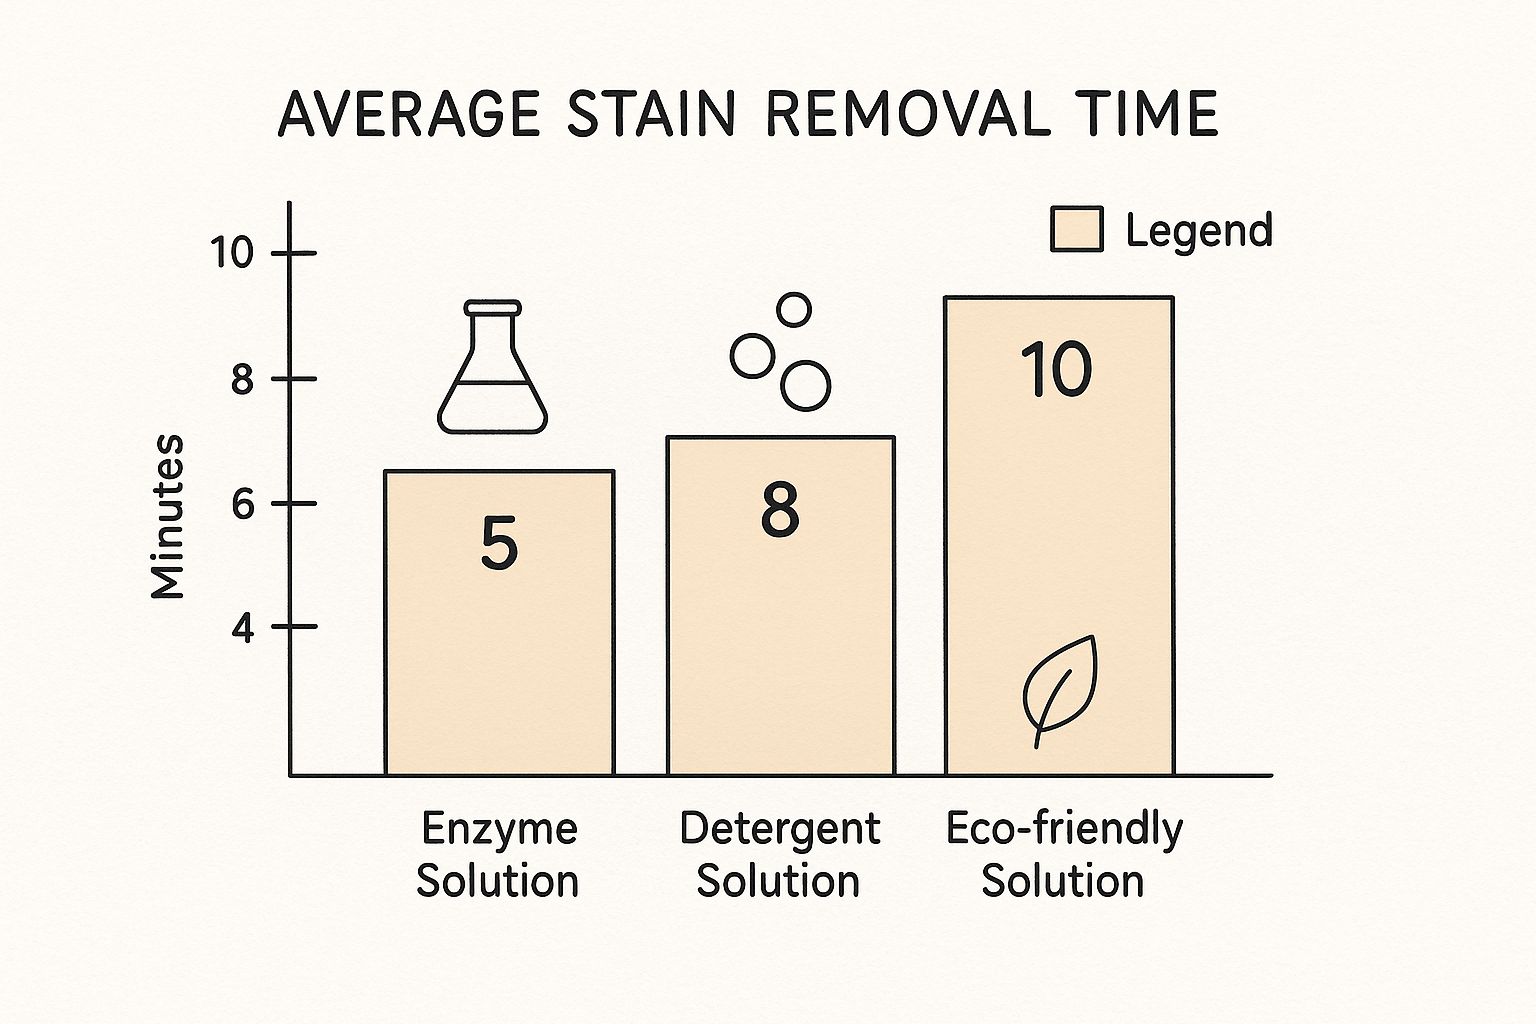
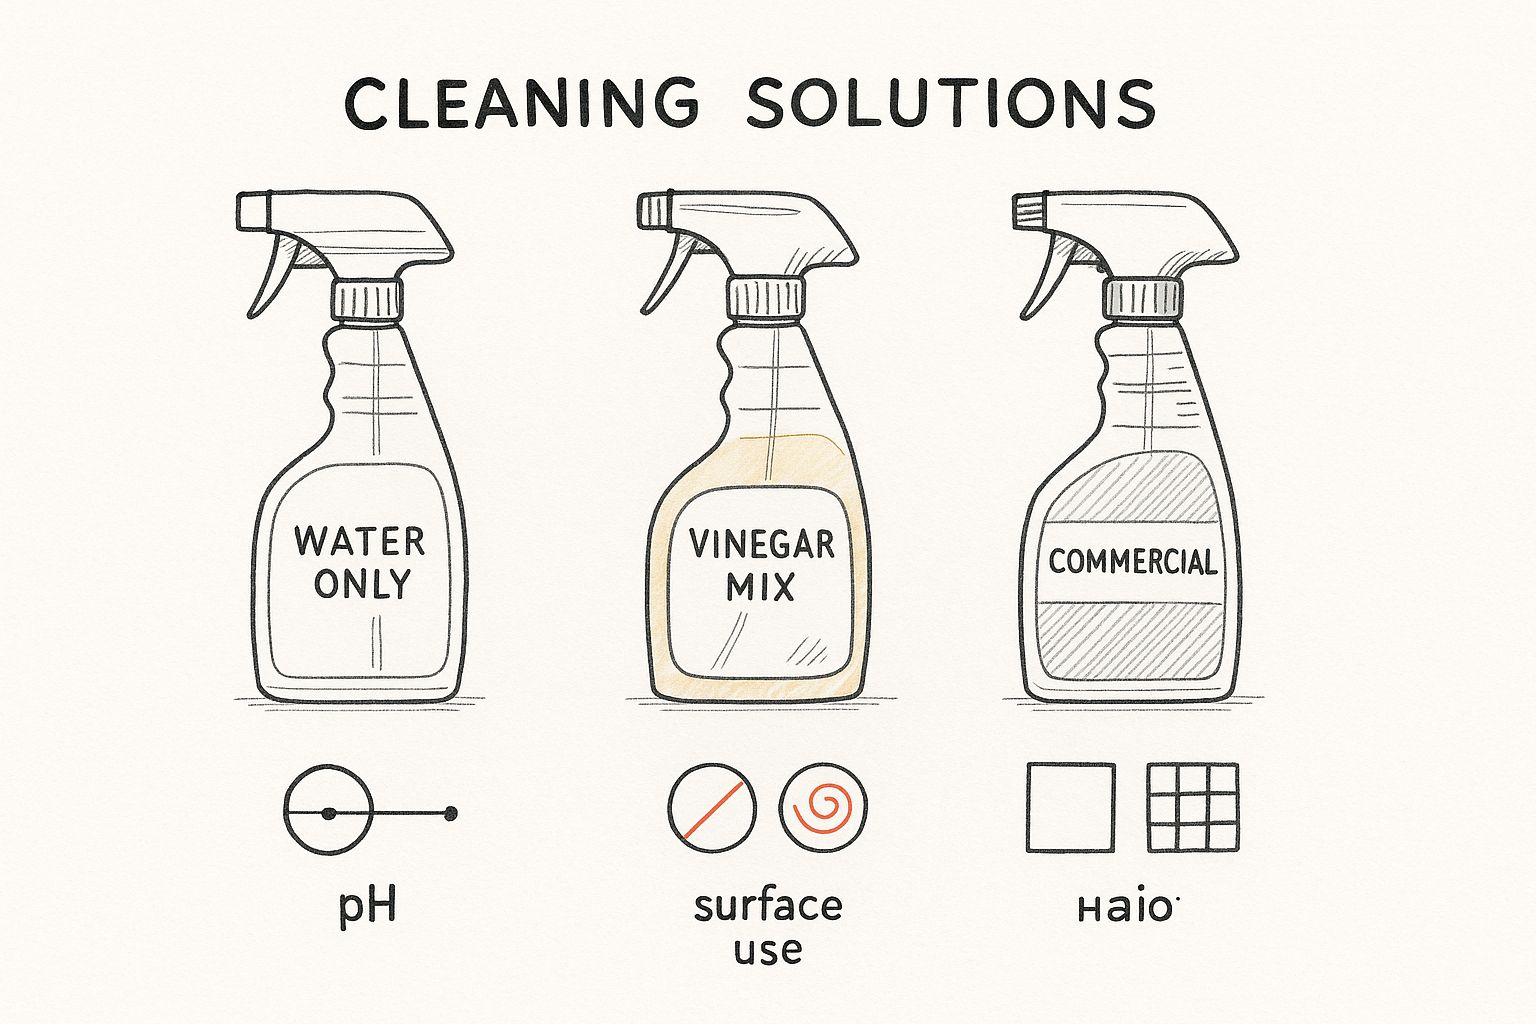
    • Deep Cleaning: This is the stuff that goes beyond a quick wipe-down, like scrubbing the oven, washing internal windows, or tackling stubborn limescale. For more tips on this, our guide on how to remove stubborn stains has some great advice.
    • Laundry Management: Are we talking a simple wash and dry, or do you need ironing, folding, and putting everything away in wardrobes?
    • Household Errands: This could be anything from picking up the dry cleaning and posting parcels to doing the big weekly shop.
    • Pet Care: Does the dog need walking? Do the cats need feeding? Maybe even arranging vet appointments.
    • Light Meal Prep: Perhaps you need someone to prep simple family meals or get the kids' packed lunches ready for school.

    By mapping out every potential task, you create a clear scope of work. This not only helps you find the right person but also allows you to set a fair and competitive salary.

    Tailoring to Your Home and Lifestyle

    Naturally, the size of your home and your family's lifestyle will play a huge role here. A sprawling family home with three kids and a dog has completely different demands than a two-bedroom flat owned by a busy professional. You have to be realistic about the hours needed.

    For instance, a busy family might need someone for 20 hours a week to stay on top of daily tidying, laundry, and maybe even help with the school run. On the other hand, a couple might only need 10 hours a week for a thorough clean, ironing, and general organising.

    Being upfront about these expectations from the start makes it so much easier to find a housekeeper who genuinely fits into your life.

    Where to Find a Great Housekeeper in the UK

    Right, you’ve got your list of duties sorted. Now for the big question: where do you actually find someone reliable?

    It’s a bustling market out there. The UK cleaning industry is huge, employing around 1.47 million people and worth nearly £60 billion. That means you’ve got options, but you need to know where to look to find the real gems.

    When you start digging into how to find a housekeeper, you'll see a few common paths emerge. Each one has its own set of pros and cons, catering to different needs and how hands-on you want to be in the search.

    The chart below gives a good snapshot of where most homeowners in the UK kick off their search.

    Image

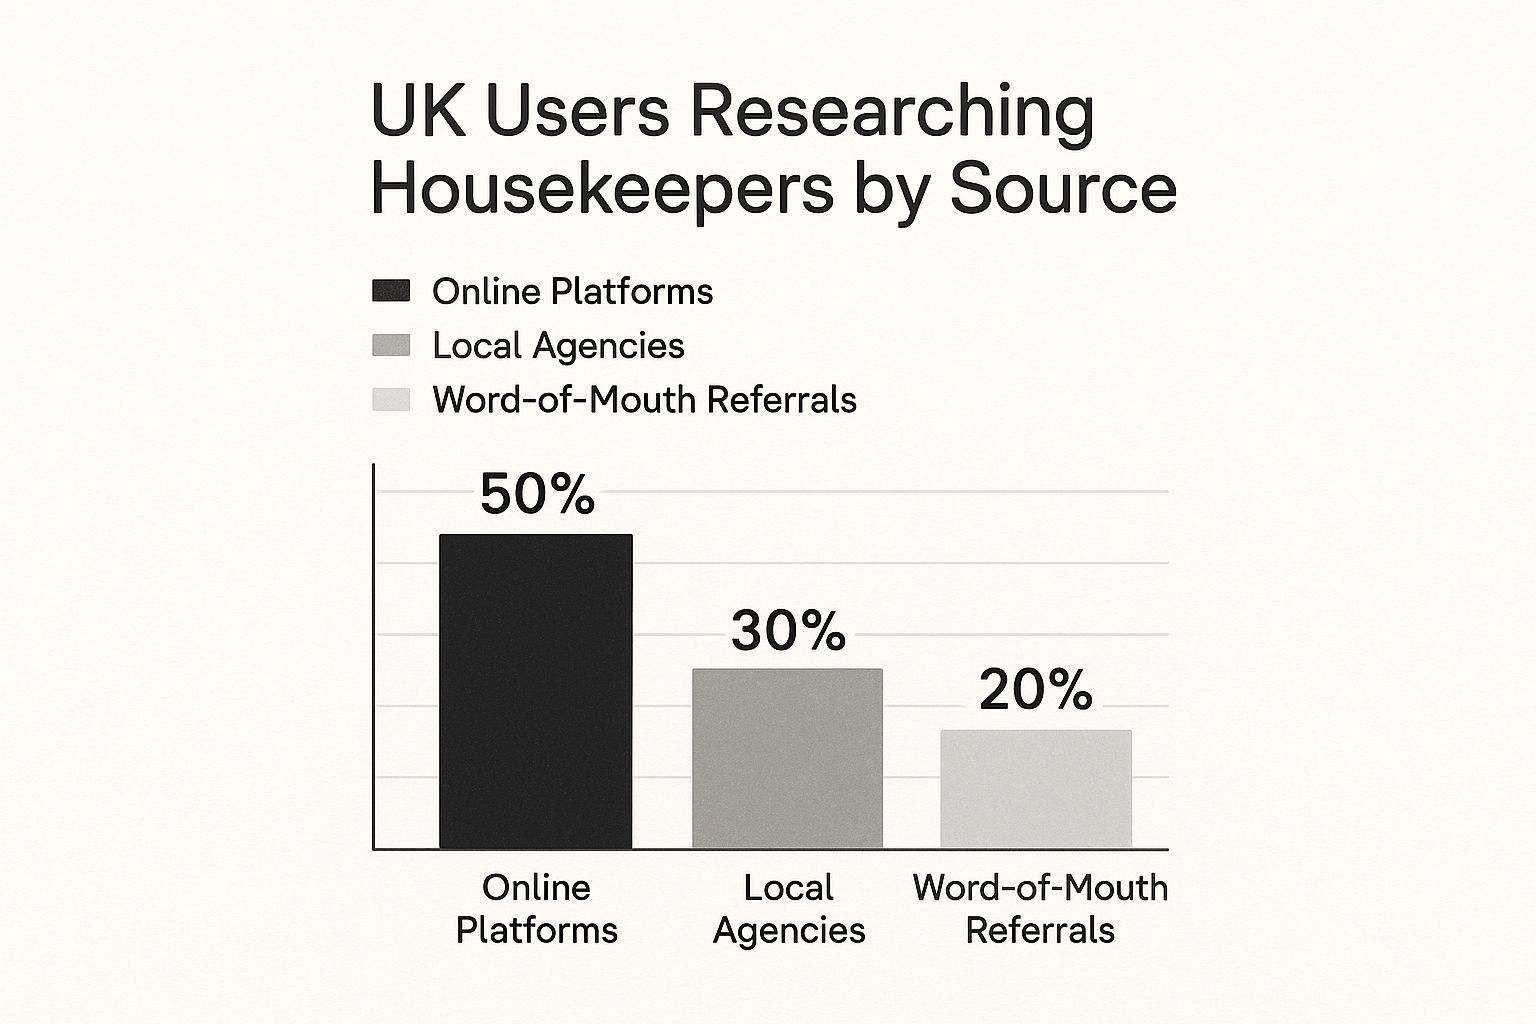
    As you can see, online platforms are the go-to for most, but plenty of people still value the old-school routes like agencies and personal recommendations—and for good reason when you’re inviting someone into your home.

    Let's break down your main options so you can figure out which path is right for you.

    Comparing Your Housekeeper Search Options

    To make sense of it all, here’s a quick comparison of the three main ways you can find a housekeeper in the UK.

    Method Pros Cons Best For
    Specialist Domestic Agencies Vetted candidates, handles all checks, saves you time, high-calibre professionals. Expensive placement fees, smaller pool of candidates, can feel a bit formal. Busy professionals who need a fully vetted, experienced housekeeper with minimal fuss.
    Online Platforms & Job Boards Huge pool of candidates, more control over hiring, cost-effective, direct communication. Very time-consuming, you do all the vetting, can be a bit of a lottery. People who are happy to manage the hiring process themselves and want a wide choice of applicants.
    Word of Mouth & Community Highly trusted referrals, proven reliability, candidates are often local. Can be slow, limited options, relies on your personal network. Anyone who values a personal recommendation above all else and isn't in a major rush.

    Each route can lead you to a fantastic housekeeper, but the journey to get there is quite different.

    Specialist Domestic Staff Agencies

    If you want the gold standard in vetting and have very little time to spare, a specialist agency is your best bet. Think of them as recruiters for your home. They do all the heavy lifting: advertising the role, sifting through applications, conducting initial interviews, and carrying out extensive background and reference checks.

    The biggest advantage here is the peace of mind. You’ll be presented with a small, carefully curated list of highly experienced professionals. The trade-off? It’s the most expensive option. Agencies typically charge a hefty placement fee, often calculated as a percentage of the housekeeper’s annual salary.

    Online Platforms and Job Boards

    This is where the majority of people start, and for good reason. Websites like Gumtree, Indeed, and other specialised domestic help sites give you direct access to a massive pool of potential candidates. You’re in the driver's seat for the entire process.

    You'll be responsible for writing a compelling job advert, filtering the applications, arranging interviews, and checking references yourself. It's definitely more work, but it’s a much cheaper route. This path is ideal if you’re confident in your hiring skills and want to have the final say on every detail.

    The secret to success on these platforms? A crystal-clear job advert. Be incredibly specific about the duties, hours, location, and the kind of person you think would be a good fit. It’ll help you attract serious, high-quality applicants from the start.

    Of course, if you’d rather skip the recruitment marathon entirely, you can always book a professional cleaning service online in just a few clicks.

    Word of Mouth and Community Boards

    Never, ever underestimate the power of a good old-fashioned recommendation. Asking friends, family, or neighbours is still one of the most reliable ways to find a housekeeper you can trust. A referral comes pre-vetted, in a way, because the person has already proven themselves in a home you know.

    Don’t forget to check local resources, too. Community Facebook groups or even notice boards in local shops and community centres can be goldmines, particularly in smaller towns. This hyperlocal approach often turns up great candidates who live just around the corner, which is a huge plus for reliability and building a long-term working relationship. It's a low-tech strategy that thrives on community trust.

    Budgeting for Housekeeper Salaries and Costs

    Image

    Right, let’s talk money. Getting the financial side of things sorted from the get-go is probably the most important step for making this whole process a success. Before you can even think about making an offer, you need a realistic idea of what the role is worth in today’s market.

    Several big factors will shape the salary, and understanding them now will save you from any nasty surprises down the line. The three main drivers are always location, whether the role is live-in or live-out, and the specific duties you need them to perform. It's common knowledge that wages in London and the South East are considerably higher than elsewhere in the UK—often by 15-20%—to account for the steeper cost of living.

    Understanding Typical Salary Ranges

    When you start to find a housekeeper in the UK, having some benchmark figures in your head is a huge help. A full-time, live-out housekeeper covering a wide range of tasks will command a salary that reflects both their experience and the local pay scale.

    For example, in London, a live-in housekeeper might expect to earn between £30,000 and £50,000 a year. Interestingly, their live-out counterparts often earn a little more, typically from £35,000 to £55,000, to cover their own rent, bills, and travel costs. You can always check out more detailed salary guidelines to get a better feel for the market.

    A competitive salary doesn't just attract more candidates; it attracts better candidates. Offering a fair wage that reflects the role's demands and the local market is the best way to find a skilled and committed professional who will stay with you long-term.

    To give you a clearer picture, here’s a quick summary of what you might expect to pay for a full-time professional.

    Typical UK Housekeeper Salary Ranges (Annual)

    This table outlines the average salary expectations for full-time housekeepers across the UK. Remember that these are just guides—a candidate with specialist skills or extensive experience may command a higher salary.

    Role Type London & South East Rest of UK
    Live-In Housekeeper £30,000 – £50,000 £28,000 – £40,000
    Live-Out Housekeeper £35,000 – £55,000 £30,000 – £45,000
    Part-Time Housekeeper (Hourly) £17 – £25+ per hour £15 – £20 per hour

    These figures are a brilliant starting point, but always be prepared to adjust them based on the specific skills and level of experience you’re looking for.

    Looking Beyond the Basic Salary

    The agreed salary is just one piece of the puzzle. When you employ a housekeeper directly (as opposed to hiring a self-employed cleaner), you become an employer in the eyes of the law. This comes with responsibilities, and forgetting to budget for them can cause some real financial and legal headaches.

    Make sure you factor these crucial on-costs into your budget:

    • Employer's National Insurance: You’ll need to pay these contributions for your employee if their earnings are above the official threshold.
    • Workplace Pension: If your housekeeper is eligible for auto-enrolment (and most are), you are legally required to contribute to their pension scheme.
    • Employers' Liability Insurance: This is non-negotiable and a legal must-have for UK employers. It protects you if your housekeeper is injured or falls ill because of their work for you.
    • Paid Holiday: Every employee is entitled to a minimum of 5.6 weeks of paid holiday each year. This is calculated on a pro-rata basis for part-time staff.

    Accounting for these extras from day one gives you the true cost of employment. It’s the best way to build a professional, respectful, and sustainable relationship with your new housekeeper.

    Vetting Candidates You Can Trust

    Right, you’ve sorted through the initial applications and have a handful of promising people lined up. This is where the real work of finding the right person begins. A polished CV can tell you one story, but discovering a housekeeper who is genuinely trustworthy and reliable for your UK home takes a bit more digging.

    Remember, you’re inviting someone into your personal space. It's a big deal. The interview is your chance to get a real sense of their character, attitude, and how they handle the unexpected—things a piece of paper just can't show you. Don't be shy about moving past the standard questions.

    Asking Insightful Interview Questions

    The goal here is to see how a candidate thinks on their feet. Instead of just running through a list of duties, try framing your questions around real-life scenarios. This approach is far more revealing about their professionalism and integrity.

    Consider throwing in a few questions that go a bit deeper:

    • "Tell me about a time you had to deal with a sudden household problem, like a leak or a broken appliance. What steps did you take?"
    • "Let’s imagine you accidentally broke a small, inexpensive item. What would you do?"
    • "How do you manage your time and prioritise tasks on a really busy day when it’s clear you won't get to everything?"
    • "What's your approach to getting feedback? Can you give me an example of how you’ve adjusted your work based on what an employer preferred?"

    The answers to these kinds of questions are incredibly telling. You're not just looking for someone who can clean; you're looking for honesty, clear communication, and a bit of initiative. Someone who explains a calm, practical approach to a problem is often a much better bet than someone with years of experience but questionable judgement.

    A great housekeeper is a problem-solver who takes initiative. Listen for answers that show they can think independently and communicate clearly, especially when things don't go according to plan.

    Conducting Meaningful Reference Checks

    Whatever you do, don't skip the reference checks. This is your best opportunity to confirm what a candidate has told you and spot any potential red flags before it’s too late. When you get a previous employer on the phone, be prepared with a few solid questions.

    Try to go beyond just confirming dates of employment. Open-ended questions will give you much more valuable insight.

    For instance, you could ask:

    1. "Could you tell me a bit about their reliability and timekeeping?"
    2. "How did they respond to constructive feedback or any changes to the daily routine?"
    3. "Was there anything you felt they were particularly brilliant at around the home?"
    4. "Would you rehire them without a second thought?"

    That last question is often the most revealing. Any hesitation or a qualified "yes" is your cue to probe a little further. Honest, direct feedback from someone who has been in your shoes is priceless. It gives you that final layer of confidence before making an offer.

    In 2025, the demand for skilled housekeepers in the UK remains notably strong, with salary expectations reflecting both experience and the nature of employment. Recruitment data shows typical housekeeper salaries range between £35,000 and £45,000 annually for standard roles. You can discover more insights about 2025 domestic staff salary trends from Domestic Bliss Appointments.

    Getting to Grips with Your Legal Duties as an Employer

    Image

    Here’s a crucial distinction: when you hire a housekeeper directly, you’re not just a client—you become their employer. This shift changes everything in the eyes of the law, and it comes with a specific set of responsibilities you need to get right from the very beginning.

    It might sound a bit intimidating, but honestly, it’s a straightforward process once you know the steps. Getting this sorted protects both you and your housekeeper, setting the foundation for a professional and respectful relationship. It all starts with one key document: a formal employment contract.

    Why a Proper Contract is Non-Negotiable

    A contract isn't just a formality; it’s a legal requirement that provides clarity and security for everyone involved. It’s your opportunity to get everything down in black and white, so there are no misunderstandings or awkward conversations down the line. Think of it as the instruction manual for your working relationship.

    This document needs to include what's officially called a "written statement of employment particulars."

    Make sure yours covers:

    • The Job Description: A really clear list of every task you expect them to handle.
    • Working Hours: Pinpoint the exact days and times they'll be working.
    • Rate of Pay: The agreed wage and when they can expect to be paid (e.g., weekly, monthly).
    • Holiday Entitlement: How much paid time off they get. The legal minimum is 5.6 weeks a year.
    • Notice Periods: How much notice either of you needs to give to end the arrangement.

    A solid contract is your best friend if a disagreement ever crops up. It means everyone knows exactly where they stand on everything from sick pay to disciplinary procedures.

    Sorting Out HMRC and Payroll

    Once you've found your perfect housekeeper and they've accepted the job, your next move is to register as an employer with HMRC. This needs to be done before their first payday. Registering allows you to manage their tax and National Insurance contributions through the PAYE (Pay As You Earn) system.

    The thought of running payroll can feel a bit daunting, I know. The good news is there are plenty of user-friendly payroll services designed specifically for people employing staff at home. These platforms do the heavy lifting for you—calculating deductions, creating payslips, and sending all the right info to HMRC.

    You'll also need to think about a workplace pension. If your housekeeper meets the criteria for auto-enrolment, you're legally required to set one up. This just means choosing a pension provider and making regular contributions. Taking these legal duties seriously from the outset is a core part of learning how to find a housekeeper in the UK the right way.

    Answering Those Lingering Questions About Hiring a Housekeeper

    Even with the best plan in place, hiring someone to work in your home for the first time can feel a little daunting. A few last-minute questions always seem to pop up, and that’s perfectly normal. Let's clear up some of the most common queries so you can move forward with confidence.

    First up, a crucial distinction: are you hiring a self-employed cleaner or directly employing a housekeeper? A self-employed cleaner is a business owner. They usually work for several clients, bring their own supplies, and handle their own taxes. You’re simply a customer buying their service.

    Hiring a housekeeper directly, especially for a set number of hours each week, often makes you their employer. This changes everything. Suddenly, you’re responsible for things like PAYE, pension contributions, and providing a proper employment contract. Getting this right from the start is non-negotiable for staying on the right side of the law.

    What Kind of Insurance Do I Need?

    This is a big one, and it’s something you absolutely can't afford to get wrong. If you become an employer, UK law requires you to have Employers' Liability Insurance. Full stop.

    This insurance covers you if your housekeeper is injured or falls ill because of the work they do in your home. Don't assume your standard home insurance has you covered—it almost certainly doesn't. You'll likely need to add it to your policy or take out a separate one. It’s a small price to pay for total peace of mind.

    If you’re hiring a self-employed cleaner, the shoe is on the other foot. They should have their own Public Liability Insurance. Don't be shy about asking to see proof of their policy before they start work.

    How Should I Run a Trial Period?

    A trial period is a fantastic idea. It’s your chance to see if you’ve found the right person before you make a long-term commitment. Think of it less as a test and more as a "getting to know you" phase for both of you.

    Be upfront about it and make sure it’s a paid arrangement, usually lasting between two and four weeks.

    During the trial, pay attention to a few key things:

    • Communication: Are your instructions understood? Do they ask questions if they’re unsure about something?
    • Job Performance: Are the tasks you agreed on being done to a standard you're happy with?
    • Professionalism: Are they punctual, reliable, and pleasant to have in your home?

    A great trial period isn't about catching someone out. It’s built on clear expectations and friendly, open feedback. This is your first opportunity to build a solid working relationship.

    Providing Feedback and Maintaining a Great Relationship

    The secret to keeping a great housekeeper for years? Open and respectful communication. It’s that simple. Don’t let little annoyances fester until they become major issues. A quick, friendly chat every couple of weeks can make all the difference.

    When you do give feedback, keep it constructive. Instead of saying, "You missed the skirting boards," try something like, "Could we put the skirting boards on the priority list for next time?" It’s a small shift in language, but it frames the conversation collaboratively. For more tips on managing your home and building professional relationships, feel free to explore the different topics on our main blog.

    Finally, remember the little things. Offering a cup of tea or being a bit flexible if they have a personal appointment goes a long, long way. A housekeeper who feels valued and respected is one who will be motivated to do their very best for you.


    Ready to skip the hiring process and enjoy a spotless home without the hassle? The team at Signal Cleaning offers professional, reliable cleaning services across Oxford. Book your clean online in just a few clicks!

  • Choosing Carpet Cleaning Solutions for Machines

    Choosing Carpet Cleaning Solutions for Machines

    Picking the right cleaning solution for your carpet machine is about more than just lifting stains—it’s about protecting the machine itself. The best carpet cleaning solutions for machines are always low-foaming formulas, ideally the ones recommended by your machine's manufacturer. Why? Because they're engineered to clean deeply without harming the sensitive internal parts, like motors and pumps.

    Pouring the wrong stuff in, especially a homemade concoction, can create a mountain of suds, leave a sticky residue on your carpets, and might even void your warranty.

    Navigating Your Carpet Cleaning Solution Choices

    Image

    Think of your carpet cleaner like a car engine. You wouldn't put diesel in a petrol car, and for the same reason, you shouldn't pour just any old soap into your machine. The wrong formula can set off a chain reaction of problems, turning a simple cleaning day into a weekend-ruining, expensive repair. Getting your head around the basics is the first step to getting that professional-level clean while keeping your machine in good nick.

    The whole setup—the machine, the solution, and your carpet—is a system designed to work together. The right liquid is formulated to work with the machine's specific water pressure, heat output, and suction power. It's this teamwork that really gets down into the carpet fibres and pulls out all that ground-in dirt.

    The Myth of "Any Soap Will Do"

    It’s a common mistake to think that regular household soaps, like washing-up liquid or laundry detergent, are a good substitute. They might produce a lot of impressive-looking foam, but that’s exactly where the trouble starts. Carpet cleaning machines simply aren’t designed to cope with that many suds.

    All that foam can easily overwhelm the recovery tank and get sucked straight into the vacuum motor. Once moisture gets into those delicate electrical components, it's game over. You're looking at motor failure, which is almost always a costly fix not covered by the warranty.

    Using a non-approved, high-foaming detergent is one of the fastest ways to kill a carpet cleaning machine. The suds can cause irreversible damage to the motor, and the sticky residue they leave behind acts like a magnet for fresh dirt, making your carpets look grubby again in no time.

    Key Factors for Selecting the Right Solution

    Before you grab any bottle off the shelf, think about these three crucial points. Getting this right ensures you get a great clean without causing any damage.

    • Your Machine's Model: First things first, check what the manufacturer recommends. Brands like Vax, Bissell, and Rug Doctor spend a lot of time developing their own formulas that are guaranteed to work safely and effectively in their machines. Your user manual is the best place to start.
    • Your Carpet's Material: Not all carpets are created equal. Tough synthetic fibres can take a fair bit of punishment, but natural materials like wool are much more delicate. Wool is particularly sensitive to cleaners that are too alkaline or acidic, which can cause permanent damage or discolouration.
    • The Type of Mess: A standard shampoo is fine for general, everyday dirt. But for specific stains, you need a specific tool for the job. If you’ve got pets, for example, an enzymatic cleaner is your best bet. It doesn't just clean the stain; it uses enzymes to break down the organic proteins causing the smell, eliminating it for good.

    Making a smart choice here will keep both your carpet and your machine happy for years to come. For more expert advice on keeping your home looking its best, you can find a whole host of articles on our Signal Cleaning blog.

    Why Machine-Specific Formulas Are Essential

    Image

    Think of your carpet cleaner as a high-performance engine. You wouldn't pour just any old fluid into a finely tuned car and expect it to run smoothly, and the same logic applies here. If you want a genuinely deep clean and want to protect your investment, using a formula specifically engineered for your machine isn't just a good idea—it’s essential.

    Reaching for a generic or homemade solution might feel like a clever way to save a few quid, but it's often a false economy. It’s a bit like putting diesel into a petrol car; any short-term savings can be completely wiped out by long-term damage. The chemistry inside a bottle of proper carpet cleaning solution is a precise science, blended to work in perfect harmony with your machine's mechanics.

    The Science of Synergy

    A machine-specific formula is so much more than just fancy soap. Every single ingredient has been chosen to interact perfectly with your machine’s heat, water pressure, and suction power. This teamwork between the chemical and the machine creates a cleaning action that standard detergents just can't touch.

    The result is a far deeper, more effective clean that lifts grime right from the base of the carpet fibres without leaving behind any gunk or residue. It’s a beautifully coordinated effort between chemistry and mechanics.

    Let's break down what makes these formulas so crucial:

    • Precise pH Balance: This is key to preventing damage to delicate carpet fibres. A solution that’s too acidic or alkaline can cause discolouration, weaken the fibres, or even dissolve the latex backing holding your carpet together.
    • Low-Foaming Agents: This might be the most critical point of all. Too many suds can get sucked into the machine's motor, causing catastrophic failure and almost certainly voiding your warranty.
    • Anti-Resoiling Polymers: These clever ingredients leave an invisible shield on your carpet fibres, which helps to repel future dirt. It means your carpets stay looking fresh for much, much longer.

    "The true value of a machine-specific solution lies in its ability to clean effectively while protecting the intricate components of the cleaner. It’s an engineered partnership between the liquid and the machine, ensuring both longevity and superior results."

    Avoiding Damage and Getting the Best Results

    Using an unapproved cleaner is asking for trouble. The most common problem is the sticky residue that high-foaming detergents leave behind. This tacky film acts like a magnet for new dirt, which means your freshly cleaned carpets get grubby again in a fraction of the time.

    Beyond that, the wrong chemicals can react badly with your machine's internal plastic and rubber parts, like the seals and hoses. Over time, they can become brittle and crack, leading to leaks and a loss of suction power that makes the machine pretty useless.

    More and more of us are looking for professional-grade cleaning results at home. In the UK, the wider cleaning services market was valued at nearly £60 billion in 2021, and carpet cleaning is a huge part of that. Global revenues are projected to climb from around USD 3.99 billion in 2022 to nearly USD 5.98 billion by 2030, showing just how much we've all embraced effective, machine-based cleaning. You can discover more about the UK cleaning industry's growth and see what it means for homeowners.

    Why Manufacturer Formulas Matter

    Brands like Bissell, Vax, and Rug Doctor spend a fortune on research and development, creating formulas that are perfectly calibrated for their machines. When you use their recommended solution, you're not just buying a cleaner; you're using a product that has been tested again and again to deliver the best possible performance.

    This gives you a few key benefits:

    1. Guaranteed Compatibility: You have peace of mind that the solution won't harm any of the machine's internal parts.
    2. Maximum Cleaning Power: The formula is designed to get the absolute most out of your machine's specific features, tackling stains and dirt effectively.
    3. Warranty Protection: Using the approved formula means you won't accidentally do something to void your manufacturer's warranty.

    At the end of the day, sticking to machine-specific formulas is the smartest move for anyone serious about looking after their carpets and their cleaning equipment. It's the only way to guarantee a safe, deep, and long-lasting clean every time.

    Breaking Down Common Cleaning Solution Types

    Staring at an aisle full of carpet cleaning formulas can feel overwhelming. It’s easy to just grab the first bottle you see, but taking a moment to understand what's inside can be the difference between a so-so clean and a fantastic one. Think of these solutions like a specialist’s toolkit – you need the right tool for the right job.

    Each type of carpet cleaning solution for machines is engineered to tackle a specific kind of mess. Using a general cleaner on a stubborn pet stain is like using a butter knife to chop an onion; it might work eventually, but it’s not the most effective way. Matching the formula to the problem saves you time, effort, and delivers a much deeper, more satisfying clean.

    Enzymatic Cleaners: The Stain Demolition Crew

    If you’ve got pets or kids, enzymatic cleaners are nothing short of a lifesaver. These aren't your typical soaps. Instead, they’re packed with beneficial enzymes—think of them as a microscopic demolition crew that gets to work on organic messes.

    When you use an enzymatic solution on a stain from pet urine, spilt milk, or food, the enzymes target and break down the specific proteins, starches, and fats making up the mess. They don't just lift the visible part; they completely dismantle the stain at a molecular level. This is absolutely crucial for getting rid of nasty odours for good.

    Here's why they're so effective:

    • Targeted Action: The enzymes are programmed to go after organic stuff, breaking it into tiny, water-soluble bits your machine can easily suck up.
    • Odour Elimination: By destroying the source of the smell, they stop those lingering odours that have a nasty habit of reappearing on damp days.
    • Gentle on Fibres: Most are pH-neutral, making them a safe bet for a huge range of carpet types, including delicate natural fibres.

    Oxygen-Based Cleaners: The Brightening Powerhouses

    Ever spilt a glass of red wine or a mug of black coffee and felt that sense of dread? This is where oxygen-based cleaners come to the rescue. These formulas harness the power of active oxygen to break down and lift away those vibrant, dye-based stains.

    When the solution mixes with water, it releases a flurry of tiny oxygen bubbles. This reaction, known as oxidation, attacks the chemical bonds of the stain, effectively bleaching out the colour without harming your carpet’s original dye. It’s a brilliant way to deal with colourful disasters.

    Think of it as a gentle, colour-safe bleach for your carpet. It doesn't just remove the stain; it actually brightens the fibres, leaving your carpet looking refreshed and vibrant, not faded.

    This type of cleaner should be your go-to for any intensely coloured spill. It works wonders on fruit juice, tea, and all those other common household accidents that leave a glaring mark.

    The image below gives a great visual of how choosing the right solution can make a real difference in how quickly you see results.

    Image

    As you can see, specialised formulas like enzymatic solutions often cut down the cleaning time significantly when used on the right kind of stain, compared to just a standard detergent.

    At-a-Glance Guide to Carpet Cleaner Solutions

    To make choosing a little easier, this table breaks down the main types of cleaning solutions, what they do best, and which carpets they're suited for.

    Solution Type Primary Function Best For Tackling Carpet Compatibility
    Enzymatic Cleaner Breaks down organic matter Pet urine, food spills, vomit, blood Excellent for most synthetic and natural fibres (always patch test)
    Oxygen-Based Cleaner Lifts and decolourises stains Red wine, coffee, tea, fruit juice Best for synthetic carpets; use with caution on wool/natural fibres
    Pre-Treatment Spray Loosens deep-set dirt High-traffic areas, ground-in grime Generally safe for all machine-washable carpets
    Rinse Aid / Neutraliser Removes detergent residue Post-cleaning stiffness, dullness Highly recommended for all carpet types to restore softness

    Using this as a quick reference can help you confidently pick the perfect product for your specific cleaning needs.

    Pre-Treatments and Rinse Aids: The Finishing Touches

    To get a truly professional-level result, you need to think beyond just the main cleaning formula. Two other products can make a huge difference: pre-treatment sprays and rinse aids.

    A pre-treatment spray is your first line of attack against those really tough spots. You spray it directly onto high-traffic lanes or set-in stains about 5-10 minutes before you start cleaning. This gives the concentrated formula time to work its way deep into the carpet fibres, loosening the dirt and making it much easier for your machine to lift away.

    A rinse aid (sometimes called a neutralising rinse) is the final, crucial step for getting that soft, fresh-from-the-shop feel. Some cleaning detergents can leave a slightly sticky residue behind, which makes the carpet feel stiff and actually attracts new dirt faster. A rinse aid is a mild, acidic solution you add to the final rinse water. It neutralises any alkaline soap residue left in the fibres.

    This simple step leaves your carpets feeling noticeably softer and helps them stay cleaner for longer. It’s an optional touch, but one I always recommend for the best possible finish.

    Understanding What's Inside Your Cleaning Solution

    Image

    Have you ever found yourself in the cleaning aisle, staring at a bottle of carpet cleaner and feeling like you need a degree in chemistry to figure out what's on the label? You're definitely not alone. The list of ingredients can be pretty baffling, but getting to know what’s actually in the formula is the secret to getting a fantastic clean without accidentally damaging your carpet.

    Think of it like a good recipe. Each ingredient has a very specific job to do, and they all have to work in harmony to break down dirt, lift out stains, and leave your carpets feeling genuinely fresh. Once you know the main players, you can pick out carpet cleaning solutions for machines like a pro.

    The Power Players: Surfactants and Solvents

    At the heart of any decent cleaning solution, you'll find two heavy lifters: surfactants and solvents. They're a dynamic duo, each tackling different kinds of grime to make sure you get a deep clean, right from the base of the fibres to the very tips.

    Surfactants are the real workhorses here. Picture a tiny molecule that’s a bit like a magnet – one end loves water, and the other end loves oil and dirt. When you're cleaning, these little guys grab onto the dirt particles, pulling them away from the carpet fibres so the machine's water can easily wash them away.

    Solvents, on the other hand, are the specialists. They're designed to dissolve all the greasy, oily messes that water simply can't handle on its own. They’re essential for getting rid of things like food spills, greasy footprints, or oily residues that get trodden in from outside.

    Ingredients to Approach with Caution

    Just as it's important to know what you want in a solution, it's crucial to know what you want to avoid. Certain chemicals can end up doing more harm than good, leading to permanent damage or odd discolouration over time. Being a savvy buyer means keeping an eye out for a few red flags on that ingredients list.

    Here are a few ingredients you should be wary of:

    • Optical Brighteners: These don't actually clean anything. Instead, they coat the carpet fibres with a substance that reflects blue light, making the carpet look brighter. The problem is, this coating builds up over time and can eventually cause a distinct yellowing effect that's a nightmare to get rid of.
    • High-Alkaline Agents (High pH): While these can be effective on tough synthetic carpets, highly alkaline solutions are a disaster for natural fibres like wool. Wool is very sensitive to pH levels, and a harsh, alkaline formula can strip its natural lanolin, leaving it brittle, dull, and prone to damage.
    • Perchloroethylene ("Perc"): This is a powerful solvent you might find in some heavy-duty spot removers. It’s a pretty harsh chemical that can release strong fumes, so it’s best left to the professionals and avoided for general cleaning around the house.

    Always double-check the label for compatibility with your carpet type, especially if you have wool or wool-blend carpets. Using the wrong pH level is one of the most common and, unfortunately, irreversible cleaning mistakes people make.

    The Rise of Eco-Friendly Formulas

    Over the last few years, the demand for cleaning options that are both effective and kind to the planet has really taken off. Modern eco-friendly carpet cleaning solutions for machines are miles ahead of the weak, ineffective formulas of the past. Today's plant-based solutions pack a serious cleaning punch without relying on harsh chemicals.

    These formulas generally use natural enzymes and plant-derived solvents to break down dirt and tackle stains. Better yet, they are often biodegradable and free from the synthetic fragrances, dyes, and other irritants found in traditional cleaners.

    Choosing an eco-friendly option is a brilliant move for any home, but it's particularly important if you have small children or pets. Little ones and four-legged friends spend a lot of their time on the floor, so using a solution free from harsh chemical residues gives you real peace of mind. They prove you don't need aggressive chemicals to get fantastic results.

    How to Match Solution to Carpet and Machine

    Knowing the theory is one thing, but putting it into practice is where you’ll see the real results. Making sure your chosen carpet cleaning solution for machines is a perfect match for your carpet and your machine isn’t just a good idea—it’s the secret to a successful clean that protects both of your investments. Get this combination right, and you'll achieve that professional-level finish every single time.

    This is more important than ever, especially when you consider how far carpet cleaning machines have come. The global market was valued at around USD 776.62 million in 2024 and is expected to hit USD 1.32 billion by 2033. That growth is fuelled by increasingly sophisticated machines with complex pumps, heaters, and vacuums designed to lift out the most stubborn dirt—a trend we're definitely seeing here in the UK. You can read more on the tech behind these machines and discover the full carpet cleaner market research.

    Consider Your Machine Brand

    Big names like Vax, Bissell, and Rug Doctor don't just sell machines; they pour a lot of time and money into developing their own cleaning formulas. Using their recommended solution is almost always the safest bet. It's been perfectly calibrated to work with that specific machine’s water pressure, temperature, and suction power. Go off-piste with an unapproved product, and you might not only get a poor result but could also end up voiding your warranty.

    • Vax Machines: These generally work best with low-foaming solutions that are designed to complement their patented cleaning technologies.
    • Bissell Cleaners: Bissell offers a huge range of formulas, including special pet and pro-level solutions, all created to work seamlessly with their Heatwave Technology.
    • Rug Doctor Machines: Known for their powerful brushes, Rug Doctor solutions are made to handle vigorous scrubbing without turning your living room into a bubble bath.

    Identify Your Carpet Material

    Before you even think about pouring a cleaning solution, you need to know what your carpet is made of. Different fibres have wildly different needs and tolerances. A quick check now can save you from a complete cleaning disaster later.

    Most carpets have a label on the back, but if that’s missing, a simple burn test on a few spare fibres can reveal a lot. Synthetics like nylon or polyester tend to melt and form a hard little bead. Natural fibres like wool, on the other hand, will char and give off a smell like burning hair.

    Wool is probably the most sensitive carpet material you'll come across. It’s easily damaged by high-alkaline (high pH) cleaners, which can strip its natural oils, leaving the fibres brittle and dull. For wool, you must stick to a pH-neutral, wool-safe formula.

    Perform a Crucial Spot Test

    Whatever you do, don't skip this step. I don't care how confident you are in the product—a spot test is your final, critical safety check to prevent widespread discolouration or fibre damage. It takes five minutes but can save you from an expensive, irreversible mistake.

    Here’s the right way to do it:

    1. Choose a Hidden Area: Find a spot that’s usually covered, like under the sofa, inside a wardrobe, or in a far corner of the room.
    2. Mix a Small Amount: Prepare a tiny bit of the cleaning solution, following the dilution instructions on the bottle.
    3. Apply and Blot: Using a clean, white cloth, apply a small amount to the carpet. Gently blot the area; don’t scrub it.
    4. Wait and Check: Let it dry completely. Once it’s dry, check for any colour bleeding, fading, or changes in the carpet’s texture. If everything looks exactly as it did before, you're good to go.

    Concentrated vs Ready-To-Use Formulas

    Your final choice is between concentrated and ready-to-use solutions. Concentrated formulas are often better for your wallet and the environment, as they use less packaging. The catch? You have to be precise with the dilution. Get the ratio wrong, and you could be left with a weak clean or a sticky residue that attracts more dirt.

    Ready-to-use formulas offer pure convenience. You just pour them straight into the machine with no measuring or mixing, which is brilliant for quick jobs or small spills. The trade-off, of course, is a higher cost per clean. If you want to get a head start on specific blemishes before the main event, have a look at our guide on how to remove stubborn stains.

    Frequently Asked Questions

    When you're dealing with carpet cleaning machines and the various solutions that go with them, a few questions always seem to pop up. You want the best results, of course, but you also want to avoid accidentally damaging your machine or your carpet. Let's walk through some of the most common queries to help you clean with total confidence.

    Think of this as a quick-reference guide to reinforce everything we've covered, making sure you're ready for whatever your carpets throw at you.

    Can I Use a DIY Vinegar Solution in My Carpet Cleaner?

    It's tempting to reach for household staples like vinegar for a quick, cheap clean, but I'd strongly advise against using it in your carpet cleaning machine. While vinegar is a great natural cleaner for certain things, its acidic nature is bad news for the internal components of your machine. Over time, it can eat away at the rubber seals and delicate plastic parts, leading to leaks, poor suction, and a hefty repair bill.

    On top of that, DIY solutions just don't perform as well. They don't have the low-foaming agents that professional formulas do, and they lack the anti-resoiling technology that stops dirt from sticking to the fibres later. You'll likely end up with a less effective clean and a sticky residue that makes your carpets get dirty even faster.

    A quick heads-up: always check your machine’s warranty before you even think about using an unapproved cleaner. Using a homemade mix like vinegar is one of the most common ways people void their warranty, leaving them on the hook for any resulting damage.

    How Much Solution Should I Actually Use?

    This is one area where you absolutely need to follow the instructions to the letter. It’s a common myth that adding a bit of extra solution will give you a super-powered clean. In reality, it does the exact opposite. Using too much concentrate is the fastest way to leave a sticky, soapy film all over your carpet fibres.

    This tacky residue not only makes your carpet feel stiff and look dull, but it also acts like a dirt magnet. You'll find your freshly cleaned carpet looks grubby again in no time. On the flip side, using too little solution just won't have the muscle to lift out that deep-down grime.

    Always check two things:

    1. The dilution instructions printed on the solution bottle.
    2. The fill lines clearly marked on your machine’s water tank.

    These guides are there for a reason—they're precisely calculated to give you the perfect water-to-solution ratio for maximum cleaning power without any sticky aftermath.

    What Is a Pre-Treatment Spray and When Do I Need It?

    Think of a pre-treatment spray as your secret weapon for targeted stain removal. The main shampoo that goes into your machine is for general, all-over cleaning. A pre-treatment, however, is a more potent, concentrated formula that you apply directly onto tough spots before you begin the main cleaning process.

    You'll want to use it on specific problem areas like coffee spills, muddy paw prints, or that bit of dropped food. Just spray it directly onto the stain, let it work its magic for about 5-10 minutes, and then clean the area as normal with your machine. That 'dwell time' gives the powerful ingredients a chance to penetrate deep into the fibres and start breaking the stain down, making it far easier for your machine to lift it away for good. It's a non-negotiable step for a truly spotless finish.

    Are Eco-Friendly Solutions as Powerful as Chemical Ones?

    They certainly are. Modern eco-friendly formulas have advanced so much that they now give traditional chemical-based cleaners a serious run for their money. Instead of relying on harsh synthetic chemicals, they use powerful, plant-derived enzymes and solvents that are brilliant at breaking down dirt and stains naturally.

    For the vast majority of household spills and organic stains you’ll encounter, a high-quality, plant-based formula will perform just as well as its chemical counterpart. The trick is to choose a reputable brand that has specifically formulated its eco-friendly carpet cleaning solutions for machines. They're a much safer choice, especially for homes with children, pets, or anyone with allergies.

    When you decide it's time for a professional touch that guarantees incredible results, why not schedule a service with the experts? You can explore our services and get a quote on our professional carpet cleaning booking page.

  • A Guide to End of Tenancy Cleaning in the UK

    A Guide to End of Tenancy Cleaning in the UK

    Moving out is a hectic time, there’s no doubt about it. But amidst the chaos of packing boxes, there's one final task that's absolutely vital for getting your full deposit back: the end of tenancy clean. This isn’t your average weekend tidy-up. It's a top-to-bottom, deep-down clean intended to leave the property looking exactly as it did the day you moved in.

    Think of it as hitting the reset button for the next person and, just as importantly, ticking a crucial box in your rental contract.

    Why Your Tenancy Deposit Depends on a Deep Clean

    Getting your deposit back isn't luck; it's about meeting the standards laid out in your tenancy agreement. When your landlord or letting agent does their final inspection, they'll have the original inventory report in hand, comparing the property's current state to how it was at the start. A proper end of tenancy clean is your best defence against any nit-picking.

    This is a whole different ball game from your regular cleaning routine. Your weekly once-over keeps things pleasant to live in, but a move-out clean is almost forensic. It tackles the grime that builds up over months or years in all the forgotten nooks and crannies.

    Let's put it into perspective:

    • Regular Cleaning: You wipe the counters, run the hoover over the carpets, and give the loo a quick scrub.
    • End of Tenancy Cleaning: The oven is cleaned until it gleams inside and out, taps and showerheads are descaled, skirting boards are washed, and even the insides of cupboards are wiped down.

    It’s this meticulous attention to detail that property managers are trained to look for.

    The Financial Risk of an Inadequate Clean

    Cutting corners on the final clean can hit you right in the wallet. In fact, according to the housing charity Shelter UK, issues related to cleaning are one of the top reasons tenants in the UK lose some or all of their deposit. It's a stark reminder of just how seriously this is taken. You can find more stats on tenancy deposit disputes over on checkatrade.com.

    At its core, your tenancy agreement is a legal contract. It will almost certainly include a clause stating the property must be returned in its original condition, save for fair wear and tear. If you don't meet that standard, the landlord has every right to use your deposit to pay for professional cleaners to finish the job.

    Your security deposit isn't just a down payment; it's a financial guarantee that you'll meet your obligations. A professional-standard clean is the strongest proof you can offer that you've held up your end of the bargain, leaving no grey areas for dispute.

    More Than Just a Clean It's Proof

    Ultimately, a thorough end of tenancy clean is about protecting your money. It creates a clear, documented finish line for your tenancy. The receipt from a professional cleaning company is solid proof that you’ve done the right thing.

    This paperwork can be invaluable if a disagreement pops up, demonstrating you made a genuine effort to meet the required standard. Skipping this step leaves your deposit exposed and invites deductions that can often cost far more than the clean itself would have.

    Your Essential Room-by-Room Cleaning Checklist

    Getting a property up to a professional standard isn't just about a quick wipe-down. It’s a meticulous, top-to-bottom process. Inventory clerks have seen it all, and they know exactly where to look for missed spots. This guide will walk you through the essential tasks, room by room, so you know what to focus on.

    Whether you're brave enough to tackle the end of tenancy cleaning yourself or you're bringing in the pros, this checklist is your game plan. It covers everything from the obvious high-traffic areas to those sneaky corners where dust loves to hide.

    This image breaks down the core actions that are the foundation of any successful move-out clean.

    Image

    From here, we can dive into the specifics for each part of your home. To truly get it right, a systematic approach is your best friend.

    The Heart of the Home: The Kitchen

    If there’s one room that gets put under the microscope during an inventory check, it’s the kitchen. It’s the hub of the home, which means it’s a magnet for grease, food splatters, and limescale. A deep clean here is absolutely non-negotiable.

    Appliances are always the first port of call. The oven, especially, needs to be spotless inside and out. That means taking out all the racks and trays and scrubbing away every last bit of burnt-on grime. It’s a tough job, but it has to be done.

    Once the oven is gleaming, it’s time to move on to the other appliances:

    • The Hob: Get rid of all cooked-on food. For gas hobs, this means cleaning the burners; for ceramic, it's about polishing the surface until it shines.
    • The Extractor Fan: Don't forget this one! The filters need a proper degreasing, and the hood itself needs a good wipe-down.
    • The Fridge and Freezer: It needs to be fully defrosted first. Then, clean every shelf, drawer, and rubber seal.
    • The Dishwasher: Pull out the filter and clean it, run a hot empty cycle with a proper dishwasher cleaner, and then wipe down the inside and the door seals.
    • The Microwave: Clean it inside and out until it's completely free of food splatters.

    With the appliances sorted, you can tackle the rest of the kitchen. Empty every cupboard and drawer and give them a thorough wipe, inside and out. Clean and disinfect all worktops, and don't forget the sink and taps—a bit of descaler around the base of the taps makes a huge difference.

    Bathrooms and Toilets

    Just like kitchens, bathrooms are prime territory for limescale, soap scum, and mould. The aim here is to make every surface sparkle and leave it hygienically clean.

    Start with the big jobs. The toilet needs a thorough scrub—bowl, seat, lid, and cistern—until it's completely sanitised. Next, tackle the bath, shower screen, and tiles. Pay very close attention to the grout, as that’s where mould loves to grow.

    A Quick Tip from Experience: It's the little details that often get missed. Inventory clerks will check shower heads for limescale, plug holes for hair, and extractor fans for dust. A sparkling bathroom is often seen as a sign that the rest of the property has been cleaned just as well.

    Then, zero in on the finishing touches that pull the room together:

    • Clean the basin and taps, polishing them until they are free of watermarks.
    • Wipe down mirrors and any other glass so they are completely streak-free.
    • Clean the inside and outside of all cabinets or vanity units.
    • Mop the floor properly, making sure you get behind the toilet and under any freestanding furniture.

    Bedrooms and Living Areas

    These rooms might seem easier, but they have their own set of pitfalls that can lead to deposit deductions. The secret is to work methodically from top to bottom.

    Always start by getting rid of any cobwebs from the ceilings and corners. After that, dust and wipe down every surface: shelves, wardrobes, chests of drawers—the lot. Remember to clean both the inside and outside of any furniture that was part of the tenancy.

    The "forgotten spots" are what really make the difference between an amateur job and a professional one. Give some extra love to these areas:

    • Skirting Boards: You’d be surprised how much dust and how many scuff marks they collect.
    • Light Switches and Sockets: A quick wipe removes all those fingerprints and grime.
    • Door Frames and Handles: Clean every door, including the top edge of the frame.
    • Light Fittings: Dust and wipe down lampshades and other fittings.
    • Behind Radiators: A long-handled duster is perfect for getting out all the trapped dust.

    Finally, give all the carpets a thorough vacuum, making sure to move furniture so you can clean underneath. If you’ve got some stubborn marks on the carpet, you’ll need to deal with them directly. Our guide on how to remove stubborn stains has some great tips that can help. For any hard floors, a good sweep and mop is essential.

    Windows and General Tasks for All Rooms

    Some jobs apply to the entire property and are crucial for ticking all the boxes. Windows are a big one. They need to be cleaned from the inside, and that includes the frames and the sills.

    The key is consistency. Make sure every single room gets the same detailed treatment. A final check throughout the property ensures no small detail has been overlooked and gives you the best chance of passing that final inspection with flying colours.

    What Does a Professional Clean Actually Cost?

    Trying to figure out the price for a professional end of tenancy clean can feel a bit like guesswork. But once you know what goes into the quote, it all starts to make sense. It’s a lot like ordering a custom-built piece of furniture – a small, simple bookshelf will have a different price tag than a large, ornate wardrobe. The same logic applies here.

    The biggest factor, hands down, is the size of your property. It takes far less time and effort to clean a studio flat than it does a four-bedroom house, so the price will reflect that. The general condition of the place is just as important. A well-looked-after home is a much quicker job than one with serious grime, limescale build-up, or stubborn stains that need a lot of elbow grease.

    Image

    Key Factors That Determine Your Quote

    Beyond the size and condition, a few other things will influence the final number. Where you are in the UK makes a difference, as companies in big cities like London have higher running costs than those in smaller towns. Any extra services you need will also be added on top of the base price.

    So, let's break down the main pricing components:

    • Property Size: The number of bedrooms and bathrooms is the primary driver of the cost.
    • Property Condition: A property that needs a serious deep clean will cost more than one that's just a bit dusty.
    • Geographic Location: You'll likely pay a bit more in London and the South East, where the cost of living is higher.
    • Additional Services: Things like professional carpet steam cleaning, giving the upholstery a refresh, or washing the exterior windows are usually priced separately.

    A good, reputable cleaning company will almost always give you a fixed price for the job, not an hourly rate. This is a huge plus for you because you know exactly what you’re paying from the outset. Hourly rates can be a real gamble – if the clean takes longer than you thought, the bill can quickly spiral.

    A fixed quote shows that the company knows its stuff. They've sized up the job and are confident they can get it done to the required standard for a set price, no matter how many hours it takes. This protects you from surprise costs and keeps the focus firmly on the quality of the clean, not on watching the clock.

    Average Price Ranges in the UK

    To give you a rough idea for your budget, it helps to know the ballpark figures. The cost for an end of tenancy clean varies across the UK, but national averages can give you a solid starting point. You could be looking at anything from around £170 for a smaller flat to over £415 for a larger family home.

    To get a bit more specific, a studio or one-bedroom flat often falls between £80 and £220, while a two-bed property is typically in the £120 to £280 range. For a three-bedroom house, you can expect to budget between £220 and £390. These prices reflect the time, labour, and professional-grade materials needed to do the job right.

    What Should a Standard Quote Include?

    A proper quote for an end of tenancy clean should cover every essential task needed to get your deposit back. That means a deep clean of the kitchen (oven included!), sanitising every bathroom, and a top-to-bottom clean of all bedrooms and living areas. All the cleaning supplies and equipment should be part of the price, too.

    What it often won't include are the more specialised services. Think of these as optional extras you can add if you need them:

    • Professional Carpet Cleaning: Hoovering is always standard, but a deep steam clean is an add-on.
    • Upholstery Cleaning: For refreshing sofas, armchairs, or mattresses.
    • External Window Cleaning: They'll do the insides as standard, but the outside is extra.
    • Garden or Balcony Tidying: Outdoor spaces aren't typically covered in a standard interior clean.

    It’s so important to clarify what is and isn't included before you agree to anything. A transparent company will lay this all out for you from the very beginning, so there are no nasty surprises.

    If you’re ready to see what it would cost for your property, you can get a clear, fixed price tailored to your exact needs through our online booking system.

    Why You'll Pay More for a Clean in London

    When you start budgeting for an **end of tenancy clean**, it’s vital to remember one thing: London is its own beast. The prices you might see for other parts of the UK simply don’t hold up once you’re inside the M25. This isn’t just companies hiking up prices for the sake of it; it’s a direct result of the capital’s unique, high-stakes rental market.

    Think about it like buying a coffee. A flat white in a quiet village might set you back £2.80, but that exact same drink from a café in Covent Garden could easily cost £4.50. The beans are the same, but the costs to run the business—rent, staff wages, and even just getting supplies delivered—are worlds apart. Professional cleaning services in London operate under the same pressures.

    Higher running costs are the biggest factor. Cleaning companies in the capital have to cover everything from the London living wage for their staff to higher vehicle insurance and the daily Congestion Charge. These aren't optional extras; they're the basic costs of doing business, and they have to be reflected in the final price.

    It's All About Supply and Demand

    The sheer scale of London's rental market also plays a huge part. The demand for top-notch end of tenancy cleaning is massive and never-ending, driven by a city where renting is the default for millions.

    In fact, over 50% of Londoners rent their homes, a figure that's been climbing for years and is expected to hit 60% soon. This creates a constant, powerful demand for move-out cleaning, which naturally pushes up prices. It's why the average cost often settles above £250, mirroring the city’s higher cost of living. For a detailed breakdown, you can read more about London end of tenancy cleaning prices on samyxcleaning.com.

    This intense demand goes hand-in-hand with incredibly high standards. London letting agents and landlords are notoriously exacting when it comes to final inspections. They're managing incredibly valuable properties and need a perfect finish to protect their investment and get new tenants in the door without a hitch.

    In London, a professional clean isn't just about making a place look tidy. It's a non-negotiable step in the high-speed machinery of property management. The standard is often far higher than elsewhere because inventory clerks are trained to spot the tiniest flaw in one of the planet's most competitive property markets.

    How to Budget for a London Clean

    So, what does this actually mean for your wallet? A good rule of thumb is to expect to pay 20-30% more for an end of tenancy clean in London compared to the rest of the country. A two-bedroom flat that might cost £250 to clean in Manchester could easily be £320 or more in a central London borough.

    While it's always tempting to go for the cheapest quote you can find, this often turns out to be a false economy, especially in London. A price that seems too good to be true might mean you’re dealing with an inexperienced team or a company that cuts corners, which is a surefire way to risk your deposit.

    Your best bet is to work with an established, professional company that truly understands the local demands. You can see the areas we cover in Oxfordshire and beyond to get a sense of how a professional service is structured. Ultimately, investing in a quality clean is the smartest move for a stress-free handover and getting your full deposit back.

    How to Choose the Right Cleaning Company

    Picking the right professionals for your end of tenancy cleaning is probably the most critical decision you'll make in this whole process. It's not just about getting the place clean; it’s about finding a reliable partner whose work will get your deposit back. A great company is basically your insurance policy against any cleaning-related arguments with your landlord.

    Think of it like choosing a mechanic before a big road trip. You wouldn’t just go for the cheapest garage you could find. You’d want someone reputable, who guarantees their work and knows exactly what to check to make sure your car doesn't break down halfway to your destination. It's the same principle here.

    Image

    Check Their Reviews and Reputation

    First things first, do your homework. Don't be swayed by the glowing testimonials plastered all over a company's own website. You need to dig a bit deeper for the real story. Head over to independent review sites like Google Reviews or Trustpilot to see what actual customers are saying.

    A string of positive feedback across different platforms is a brilliant sign. Look for comments that specifically mention things like punctuality, how thorough the cleaners were, and most importantly, a successful deposit return. A couple of bad reviews aren't necessarily a deal-breaker—nobody's perfect—but have a look at how the company responded. A professional response shows they care; radio silence is a bad sign.

    Confirm Their Insurance and Guarantees

    This part is completely non-negotiable. Any cleaning company worth its salt must have Public Liability Insurance. This is what protects you and the property if something accidentally gets damaged during the clean—say, a window gets cracked or an appliance stops working.

    Just as crucial is the service guarantee. A reputable firm will always stand by the quality of its work.

    The gold standard here is a 'deposit return guarantee' or a free re-clean promise, usually valid for 48 to 72 hours after they've finished. This means if your check-out report flags any cleaning issues, they'll come back and sort it out for free. Make sure you get this in writing.

    This guarantee is your safety net. It proves the company is confident it can meet the incredibly high standards set by letting agents and is committed to helping you pass that final inspection with flying colours.

    Ask the Right Questions Before You Book

    Right, so you've got a shortlist. Now it's time to get in touch. How a company handles a few simple questions can tell you everything you need to know about their level of professionalism. Have a list ready so you don’t forget anything important.

    Here are the key things you absolutely need to ask:

    • Do you follow a detailed checklist? A proper end of tenancy clean isn't just a quick wipe-down. Professionals use an extensive checklist approved by letting agencies. Ask them to send you a copy.
    • Is your quote a fixed price? Steer clear of companies that only offer hourly rates. A fixed quote means the price is the price, no matter how long the job actually takes.
    • Are all cleaning supplies and equipment included? The price you're given should be all-inclusive. You don't want any nasty surprises or hidden fees for materials.
    • What's the notice period for your guarantee? You need to know if it's 48 or 72 hours. This helps you schedule the clean for just before the inventory clerk is due to arrive.
    • Do you have experience with local letting agents? A company that knows the standards of the major agents in your area is always a good bet.

    Spotting the Red Flags

    Knowing what to look for is only half the battle; you also need to know what to avoid. There are a few tell-tale signs that should have alarm bells ringing.

    Be wary of:

    • Suspiciously low quotes: If a price seems too good to be true, it almost certainly is. A rock-bottom price usually means they'll be cutting corners somewhere.
    • A shoddy online presence: A legitimate business will have a professional website and clear contact details. If they're hard to find or look unprofessional online, be cautious.
    • Vague answers to your questions: If they get cagey when you ask about insurance or their guarantee, it’s time to walk away.
    • Requests for full payment upfront: A small deposit is standard practice, but demanding the entire fee before any work has been done is a massive red flag.

    Taking the time to make an informed choice is the single best thing you can do for a stress-free move and a full deposit return.

    Your End of Tenancy Cleaning Questions Answered

    Moving out can feel like navigating a minefield of small print and hidden expectations, especially when it comes to the final clean. It's completely normal to have questions about what's actually required of you. Here, we’ll tackle the most common queries tenants have about end of tenancy cleaning, giving you clear, no-nonsense answers to help you get your deposit back in full.

    We'll clear up the confusion, from whether you really need to hire professionals to what to do if your landlord still isn't happy. Think of this as your practical guide to getting it right.

    Is a Professional End of Tenancy Clean Mandatory?

    This is the big one, and the answer is a classic "it depends". While the law itself doesn't typically mandate a professional clean, your tenancy agreement is what really matters here. Most modern agreements include a clause stating the property must be returned cleaned to a "professional standard"—a phrase that causes more headaches than almost any other.

    So, what does that actually mean? It means a level of cleanliness an inventory clerk will sign off on. They're trained to spot the little things an amateur clean often misses, like dust lingering on skirting boards or limescale buildup around taps. Hiring a pro service gives you a proper invoice, and that piece of paper is your proof.

    That invoice is your best line of defence if a deposit dispute arises. It shows you've met your contractual obligations and shifts the burden of proof from your own elbow grease to a documented, professional service.

    How Long Does the Cleaning Process Take?

    There's no magic number here; it really comes down to the size of the property and its condition before the team arrives. But to give you a rough idea for planning your move-out day, we can look at some typical timeframes.

    A professional company will usually send a team of two or three cleaners to work through their checklist efficiently. Here are some general estimates:

    • Studio Flat: A team of two might take 3-4 hours.
    • Two-Bedroom Flat: You're probably looking at 4-6 hours for a team.
    • Three-Bedroom House: Expect the job to take 6-8 hours or even longer.

    Remember, these estimates cover a deep clean of everything on their list, from scrubbing the oven back to a shine to washing every internal window. If you've added on extras like professional carpet steam cleaning or having the upholstery washed, that will naturally add more time to the job.

    What if My Landlord Is Still Not Satisfied?

    This is exactly why choosing a reputable company that offers a solid guarantee is non-negotiable. Any trustworthy cleaning firm will provide a service guarantee, which usually lasts for 48 to 72 hours after they've finished.

    This means if the final check-out report flags any cleaning-related issues, the company will return to fix them for free. It’s absolutely critical that you get this guarantee in writing before you book.

    For extra peace of mind, it’s also a brilliant idea to take your own photos and videos of the property right after the cleaners have left. This visual evidence, along with your professional invoice, becomes your trump card if you need to challenge an unfair deduction through one of the UK's tenancy deposit schemes.

    Do I Need to Be Present During the Clean?

    Nope, you don't need to hang around while the cleaners work their magic. In fact, it’s much better if you don't. The ideal time to schedule the clean is after you've moved all your belongings out. An empty property is a blank canvas for a cleaning team, making their job faster and more effective.

    You will, of course, need to arrange for them to get in. This is usually pretty simple:

    • You can meet the team at the property to hand over the keys in person.
    • Leave the keys in a secure key safe and give them the code.
    • Arrange for the letting agent or landlord to let them in.

    Once they're finished, the team will make sure the property is locked up securely. This frees you up to focus on the million other things you have to do when moving, knowing the cleaning is being handled properly. Honestly, this hands-off convenience is one of the biggest perks of hiring a pro.


    At Signal Cleaning, we provide a guaranteed, professional service designed to meet the strictest letting agent standards and help you get your deposit back. Book your end of tenancy clean in minutes with our easy online system. Find out more at https://signalcleaning.co.uk.

  • Your Weekly Cleaning Schedule Template That Works

    Your Weekly Cleaning Schedule Template That Works

    Think of a weekly cleaning schedule template as your secret weapon against household chaos. It's essentially a game plan that takes all those overwhelming chores and breaks them down into small, bite-sized tasks you can tackle daily and weekly. The goal? To keep your home consistently clean without sacrificing your entire weekend to a marathon cleaning session.

    How a Cleaning Schedule Can Bring Back Your Sanity

    That feeling of being completely swamped by a never-ending to-do list? We've all been there. A messy, chaotic home can quietly add a lot of stress to your life, but a simple, structured cleaning routine can turn that around, transforming your space into a place of calm. Instead of dreading the mountain of chores waiting for you on a Saturday morning, a good schedule helps you build small, manageable cleaning habits into your week.

    This isn't about chasing some unrealistic, show-home level of perfection. It's about finding a rhythm that actually works for you and your family. Picture this: spending just 20-30 minutes each weekday on a specific zone. Maybe Mondays are for bathrooms, and Tuesdays are for dusting and wiping surfaces. This approach stops the mess from ever getting out of hand and, most importantly, gives you your weekends back.

    The Real-World Mental Health Perks of a Tidy Home

    The benefits go way beyond just having a nice-looking house. When your home is clean and organised, it can genuinely help reduce anxiety and sharpen your focus – a massive plus, especially if you work from home in Oxford. It’s funny how when your physical space feels orderly, your mind tends to feel clearer and more productive, too.

    It’s clear that keeping on top of housework is a major priority for many. The demand is so high, in fact, that the UK's cleaning industry has become a huge sector. Around 17% of private households now hire professional help to keep things in order, which really shows how much we value a clean home for our well-being. You can dig deeper into the UK cleaning industry statistics on Policybee.co.uk.

    A great weekly cleaning schedule template doesn't just tell you what to clean; it gives you permission to stop cleaning. Once a task is done for the day, you can genuinely relax, knowing everything is under control.

    At the end of the day, a schedule like this is a tool for taking back your time and mental energy. It helps you create a peaceful home where you can properly switch off and unwind.

    Getting Your Custom Cleaning Template Just Right

    Image

    Let's be honest, those one-size-fits-all cleaning checklists you find online rarely stick. They weren’t designed for your house, your family’s routine, or the unique chaos of your life in Oxford. The only truly effective weekly cleaning schedule template is the one you create yourself, perfectly moulded to your home’s layout and your family’s rhythm.

    The best way to start is by putting on your detective hat. Take a walk through your home and really look at it. Where do the messes pile up the fastest? For most families I've worked with, it's the entryway where shoes and bags are dumped, the kitchen surfaces, and the main bathroom. These high-traffic areas are your "hotspots" and need a bit of daily attention. That spare room? It can probably wait for a quick weekly once-over.

    Sorting Your Tasks: Daily, Weekly, and Monthly

    Once you’ve identified your hotspots, the next step is to sort your chores into manageable chunks. This isn’t about creating a rigid, intimidating list; it’s about understanding what needs doing and when, so you never feel overwhelmed.

    I find it helps to group everything into three simple buckets:

    • Daily Tidies (The 15-Minute Reset): These are the small, quick jobs that stop clutter from taking over. Think wiping down kitchen counters after meals, making the beds each morning, or a quick sweep of the hallway floor.
    • Weekly Cleans (The Proper Jobs): This is where you put in a bit more effort. We’re talking about things like properly vacuuming the whole house, giving the bathrooms a thorough clean, changing the bed linen, and dusting all the main surfaces.
    • Monthly Deep Dives (The Big Stuff): These are the less frequent but equally important tasks that keep your home in great shape. This could be cleaning out the microwave, washing the inside of the windows, or wiping down all the skirting boards and light fittings.

    Breaking it down this way gives you a clear, realistic framework. You’re no longer faced with an endless list of "things to clean." Instead, you have a structured plan that prevents small messes from turning into a weekend-long chore.

    The biggest mistake people make is trying to deep-clean the entire house in one go. A good template is all about spreading the load. You assign specific, achievable tasks to different days, so you're only ever doing a little bit at a time.

    A well-structured list is a great starting point. Here's a sample table showing how you can start to categorise tasks for your own home. Use it as a guide to build a schedule that feels right for you.

    Sample Task Distribution by Room and Frequency

    Room/Area Daily Tasks (10-15 mins) Weekly Tasks (30-45 mins) Monthly Tasks (1-2 hours)
    Kitchen Wipe counters, wash up, sweep floor Mop floor, clean hob, wipe appliance fronts Clean inside oven, descale kettle, wipe cupboards
    Living Room Plump cushions, tidy clutter, fold throws Vacuum/mop, dust all surfaces, dust electronics Clean under furniture, wash cushion covers
    Bathrooms Wipe sink & taps, squeegee shower screen Clean toilet, shower & bath, mop floor, empty bin Deep clean grout, wash bath mat, clean cabinets
    Bedrooms Make beds, put clothes away Dust furniture, vacuum floor, change linen Organise wardrobe, flip mattress, dust light fittings

    This table isn't a set of rules, but a foundation. You can add, remove, or shift tasks to match how your family uses each space, creating a plan that genuinely works.

    Making It Fit Your Real Life

    Now for the most important part: making it work for you. Grab your family’s calendar and have a look at the week. Are you full of energy on a Monday morning or is that pure chaos? Perhaps you work from home on Thursdays, making it the perfect day to tackle the weekly bathroom clean while on a lunch break. If Tuesday evenings are a rush with after-school clubs, that’s probably not the night to schedule a big job.

    Getting the whole family involved is the secret to making any schedule stick. Even small children can help by putting their own toys away or helping to set the dinner table. When cleaning becomes a shared team effort instead of just one person's responsibility, the whole system feels lighter and you'll be teaching brilliant life skills along the way. The end goal is a flexible system that serves you, not the other way around.

    Building a Realistic Day-by-Day Cleaning Framework

    The secret to making cleaning feel less like a monumental chore is to build it into the rhythm of your week. I've found that the most successful approach, especially for busy Oxford families, is something called ‘zone cleaning’. Forget trying to clean the entire house in one go; instead, you focus on one specific area each day.

    This simple shift in strategy prevents those dreaded weekend-long cleaning marathons. By giving each part of your home focused attention on a regular basis, nothing ever gets too out of hand. For example, Monday could be your dedicated bathroom day, while Tuesday is all about dusting and vacuuming. On Wednesday, you might give the kitchen a proper deep clean. It’s a game-changer because no corner is left to gather dust for weeks on end.

    Image

    This visual is a great example of how you can map out your week, assigning a specific zone to each day. The real magic here is breaking the overwhelming task of "clean the house" into small, manageable chunks that you can actually achieve.

    A Sample Weekly Breakdown to Get You Started

    Think of this as a starting point. Feel free to move things around to fit your own life.

    • Monday: Bathrooms
      Give the toilets, showers, sinks, and floors a thorough clean. Getting this done early in the week feels like a real win.

    • Tuesday: Dust & Vacuum
      Go through every room with a duster and the hoover. This is a maintenance task that keeps the whole house feeling fresh.

    • Wednesday: Kitchen Focus
      Wipe down all appliances (inside the microwave!), give the hob a good scrub, and mop the floor.

    • Thursday: Bedrooms
      Change the bed linen, clear any cluttered surfaces, and put away stray clothes.

    • Friday: Floors & Final Tidy
      A quick mop of all hard floors, tackle any spots you missed during the week, and generally prep the house for a relaxing weekend.

    This structure also makes it easier to handle those never-ending tasks like laundry. Did you know that the average British household does around 6.3 laundry washes every two weeks? By slotting a load or two into your schedule on specific days, you can stop the laundry basket from overflowing. Integrating these recurring habits is what makes the whole system work. If you're curious about UK cleaning habits, YouGov has some fascinating survey results.

    The best cleaning schedule is one that works for you. If your living room is the family hub and gets messy fast, maybe it needs its own dedicated day. The goal is to create a rhythm that reduces stress, not a rigid set of rules that adds to it.

    Remember, life happens. If you miss a day, don't sweat it. Just pick up where you left off the next day. This is all about progress, not perfection.

    Choosing Your Cleaning Tools and Supplies

    Image

    Half the battle with cleaning is having the right gear on hand. Before you rush out and buy every specialised spray on the shelf, let's think about building a smart, effective toolkit. A well-chosen set of supplies is the secret weapon behind any successful weekly cleaning schedule template, ensuring you’re always ready without adding to the clutter.

    The big question is often whether to go for multi-purpose cleaners or task-specific products. Honestly, you need a bit of both. A good all-purpose spray is brilliant for most daily wipe-downs, but some jobs really do need a specialist. Think about the limescale build-up you get in an Oxford bathroom or a greasy hob after cooking a big Sunday roast – a dedicated product just works better and saves you from endless scrubbing.

    Curating Your Essential Cleaning Kit

    You don’t need an overflowing cupboard to keep your home sparkling. Focus on a core set of high-quality basics that genuinely make a difference. Here’s what I’d recommend starting with:

    • High-quality microfibre cloths: These are a must-have. They properly trap dust and dirt instead of just pushing it around, and you can use them on everything from windows to worktops.
    • A reliable vacuum cleaner: Whether you prefer a powerful upright for deep cleans or a lightweight cordless for zipping around, a good hoover is your best friend.
    • A versatile all-purpose cleaner: This is your go-to for quick spills and giving most surfaces a daily once-over.

    The goal is to equip yourself with tools that work hard so you don’t have to. Investing in a few quality items is more effective than having a cupboard overflowing with cheap, single-use products.

    This idea of smart, effective cleaning is definitely catching on. The UK household cleaner market is predicted to reach about US$1.60 billion by 2025, and there's a huge shift towards eco-friendly and sustainable options. People are looking for products with natural ingredients and less packaging, which you can read more about on Statista.com.

    Of course, some messes need a bit more know-how. For those trickier jobs, our guide on how to remove stubborn stains has some brilliant tips.

    Making Your Cleaning Routine Stick

    You’ve got your weekly cleaning schedule template sorted. That’s a brilliant start, but the real challenge—and where the magic happens—is making it a habit. The aim isn't just a tidy home this week; it's about creating a system that genuinely works for you and your family month after month.

    This is where a few simple, powerful mini-habits can make all the difference. Think of them as the glue that holds your schedule together, stopping those little messes from snowballing into weekend-destroying chores.

    Weave in Some Powerful Mini-Habits

    Two of my absolute favourite habits are the '15-minute nightly reset' and the 'one-touch rule'. The nightly reset is exactly what it sounds like: a quick blitz before bed. You'd be amazed what you can get done in just 15 minutes – clearing kitchen counters, putting cushions back, and getting things ready for the morning.

    The 'one-touch rule' is even simpler but just as effective. Instead of dumping the post on the table to sort later, you deal with it immediately. When you take your coat off, you hang it up straight away. These tiny actions are your secret weapon against clutter.

    Life in Oxford gets hectic, and let's be honest, perfection is impossible. The real key here isn't about ticking every single box every single week. It's about consistency over perfection. Your schedule is a guide, not a stick to beat yourself with.

    Keep Your Schedule Fresh and Relevant

    Life changes, and your cleaning schedule should change with it. The routine that works perfectly now might not fit in six months' time, especially with kids' activities or work commitments shifting. Plan to give your template a quick review every few months to make sure it still makes sense.

    • Plan for the Big Jobs: Don't let huge tasks derail your weekly rhythm. Schedule those seasonal deep cleans—like washing the windows or deep cleaning the carpets—on a separate calendar. Blocking out one weekend a quarter usually does the trick.
    • Be Flexible: Sometimes life just gets in the way. If you miss a task or even a whole day, don't sweat it. Just pick back up when you can. This is supposed to reduce your stress, not add to it.

    At the end of the day, making your routine stick is all about building a system that feels supportive, not punishing. And for those times when a seasonal clean feels overwhelming or you just need a proper reset, remember you can always get some help. It's easy enough to look into booking a professional clean in Oxford to get your home back to a brilliant baseline.

    Your Cleaning Schedule Questions, Answered

    Even with the perfect template, you're bound to run into a few real-world snags. That's completely normal when building a new habit. Let's walk through a couple of the most common questions we hear from busy Oxford households.

    How Can I Get My Family or Flatmates to Help?

    This is the big one, isn't it? Getting everyone on the same page can feel like an uphill battle, but the key is to make it a team effort.

    Instead of just handing down a list of chores, sit down and create the schedule together. This simple shift gives everyone a sense of ownership. A great little trick I've learned is to let people pick the jobs they least despise. Someone might not mind cleaning the loo but hates doing the washing up – it’s an easy win.

    With kids, a classic reward chart is still surprisingly effective. For flatshares, agreeing on who does what and sticking the schedule on the fridge acts as a constant, gentle nudge.

    A cleaning schedule is a tool for teamwork, not a source of tension. A quick, friendly check-in each week works far better than constant nagging. It keeps everyone accountable and the atmosphere positive.

    What Happens When I Inevitably Fall Behind?

    Life happens. A busy week, an unexpected deadline, or just feeling a bit under the weather can throw your whole schedule off. The most important thing? Don't panic.

    Whatever you do, don't try to cram a week's worth of missed chores into a single day. That's a surefire recipe for burnout. Just pick up where you are on the current day and move forward. The world won't stop spinning if the hoovering is a day late.

    If you're feeling completely swamped, just focus on a few "reset" tasks. Wiping down the kitchen surfaces, getting one load of laundry done, and a quick clean of the bathroom can make a huge difference. Remember, your schedule is a guide, not a contract. For more home maintenance tips, have a look at the helpful articles on the Signal Cleaning blog.


    When life just gets too hectic, let the professionals take the weight off. Book your next clean with Signal Cleaning at https://signalcleaning.co.uk.

  • Find Top Spring Cleaning Services Near Me | Get a Fresh Start

    Find Top Spring Cleaning Services Near Me | Get a Fresh Start

    When you find yourself typing spring cleaning services near me into a search bar, you’re not alone. More and more households across the UK are making the switch, moving away from the old-school, do-it-yourself marathon and embracing a practical solution that saves a huge amount of time while delivering a truly professional finish. Think of it as an investment in your home's health and, just as importantly, your own peace of mind.

    Why More UK Homes Are Hiring Professional Spring Cleaners

    We all know the tradition of the annual spring clean—a heroic effort of scrubbing, dusting, and decluttering. But let's be honest, in today's world of jam-packed schedules, demanding jobs, and family life, who really has the time? The reality is that finding the energy, let alone the motivation, for such a huge job is a massive ask.

    This is precisely where professional help comes into its own. What was once seen as a bit of a luxury is now a smart, practical choice for countless people. It’s all about getting your precious weekends back and knowing the job will be done to a standard that’s pretty tough to hit on your own. A professional team doesn’t just show up with a cloth and a bottle of spray; they arrive with specialised equipment, powerful cleaning products, and the know-how to deal with grime in all the places we tend to forget.

    Beyond the Surface Tidy

    There’s a world of difference between a quick wipe-down and a deep, restorative clean. A professional spring clean gets into all the nooks and crannies, targeting the dust, allergens, and bacteria that have settled in over the winter months. We’re talking about the jobs that often get put off indefinitely:

    • Getting inside the oven until it genuinely sparkles.
    • Washing down all the skirting boards and door frames.
    • Descaling taps and showerheads until they shine like new.
    • Dusting those awkward, hard-to-reach spots like the tops of kitchen cupboards and light fittings.

    This isn’t just about making things look nice; it creates a much healthier living space. Clearing out all those hidden allergens can dramatically improve your home’s air quality, which is a game-changer for families with children or anyone who suffers from allergies.

    By handing over this mammoth chore, you're not just buying a clean house. You're investing in a sense of calm, a healthier environment for your family, and the freedom to spend your time on things you actually enjoy.

    At the end of the day, the growing search for spring cleaning services near me is all about getting better results, more efficiently. It’s a simple acknowledgement that some jobs are just better left to the experts, letting you step back and enjoy a properly refreshed and revitalised home without any of the stress.

    What a Professional Spring Clean Actually Delivers

    It’s easy to think a professional spring clean is just a more thorough version of your usual Saturday morning blitz. But honestly, that’s like comparing a quick car wash to a full MOT and service. One makes things look good on the surface; the other gets right into the nuts and bolts to restore everything to its best working order.

    When you bring in professional spring cleaning services, you're paying for a level of detail that genuinely resets your home. It goes way beyond just hoovering the floors and wiping down the counters. Think of it as a complete, top-to-bottom refresh for the season ahead.

    From the Big Jobs to the Smallest Details

    Professional cleaners dive straight into the tasks we all love to put off. They’ll pull out heavy appliances like the fridge and washing machine to get at the years of dust and lost crumbs hiding behind them. The inside of your oven? They’ll tackle that too, getting rid of all the baked-on grease that a normal spray-and-wipe just can’t shift.

    But the real magic is in the details – the little things that often go unnoticed but make a huge difference. A professional team works methodically, room by room, making sure nothing is missed.

    • Skirting Boards and Door Frames: No more scuffs and dust bunnies. They get wiped down properly.
    • Light Switches and Sockets: All those grimy fingerprints and germs are sanitised away.
    • Interior Windows and Sills: Cleaned and polished to let that beautiful spring light flood in.
    • Radiators: Dusted inside and out, which is not only better for air quality but can even help your heating work more efficiently.

    This isn’t just about aesthetics; it’s about creating a healthier, more pleasant space to live in, as you can see below.

    Image

    As the image shows, the benefits go far beyond a tidy-looking home. It's about improving your environment and freeing up your time.

    To really see the difference, it helps to compare the tasks side-by-side. Your regular clean keeps things ticking over, but a spring clean is a deep-dive restoration.

    Comparing a Standard Tidy-Up to a Deep Spring Clean

    Cleaning Area Standard Clean Task Spring Clean Task (Includes Standard +)
    Kitchen Wipe counters, clean sink, mop floor Deep clean oven, degrease hood, clean inside cupboards, descale taps
    Bathroom Clean toilet, wipe sink, clean mirror Scrub grout lines, descale shower head/screen, sanitise all surfaces
    Living Areas Dust surfaces, vacuum carpets Clean behind furniture, wipe skirting boards, wash interior windows
    General Empty bins, general tidying Clean light fittings, sanitise switches & door handles, dust radiators

    This table just scratches the surface, but it gives you a good idea of the extra mile a professional service goes. It’s all about tackling the built-up grime that routine cleaning can’t touch.

    The Kitchen and Bathroom Deep Dive

    Nowhere is the difference more obvious than in the kitchen and bathroom. These are the high-traffic, high-grime areas that need some serious attention to be properly sanitised.

    A professional spring clean isn’t just about making your home look good. It's about removing hidden dirt and allergens, creating a healthier environment for you and your family to enjoy. This deep clean revitalises your space in a way that weekly tidying simply cannot match.

    In the kitchen, cleaners will get the grease off your cooker hood, properly clean the inside of your cupboards, and give all your worktops a full sanitisation. They’ll also tackle the stubborn limescale on taps that can make even a clean sink look dull. Some messes are trickier than others, which is why we’ve put together a guide on how to remove stubborn stains.

    It’s a similar story in the bathroom, where the focus is on total hygiene. A professional will scrub grout lines to get rid of mould and mildew, descale the shower screen until it gleams, and deep-clean the toilet. This isn't just about appearances; it’s about creating a genuinely more hygienic space for your family. That's the expert touch that sets a professional spring clean apart.

    What You Really Gain by Outsourcing Your Spring Clean

    Image

    Getting your weekend back is, of course, the most obvious win when you hire professional spring cleaning services. But let's be honest, the real value goes much deeper than just saving a few hours. When you hand the job over to the experts, you unlock some serious perks that make your home healthier and your life a whole lot easier.

    Think of it this way: you wouldn't try to fix your own car engine without the right tools and know-how. Professional cleaners are specialists for your home. They’ve seen it all and know exactly which product to use on your delicate marble worktops versus the hard-wearing laminate in the utility room. This kind of expertise means they get a perfect finish without the risk of you accidentally damaging something with the wrong chemical.

    A Genuinely Healthier Home

    One of the biggest, yet often overlooked, benefits is the dramatic improvement in your home's air quality and overall health. All winter long, with the windows shut tight, allergens, dust, and even mould spores have been settling into your carpets, furniture, and all those forgotten corners. A proper deep clean is designed to tackle these problems head-on.

    • Proper Allergen Removal: Pros use high-powered vacuums with HEPA filters that trap tiny particles a standard hoover just recirculates back into the air.
    • Mould and Mildew Prevention: They know exactly where to look for damp in bathrooms and kitchens, getting rid of nasty spores before they become a bigger issue.
    • Deep Sanitisation: Using professional-grade products, they effectively eliminate bacteria and viruses from doorknobs, light switches, and other high-touch spots.

    It’s not just about appearances. This is about creating a space that’s fundamentally better for you and your family to live and breathe in, especially if anyone suffers from allergies or asthma.

    A professionally cleaned home isn't just tidy—it's a sanctuary. Clearing out all the hidden grime and allergens creates an environment that truly supports your family’s well-being and helps lower stress.

    The Mental Boost of a Fresh Start

    You can't put a price on the feeling of walking into a completely fresh, organised, and sparkling home. It’s an instant mood lift. That sense of order helps clear away the mental clutter, letting you relax and focus on what matters. It’s a powerful reset button that sets a positive tone for the rest of the season.

    And there's another angle to consider. Hiring a local service means you're investing directly in your community. The UK cleaning industry is huge, employing around 1.47 million people in 2023, with the vast majority of companies being small, independent businesses. You can read more about the sector's impact and find other interesting facts in this overview of UK cleaning industry statistics.

    How to Choose the Right Local Cleaning Service

    Typing "spring cleaning services near me" into a search engine is easy. What’s not so easy is sifting through the dozens of results to find a company you can actually trust with your home. It can feel like a chore in itself, but getting it right means you get a sparkling home and complete peace of mind.

    So, how do you sort the pros from the rest? Let's break it down.

    First things first, look past the slick website and get straight to the essentials: insurance. A reputable company must have public liability insurance. This isn't just a nice-to-have; it protects your home and belongings against any accidental damage. Think of it as your safety net.

    Before you even consider getting a quote, ask for proof of their insurance policy. Any professional service worth its salt will have this ready to share without a moment's hesitation. If they get cagey or can't provide it, that's your cue to walk away.

    Digging into Reviews and Reputation

    Now it's time to do a bit of detective work. The testimonials on a company's own website are always going to be glowing, so you need to look for the real story elsewhere. Check out recent, independent reviews on platforms like Google, Trustpilot, or even local Facebook groups. This is where you'll find a far more balanced picture of their service.

    Pay close attention to how a company handles criticism. Do they respond to negative feedback constructively and offer to put things right? A provider that engages with unhappy customers shows they stand by their work and genuinely care about their reputation. That tells you more than a dozen five-star reviews.

    You’ll also want to make sure they actually operate in your neck of the woods. For instance, you can see the areas we serve to check if we’re local to you. A truly local company will have roots and a reputation built within your community.

    Asking the Right Questions Before You Book

    Once you have a shortlist, it's time to pick up the phone or send an email. A few direct questions now can save you a lot of headaches later. Getting clarity on the specifics ensures there are no nasty surprises when the bill arrives.

    Here’s what you absolutely need to ask:

    • Do you bring your own supplies and equipment? Professionals should arrive fully equipped with their own high-grade products and tools. You shouldn't have to provide a thing.
    • What, exactly, is included in your spring clean? Ask for a detailed checklist. Does it cover the oven, inside windows, or behind the fridge? Don't assume.
    • How do you charge? Is it a flat fee for the job or an hourly rate? Always ask for a comprehensive quote with no hidden extras.
    • Are your staff trained and background-checked? You're letting these people into your home, so you have to be able to trust them.
    • What happens if I'm not happy? A good company will have a satisfaction guarantee and will offer to fix any issues right away.

    Choosing a cleaning service is about more than just a tidy home; it's about trusting professionals to care for your personal space. Taking the time to properly vet a company ensures you get the quality and reliability you deserve.

    This kind of careful vetting is becoming the norm. Outsourcing a deep clean is no longer a luxury; it's a standard practice for busy households and businesses alike. In fact, a growing number of UK companies are ditching in-house teams for specialist cleaning providers. This trend, as detailed in these commercial cleaning trends on mnssltd.co.uk, highlights the real value of professional expertise. It just goes to show that when you need a job done right, calling in the experts is the way to go.

    Preparing Your Home for the Cleaning Crew

    Image

    To get the most out of your professional spring clean, a little bit of prep work goes a very long way. Think of it like a decorator clearing a room before they start painting—it just lets them get straight to the important stuff. The goal isn't to clean before the cleaners arrive, but to clear the decks so they can work their magic.

    This simple groundwork means the team can spend 100% of their time on the deep-cleaning jobs you hired them for. Instead of spending precious minutes tidying, they can focus on scrubbing grout lines and degreasing the oven, which ensures you get the best possible value for your money.

    A Simple Pre-Arrival Checklist

    Running through these quick steps before your appointment can make a huge difference to the final result.

    • Declutter All Surfaces: Clear off the countertops, coffee tables, and desks. Piles of paperwork, toys, and general bits and bobs just get in the way, preventing the team from properly wiping, polishing, and sanitising those surfaces.
    • Provide Clear Access: Make sure the floors are free of obstacles. Picking up clothes, shoes, or bags gives the cleaners a clear run to vacuum and mop every corner of the room without having to navigate an obstacle course.
    • Secure Your Pets: A group of new people with hoovers and other equipment can be a bit much for our furry friends. It’s usually best to pop them in a single room or crate with their food, water, and a favourite toy. This keeps them safe, happy, and out from underfoot.

    Taking just a few minutes to prepare lets the cleaning crew concentrate entirely on the deep cleaning. It results in a far more thorough job and shows a bit of respect for their time and expertise, making the whole experience smoother for everyone.

    Communicating Your Priorities

    Every home is different, and you know yours best. Maybe you've got a stubborn patch of limescale on the shower screen, or a few scuff marks in the hallway have been bugging you for months.

    Jot down a quick list of these "problem areas." When the team arrives, take a moment to walk them through your priorities. This clear communication helps them focus their skills exactly where you need them most, so you get the results you're truly hoping for. It's a key step when booking professional spring cleaning services near me, as it helps tailor the service to your home.

    If you’re ready to get started, you can get a quote and schedule your cleaning service online in just a few clicks.

    Your Spring Cleaning Service Questions Answered

    Deciding to bring in professional cleaners is a big step, and it’s completely normal to have a few questions before you commit. When you start searching for "spring cleaning services near me," you want clear, straightforward answers to feel good about your choice.

    We’ve pulled together the most common questions we hear to give you all the information you need. Think of this as your go-to guide for taking the guesswork out of the process. From costs to timings, let's get into the details.

    How Much Should I Expect to Pay for a Spring Clean in the UK?

    This is nearly always the first question on everyone's mind, and the honest answer is: it depends. The cost of a proper deep spring clean hinges on a few things – namely, the size of your home, its current condition, and where you are in the UK.

    Generally, you'll find that professional cleaning companies charge in one of two ways:

    1. By the hour: This is a common approach, with rates usually falling between £15 and £25 per hour, per cleaner. So, a team of two would cost you somewhere in the region of £30 to £50 per hour.
    2. A flat fee: Some companies will give you a fixed price for the whole job after getting a sense of what’s needed. This can be great for budgeting, as you know the final cost upfront.

    To put that into perspective, a full spring clean for an average three-bedroom house could land anywhere between £150 and £400. The best advice? Always get a few detailed, written quotes from local companies. It lets you compare not just the price, but exactly what’s included for your money.

    Will I Need to Supply My Own Cleaning Products?

    In a word, no. One of the biggest perks of hiring a professional service is that they turn up with everything they need to get the job done right. They’ll have their own professional-grade cleaning solutions and specialised gear, from high-powered vacuums with HEPA filters to the right stuff for cutting through tough limescale and grease.

    It means you don’t have to worry about a thing. That said, it never hurts to double-check when you book.

    A reputable cleaning service will always arrive fully equipped. If you have any special requirements, like a preference for eco-friendly or allergy-safe products, just let them know beforehand. Most good companies are more than happy to accommodate.

    This is all part of the service – ensuring they use the best products for every surface to get your home looking its best, efficiently and safely.

    How Long Will a Professional Spring Clean Take?

    The time it takes is tied directly to the size of your property and how much work is involved. A larger house or a home that hasn't had a deep clean for a while is naturally going to take more time.

    As a rough guide, a team of two cleaners could spend anywhere from 4 to 8 hours carrying out a thorough spring clean on a standard three-bedroom house. Things like heavy clutter, serious grime build-up in the kitchen or bathroom, or any extra services you’ve requested – like cleaning inside the fridge or washing interior windows – can add to the clock. Any reliable company should be able to give you a solid time estimate along with their quote.

    What if I Am Not Happy with the Result?

    Your satisfaction should be the number one priority for any cleaning service worth its salt. Before you hire anyone, be sure to ask what their policy is for dealing with any issues. A truly professional company will always have a satisfaction guarantee.

    So, what does that actually mean? It usually means they'll offer to send the team back to re-clean any areas you're not happy with, at no extra cost to you. There’s typically a time limit on this, often asking you to get in touch within 24 to 48 hours of the original clean.

    This guarantee isn't just a nice-to-have; it's a sign you're dealing with a reliable, customer-focused business that stands by its work.


    Ready to experience a professionally cleaned home without lifting a finger? The team at Signal Cleaning is here to deliver a sparkling, refreshed space you'll absolutely love. Get your free, no-obligation quote and book your service online in just a few clicks at https://signalcleaning.co.uk.

  • How to Clean House Fast A Guide for Busy People

    How to Clean House Fast A Guide for Busy People

    Knowing how to clean your house fast isn't about rushing around like a whirlwind. It really boils down to two things: working smart and having a plan before you even pick up a cloth. The real secret isn't frantic scrubbing; it's using a methodical approach that cuts out wasted time and effort.

    Your Speed-Cleaning Game Plan

    What separates an exhausting, all-day cleaning slog from a quick, satisfying blitz? Strategy. Trust me, professional cleaners don’t just start wiping things at random. They follow a tried-and-tested system, and you can absolutely do the same to reclaim your weekends. Before you even think about sprays and sponges, just take a minute to map out your attack.

    This is where the magic happens. Instead of bouncing from one messy spot to another, you’ll move with purpose. It’s about creating a flow that stops you from having to clean the same spot twice.

    Always Work From Top to Bottom

    If you take only one tip away from this, make it this one. Always clean from top to bottom, and from left to right around a room. It's simple physics: dust and crumbs fall down.

    Think about it. You wouldn't vacuum the living room floor and then dust the ceiling fan and bookshelves, would you? All that dust would just settle on your nice, clean carpet, and you'd have to get the vacuum out all over again. Start high—with light fittings, the tops of cupboards, and curtain rails—and let gravity do the work for you. You'll only have to clean each surface once. There’s a reason the pros swear by this method: it just works.

    Batch Your Tasks for Maximum Efficiency

    Here’s another trick that will completely change your cleaning routine: task batching. Instead of cleaning one room completely before starting the next, you group all the similar jobs together and do them in one go across the whole house.

    • Do a Dusting Run: Grab your duster and go through every single room, wiping down all the surfaces from, you guessed it, top to bottom.
    • Tackle Glass and Mirrors: Next, arm yourself with glass cleaner and a good cloth and hit every mirror, interior window, and glass tabletop in the house.
    • Finish with the Floors: Finally, do all the vacuuming or mopping in one continuous session, moving from room to room until it's all done.

    Sticking to one task at a time helps you get into a rhythm. You're using the same tools and motions, which cuts down on the mental energy and time you'd waste stopping and starting. If you're consistently stretched for time, you could always look into professional cleaning packages that fit your schedule.

    Building Your Ultimate Speed Cleaning Toolkit

    To really clean your house fast, you need more than just a good plan; you need the right tools that work as hard as you do. Forget having an overflowing cupboard stuffed with single-use gadgets and a dozen different chemical sprays. A minimalist, high-impact toolkit is all it takes to move seamlessly from one job to the next without breaking your rhythm.

    Image

    The absolute foundation of any speed cleaning kit is a set of high-quality microfibre cloths. These aren't just any old rags; their unique fibres are brilliant at trapping dust and dirt instead of just pushing it around. I use them dry for dusting and then just slightly damp for wiping down surfaces to get a streak-free shine every time.

    The Essentials for Rapid Results

    Next up, grab a squeegee. Honestly, it’s not just for windows! A good squeegee makes short work of shower doors, mirrors, and even tiled walls, slashing your bathroom cleaning time. Pair it with a simple all-purpose cleaner that you can use on most surfaces, and you'll stop juggling different bottles.

    Your toolkit isn't complete without a powerful, lightweight vacuum cleaner. A cordless stick vacuum is a real game-changer, letting you move freely from room to room without being tethered to a socket. If you can, get one with versatile attachments that can quickly switch from hardwood floors to the sofa.

    My top tip? Keep your core supplies organised in a portable caddy. It’s a simple habit that means you can carry everything with you, which stops you from wasting time walking back and forth to the cupboard to grab another product.

    With a focused kit like this, you’re always prepared. While these tools tackle everyday grime with ease, some spots will inevitably need extra attention. For guidance on those tougher jobs, you can learn more about how to remove stubborn stains from our detailed article.

    The 60-Minute Full-House Blitz

    Right, this is where the magic happens. We're going to put your strategy and cleaning kit to the test with a high-energy, 60-minute cleaning blitz. Let's be clear: this isn't about deep cleaning every nook and cranny. It's about a focused, high-impact routine that makes your whole house feel fresh and organised in about an hour. Knowing how to clean your house fast is all about building momentum and hitting the tasks that give you the biggest visual payoff.

    The trick is to set a timer and actually stick to the schedule. You’ll be genuinely surprised at what you can get done when you work with real purpose. This routine hones in on the rooms guests see first and where your family spends most of their time.

    Kitchen: The 20-Minute Refresh

    The kitchen is the heart of the home, but it often becomes the epicentre of mess. Starting here makes a massive difference, fast.

    Your first job is to clear every single counter. Put away the toaster, stack dirty dishes by the sink (or even better, load them straight into the dishwasher), and get any rubbish in the bin. Once the surfaces are clear, grab your all-purpose spray and a microfibre cloth. Wipe everything down, including the hob and splashback.

    Finish with a quick sweep or vacuum of the floor to catch any crumbs. Don't even think about mopping right now—the goal is simply a visibly tidy space.

    Bathrooms: The 15-Minute Tidy

    You can get a bathroom looking great in no time if you focus on the right spots. Give the toilet a quick scrub with a brush and some cleaner. While that’s working its magic, use a cloth to wipe down the outside of the toilet, the cistern, the sink, and the taps.

    Next, spray and wipe the mirror until it’s streak-free. A clean mirror instantly makes a bathroom feel brighter and much cleaner. A final, quick sweep of the floor and you’re done.

    My Pro Tip: For a rapid bathroom clean, I always focus on the 'big three'—the toilet, the sink, and the mirror. These are the areas that make the most immediate impression and give you that satisfying feeling of a truly clean room.

    Here’s a quick visual guide to the key focus points for your rapid cleaning routine.

    Image

    The illustration highlights the high-impact zones that deliver the biggest visual reward for the effort you put in.

    Living Areas and Bedrooms: The 25-Minute Reset

    With the remaining time, it’s time to fly through your main living spaces and bedrooms with a clear plan.

    • Tackle the Surfaces: Quickly tidy coffee tables, bedside tables, and any other flat surfaces. Straighten books and stack magazines in a neat pile.
    • Plump and Straighten: Fluff up sofa cushions and neatly fold any throws or blankets. This small action makes a huge difference to how a room feels.
    • Dust and Vacuum: Give the main furniture a quick once-over with a duster, then run the vacuum over all the floors. Pay special attention to the areas where people walk the most.

    The demand for efficient home cleaning is growing right across the UK. It’s no surprise that floor care commands a whopping 31.89% of the cleaning services market revenue, which just shows how much clean floors matter to us. You can learn more about trends in the UK's residential cleaning market and see how professional techniques are constantly adapting.


    To help you visualise this, here’s a simple timetable for your 60-minute blitz.

    The 60-Minute Blitz Timetable

    This table breaks down how to allocate your precious 60 minutes for the best results.

    Room/Area Allocated Time (Mins) Priority Tasks
    Kitchen 20 Clear all counters, wipe down surfaces/hob, sweep or vacuum the floor.
    Bathroom(s) 15 Clean the toilet, wipe the sink and taps, shine the mirror, sweep the floor.
    Living Room & Bedrooms 25 Declutter surfaces, plump cushions/throws, quick dust, vacuum all floors.

    Sticking to a plan like this is the secret to getting a huge amount done in a short space of time. It keeps you moving and prevents you from getting bogged down in one area.

    Daily Habits That Keep Your Home Cleaner for Longer

    While a big weekend clean has its place, the real trick to cleaning your house fast is doing less, more often. It’s all about stopping the mess from piling up in the first place. By weaving a few simple habits into your daily routine, you can slash your overall cleaning time and make those bigger jobs feel a lot less daunting. Think of it as shifting from a weekend cleaning marathon to a series of quick daily sprints.

    The most effective habit I’ve ever adopted is the "one-minute rule." It’s simple: if a task takes less than a minute, just do it then and there. Wipe the kitchen counter after you make a sandwich. Hang your coat up as soon as you get home. Put your shoes back on the rack. These tiny actions prevent small messes from turning into an overwhelming weekend project.

    Image

    The 15-Minute Nightly Reset

    Another brilliant strategy is what I call the "15-minute nightly reset." Before you settle down for the evening or head to bed, just set a timer for 15 minutes and have a quick whip-round of the main living areas. This isn’t about deep cleaning; it’s a surface-level tidy to reset the space for the morning.

    • Living Room: Plump up the sofa cushions, fold any throws, and clear mugs or magazines off the coffee table.
    • Kitchen: Pop the last few dishes in the dishwasher, give the counters a quick wipe, and sweep up any obvious crumbs.
    • Hallway: Tidy away the shoes, bags, and post that always seem to gather by the front door.

    Waking up to a reasonably tidy house really does set a better tone for the entire day. It’s a small investment of time that pays off handsomely by stopping yesterday's clutter from becoming today's problem.

    The goal is to maintain a baseline level of tidiness. That way, your proper cleaning time is spent actually cleaning—tackling dust and grime—not just fighting through clutter before you can even begin.

    It's clear that people are looking for smarter ways to manage their homes. The UK's cleaning and hygiene industry soared to nearly £66.9 billion in 2025, with over 77,535 businesses meeting this demand. This boom shows a collective desire for faster, more effective methods to keep our living spaces in order. You can discover more about the expanding UK cleaning industry and its shift towards efficiency.

    Common Speed Cleaning Blunders to Sidestep

    Even with the best intentions, a few common habits can completely derail your mission to clean the house fast. Nailing down these missteps is the secret to unlocking genuine efficiency. One of the biggest time-sinks I see is when people try to clean *around* their clutter instead of clearing surfaces first.

    Just picture it: you're trying to wipe down a coffee table piled high with magazines, remote controls, and half-empty mugs. You'll spend more time shuffling things around than you will actually cleaning. The same goes for floors. A quick five-minute tidy-up before you start can honestly save you twenty minutes of frustration later on.

    Not Letting Your Products Do the Hard Graft

    Another classic mistake is impatience. It's so tempting to spray a cleaner and immediately start scrubbing for all you're worth. The thing is, most cleaning products need a few minutes to get to work breaking down grime and soap scum. This is often called "dwell time."

    Just let your bathroom or kitchen spray sit for 5-10 minutes while you go and do something else, like emptying the bins. When you come back, a gentle wipe is often all that’s needed, saving you a surprising amount of time and elbow grease.

    Key Takeaway: The goal of speed cleaning isn't just about moving faster—it's about cutting out wasted energy. Letting your products work for you is the perfect example of cleaning smarter, not harder.

    The demand for efficient, specialised home maintenance is really taking off. In fact, the UK cleaning industry now contributes around £59 billion in annual turnover, a figure that shows just how much we all want cleaner homes without spending ages on them. You can discover more insights about UK cleaning statistics and see for yourself how the sector is changing.

    Your Fast Cleaning Questions Answered

    Even the best-laid cleaning plans can leave you with a few lingering questions. When you're up against the clock, knowing how to handle those common "what if" scenarios is key. Let's tackle some of the most frequent queries I hear from homeowners trying to master a quick clean.

    Think of this as your rapid-fire troubleshooting guide.

    What Can I Realistically Do in Just 15 Minutes?

    Right, guests are on their way and you've got 15 minutes. Forget deep cleaning; this is all about high-impact triage. The aim is to create an immediate impression of tidiness.

    Here's my go-to emergency plan:

    • In the kitchen, get everything off the worktops. Stack dirty dishes in the dishwasher and give the surfaces a quick wipe.
    • For the living room, plump the cushions, fold any blankets or throws, and clear away obvious clutter like mugs or magazines.
    • Head to the bathroom for a quick sink and mirror wipe-down. A quick swish of the toilet brush is a must.

    These tiny actions pack a visual punch, making your home feel instantly more put-together.

    Should I Clean One Room at a Time, or One Task at a Time?

    For pure speed, task batching wins every time. It’s far more efficient to stick to one job and do it everywhere. Think about it – grabbing the duster and hitting every surface in the house means you're in that specific mindset. You're not constantly stopping to put away one tool and grab another.

    My advice is to think like a production line. Do all your dusting first. Then all the glass and mirrors. Finally, tackle all the floors at once. It streamlines the whole process and seriously cuts down on wasted time and energy.

    Which Jobs Can I Get Away With Skipping?

    Let's be realistic – when you're really pushed for time, you can't do it all. The trick is knowing what to let slide.

    Focus on what people actually see and notice. You can absolutely get away with skipping tasks like dusting the skirting boards, wiping down individual light switches, or cleaning the inside of the microwave. Prioritise the things that make your home feel clean and fresh, like clutter-free surfaces, a gleaming kitchen sink, and a tidy bathroom.

    For more practical advice on keeping your home looking its best with less effort, feel free to browse the other articles on our Signal Cleaning blog.


    Ready to reclaim your weekends for good? Let the professionals at Signal Cleaning handle the hard work. Book your professional home clean in Oxford today and enjoy a spotless home without lifting a finger.

  • A Complete Guide to Steam Cleaning Solutions

    A Complete Guide to Steam Cleaning Solutions

    Fed up with stubborn grime and that sharp, chemical smell that lingers after cleaning? What if the best cleaning solution wasn't a cocktail of chemicals, but just plain water? That’s the simple-yet-powerful idea behind steam cleaning, which turns ordinary tap water into a superheated, sanitising force that deep cleans without any toxic aftermath.

    A Healthier Home, Unlocked by Steam

    Picture this: getting your home sparkling clean using nothing more than hot vapour. This is the magic of modern steam cleaning, a method that’s quickly winning over everyone from professional cleaners to busy homeowners. It's a way to ditch the cluttered cupboard of chemical sprays for one single, highly effective tool.

    The process itself is surprisingly simple. A steam cleaner heats water far beyond boiling, often pushing it to 120°C or even higher. This creates a very hot, low-moisture vapour. When you point this pressurised steam at a surface, it gets to work in two brilliant ways.

    Image

    How Steam Obliterates Grime and Germs

    First, that intense heat melts away grease and loosens dirt that’s been baked on for ages. It works by breaking down the very bonds that hold the muck to the surface. It’s a bit like running a hot knife through cold butter – the grime just gives way, making it effortless to wipe away messes that would normally need some serious elbow grease and harsh chemicals.

    Second, and this is where it gets really clever, the high temperature is a natural sanitiser.

    The heat from a quality steam cleaner can kill up to 99.9% of common household bacteria, viruses, and allergens like dust mites. This is thermal sanitation at its best, giving you a level of clean that chemicals often can't, all without leaving any nasty residue behind.

    This one-two punch of cleaning and sanitising is what really makes steam stand out. It tackles the dirt you can see and the germs you can't, making your home a genuinely healthier place to be. If you've got kids, pets, or anyone in the family with allergies or chemical sensitivities, this is a game-changer. You get total peace of mind, knowing your home is disinfected the natural way.

    How Steam Actually Gets Things So Clean

    To really get why steam cleaning works so well, you have to appreciate the simple science behind it. Forget thinking about traditional mops and sprays; this is more like giving your surfaces a deep-cleansing, high-pressure facial. It all starts with turning regular tap water into a powerful cleaning tool.

    A steam cleaner takes water way past its boiling point, often pushing it to 120°C or even higher. This creates a superheated, low-moisture vapour that we often call ‘dry steam’. When this pressurised steam hits a surface, the magic happens. The tiny water vapour molecules are minuscule compared to a droplet from a spray bottle, letting them get deep into microscopic pores and cracks that cloths and chemical cleaners just glide right over.

    Breaking Down Grime on a Molecular Level

    The real star of the show is the intense heat. It works by instantly shattering the bonds that make dirt, grease, and grime cling to surfaces. Think about trying to get stubborn grease off a pan with cold water versus hot water – the heat does all the heavy lifting. Steam just takes that idea to a whole new level, melting away tough messes without any need for harsh scrubbing or nasty chemicals.

    This molecular breakdown means dirt and other gunk can be wiped away with a simple microfibre cloth, leaving the surface looking brand new. It’s a game-changer for those notoriously tricky spots:

    • Tile Grout: Steam effortlessly blasts out the grime and mildew that collects in porous grout lines.
    • Oven Grease: Baked-on food and grease that would usually need a powerful chemical solvent just dissolve under the heat.
    • Upholstery Stains: The steam gets right into the fabric fibres, releasing trapped dirt and getting rid of lingering odours from pets or spills.

    The Power of Thermal Sanitising

    But steam cleaning goes beyond what you can see. It delivers a much deeper level of hygiene. The sheer temperature of the vapour is a powerful weapon against the invisible germs and allergens hiding around your home. We call this thermal sanitising.

    When you use it properly, the heat from a steam cleaner can kill up to 99.9% of common household bacteria, viruses, germs, and allergens like dust mites and mould spores.

    And the best part? It does all this without a single drop of chemical disinfectant. That’s a massive plus for anyone with children, pets, or sensitivities to harsh chemicals. The surface isn't just visibly clean; it's hygienically clean, which helps create a much healthier home. Because the steam has so little moisture, surfaces also dry in minutes, stopping mould and mildew from getting the damp environment they need to grow.

    Choosing the Right Steam Cleaner for Your Home

    Picking the right steam cleaner can feel a bit like choosing a new car; you've got different models, and each one is built for a specific purpose. Getting your head around the main types is the first real step to finding the perfect fit for your home and making sure your steam cleaning solutions really deliver.

    Broadly speaking, you're looking at three main players: canister steam cleaners, steam mops, and handheld steamers. Each has its own set of talents, making it better suited for certain jobs and spaces.

    Let's break down what each type does best to help you decide.

    The All-Rounder: Canister Steam Cleaners

    Think of a canister steam cleaner as the versatile estate car of the cleaning world. These machines have a separate, large water tank (usually on wheels) connected to a long hose, which lets you swap out various attachments. It’s this design that gives them their power and makes them brilliant for big, deep-cleaning missions.

    Their bigger tanks mean you can keep going for longer without needing to stop and refill, which is a massive plus when you’re tackling an entire room or several different surfaces at once.

    Image

    The Swift and Simple: Steam Mops

    If the canister cleaner is an estate car, then the steam mop is a nimble city runaround. It’s lightweight, compact, and designed for one main job: zipping across sealed hard floors. They look and feel a lot like a standard mop, but they pack the punch of hot steam to lift dirt and sanitise as they go.

    They heat up in a flash, making them your go-to for everyday spills and regular floor cleaning. For many, they're the ideal replacement for the old mop and bucket, giving you a far more hygienic clean without leaving any chemical residue behind.

    One of the best things about a steam mop is how quickly the floors dry. Because they use 'dry' steam with very little moisture, a freshly cleaned floor is often ready to walk on in minutes—a huge improvement on traditional mopping.

    The Precise and Portable: Handheld Steamers

    Handheld steam cleaners are the compact multitools of the steam world. They're small, portable, and easy to grab for those quick, targeted jobs where a bigger machine would just be a nuisance. They really shine when it comes to getting into tight spots and dealing with smaller, specific messes.

    These little gadgets are incredibly handy for tasks that need a bit more precision and a lot more convenience. You wouldn’t use one to clean a whole floor, but for spot-cleaning and tricky areas, they’re second to none.

    A Comparison of Steam Cleaner Types

    To make the choice even clearer, here’s a straightforward look at how the different types stack up against each other.

    Cleaner Type Best For Pros Cons
    Canister Steam Cleaner Large areas, deep cleaning multiple surfaces, heavy-duty jobs Powerful, versatile with attachments, long cleaning time Bulky, requires more storage space, longer heat-up time
    Steam Mop Regular cleaning of sealed hard floors (wood, tile, laminate) Lightweight, easy to store, heats up quickly, affordable Limited to floors, smaller water tank, less powerful
    Handheld Steamer Small, targeted tasks, tight spaces, upholstery, grout lines, sanitising Very portable, convenient for quick jobs, heats up instantly Very small tank, not for large areas, less overall power

    Ultimately, the best steam cleaner is the one that fits your lifestyle and the cleaning challenges you face most often.

    For those much larger, more demanding jobs, sometimes it’s worth calling in the professionals. If you're looking for expert help, you can find out more about booking professional cleaning services in Oxford to handle the heavy lifting. It's a great way to enjoy a pristine home without all the effort.

    Right then, let's talk about what really happens when you switch to steam cleaning. It’s about more than just getting things to sparkle; you're actually making a smart move for your family's health, your bank account, and the planet.

    For most people, the biggest win is creating a genuinely healthier home. Instead of just smearing chemicals around or covering up smells, steam gets right to the root of the problem and blasts it away. This is a massive relief for anyone with allergies, asthma, young children, or pets. The high-temperature vapour gives you a deep, sanitising clean with absolutely no chemical nasties left behind.

    A Healthier Home

    Think about the typical cleaning cupboard. It’s often full of harsh chemicals that can irritate lungs and release volatile organic compounds (VOCs) into the air you breathe. Steam cleaning is different. It's just superheated water doing all the hard work.

    By using nothing more than water, steam cleaning wipes out up to 99.9% of common germs, bacteria, and allergens like dust mites and mould spores. This is proper thermal sanitation, giving you real peace of mind that your home isn't just tidy, it's hygienically clean.

    This is a game-changer for families. You can let your toddler crawl around on a floor that's been disinfected by heat, not by a lingering chemical spray. If you're a pet owner, you can finally tackle those stubborn odours in the carpet without worrying about your furry friend licking up harmful residues.

    Big Savings in the Long Run

    I know what you're thinking – a steam cleaner costs a fair bit more than a bottle of all-purpose spray. And you're right, there's an initial outlay. But when you look at the bigger picture, the long-term savings are huge.

    Just take a peek under your sink. You’ve probably got a whole collection of different bottles for different jobs:

    • Floors: One cleaner for tiles, another for your sealed hardwood.
    • Kitchens: A heavy-duty degreaser for the hob and a separate spray for the worktops.
    • Bathrooms: Something for mould, a specific grout cleaner, and another for glass.
    • Fabrics: Upholstery shampoos and little spot treatments for spills.

    A good steam cleaner can replace almost all of them. Your only running costs are a tiny bit of electricity and a splash of tap water. Over the course of a year, the money you save by not buying all those specialised products really adds up. You’ll free up your budget and reclaim some serious cupboard space.

    Plus, you're doing your bit for the environment by cutting down on all that single-use plastic. It’s a choice that’s as kind to your wallet as it is to the planet.

    Mastering Your Steam Cleaning Technique

    So, you've got the right tool for the job. Now it's time to put it to work. Getting that professional-level finish isn't about brute force; it's all about technique and a little bit of prep. A bit of groundwork makes a world of difference, ensuring the steam can lift dirt and sanitise surfaces without a hitch.

    The most important first step? Clear the area. Think of it like painting a room—you need a clean canvas to start. Give the surface a good vacuum first to get rid of any loose hair, dust, and debris. If you try to steam a floor covered in crumbs, you’ll just end up with a soggy, smeared mess.

    Once you've prepped the surface, you can get to the main event. The real secret to success is picking the right attachment for the task at hand.

    Choosing the Right Tool for the Job

    Your steam cleaner probably came with an arsenal of attachments, and each one has a specific job. Using the right one doesn't just make the work easier; it makes it far more effective.

    • Jet Nozzle: This little powerhouse concentrates steam into a fine, powerful stream. It’s perfect for blasting grime out of tile grout, getting around taps, and cleaning other tight crevices.
    • Squeegee Attachment: Your best friend for windows, mirrors, and glass shower screens. It cleans and clears away the moisture in one smooth motion, leaving a brilliant, streak-free shine.
    • Floor Head with Microfibre Pad: This is your go-to for sealed hard floors. The wide head lets you cover ground quickly, while the pad mops up all the dislodged dirt.
    • Small Brushes: These usually clip onto the jet nozzle and are fantastic for scrubbing stubborn, stuck-on grime from oven hobs, BBQ grills, or tiles.

    Image

    Common Mistakes to Avoid

    Knowing what not to do is just as crucial as knowing what to do. A few simple errors can lead to disappointing results or, worse, damaged surfaces. Keep an eye out for these common pitfalls.

    The secret to great steam cleaning isn’t speed; it’s patience. By moving the cleaner slowly and steadily, you give the steam enough time to really break down the dirt and kill 99.9% of germs. Rushing just won't give the heat enough time to work its magic.

    Another classic mistake is forgetting about the microfibre pads. As you clean, these pads soak up an incredible amount of filth. If you don't swap them out when they get saturated, you're just spreading that grime right back onto the surface you’re trying to clean.

    And finally, always test a small, hidden spot first. This is especially true for sensitive materials like upholstery or certain types of flooring. Most importantly, never use a steam cleaner on unsealed surfaces like untreated hardwood, non-waterproof laminate, or porous stone. The high-pressure moisture can cause them to warp, swell, or suffer permanent damage. For really tough, set-in messes on fabrics, you might want to look into how to remove stubborn stains before you bring in the heat.

    This methodical, effective approach to cleaning is catching on. In 2023, there were 75,565 cleaning businesses in the UK, an increase from 73,655 the previous year. It’s clear that the demand for a proper, deep clean is on the rise. You can find more insights into the UK cleaning industry over on Policybee.

    Essential Safety Guidelines for Steam Cleaners

    When you’re wielding the power of high-temperature steam, a healthy dose of respect is non-negotiable. While steam cleaning solutions are brilliant at what they do, you've got to use them correctly to sidestep any accidents. The number one rule is just common sense: never, ever point the nozzle at a person, a pet, or even your favourite houseplant. That steam is hot enough to cause a nasty burn in an instant.

    It's also crucial to let the machine cool down completely before you even think about refilling the water tank or swapping out an attachment. Opening a pressurised system too early can unleash a dangerous blast of scalding water and steam. Trust me, taking a few extra minutes for it to cool is a small price to pay for your safety.

    Surfaces to Steer Clear Of

    Not every surface in your home is cut out for the intense heat and moisture that a steam cleaner delivers. To avoid that sinking feeling of having ruined something, keep your machine away from these materials.

    • Unsealed Porous Surfaces: Think unsealed wood, terracotta, and some natural stone. Steam can force moisture deep into the pores, leading to warping, swelling, or permanent water damage.
    • Delicate Fabrics: Silk, velour, and certain thin plastics just can't take the heat. You'll risk melting or permanently damaging them.
    • Freshly Painted or Papered Walls: The heat can make fresh paint bubble up and cause wallpaper glue to fail, completely ruining the finish.

    Following these essential guidelines ensures you can enjoy a sanitised home without any unintended consequences. It’s about working smart and respecting the power of the tool in your hands.

    This thoughtful approach to cleaning is catching on. As more people look for eco-friendly methods, the global steam cleaning service market is projected to hit an estimated $25,000 million by 2025. This shows a real shift towards safer, chemical-free options. You can find more insights about this growing market over on datainsightsmarket.com.

    Your Top Steam Cleaning Questions Answered

    It's completely normal to have a few questions before you dive into the world of steam cleaning. After all, you want to be sure you're getting it right and making the most of this chemical-free cleaning method. Let's walk through some of the queries we hear most often.

    A big one for many homeowners is, "Will steam cleaning damage my grout?" It’s a great question, but you can put your mind at ease. Far from causing harm, high-pressure steam is actually one of the kindest and most powerful ways to restore your grout lines. Unlike acidic chemicals that can literally eat away at grout over time, steam gets deep into the pores to blast out grime and kill mould, all without any abrasive damage.

    Water, Drying, and Getting the Best Results

    "Can I just use tap water in my machine?" is another common query. While you can, it's not always the best idea for the long-term health of your cleaner.

    We always recommend using distilled or demineralised water, particularly if you're in a hard water area. This simple step prevents limescale and other mineral deposits from building up inside your machine, which keeps it running efficiently and extends its life. For more practical advice like this, you'll find plenty of expert tips on our Signal Cleaning blog.

    Finally, what about drying times? This is where steam cleaning truly shines.

    Because the process uses superheated vapour with very little actual water, most surfaces are dry to the touch within a matter of minutes.

    It's a world away from traditional mopping, which can leave your floors out of action for ages. With steam, you can get back to enjoying your clean space almost immediately.


    Ready for a professional touch that leaves your home spotless without the hassle? Signal Cleaning offers expert services tailored to your needs. Book your next clean in just 60 seconds at https://signalcleaning.co.uk.

  • How to Clean Grout Between Tiles Like a Pro

    How to Clean Grout Between Tiles Like a Pro

    Cleaning grout isn't as daunting as it looks. At its core, it’s a simple process: apply a good cleaner, give it a proper scrub with a stiff brush, and rinse it all away. You can often get brilliant results with a homemade paste of bicarbonate of soda and water, though for really tough grime, a specialised commercial cleaner might be what you need.

    Why Your Grout Looks So Grimy

    Image

    If you're looking at your once-pristine grout lines and wondering how they got so discoloured, you’re definitely not the first. The problem is baked into what grout actually is: a porous, cement-based material that acts like a tiny, rigid sponge.

    Because it's so absorbent, it eagerly soaks up everything around it – moisture, dirt, oils, you name it. In a bathroom, this means a steady build-up of soap scum, body oils, and minerals from hard water. In the kitchen, it becomes a magnet for splattered cooking grease, food spills, and general grime from foot traffic. It doesn't take long for this accumulation to become a breeding ground for mould and mildew, which is where those ugly dark stains come from.

    The Real Culprits Behind Dirty Grout

    Figuring out what’s causing the staining is the key to picking the right cleaning tactic. It usually comes down to one of these common offenders:

    • Moisture and Mildew: In constantly damp places like showers, that persistent moisture allows mildew and mould to grow deep within the grout’s pores.
    • Soap Scum: That film left behind by soaps, shampoos, and conditioners builds up over time, trapping dirt and creating a stubborn, grimy layer.
    • Everyday Dirt: For floors in high-traffic spots like hallways or kitchens, simple dirt and mud get ground into the grout lines, causing them to darken and look worn.
    • Spills and Stains: Kitchen spills are notorious. A splash of coffee, a drop of wine, or a bit of pasta sauce can seep into the grout and leave what looks like a permanent stain if not tackled quickly.

    This is more than just a cosmetic problem. Dirty grout can harbour all sorts of bacteria. If you leave it, trapped moisture can even start to compromise the tiles themselves. The scale of this maintenance task is huge; floor care was the biggest slice of the UK's professional cleaning market in 2024, making up nearly 32% of the industry’s massive £15.4 billion revenue. It just goes to show how much work goes into keeping our surfaces clean, both in our homes and commercially. You can read more interesting UK cleaning industry statistics on policybee.co.uk.

    Gathering Your Grout Cleaning Toolkit

    Before we dive into how to clean grout between your tiles, let’s talk about getting your gear in order. Showing up to the job with the wrong equipment is like trying to paint a portrait with a roller—it’s just frustrating, and you won’t get the results you want. Having a well-stocked toolkit makes the entire process smoother, faster, and a whole lot more effective.

    The good news? You don’t need to break the bank. Many of the best tools for the job are simple, inexpensive items you might already have tucked away in a cupboard. This isn't just about grabbing any brush; it’s about having the right one for the task at hand.

    The Essential Grout Cleaning Supplies

    First things first, let's cover the basics. These are the non-negotiable items that are the foundation of any successful grout cleaning project. Think of this as your core arsenal for tackling everyday grime.

    • A Stiff-Bristled Grout Brush: This is your primary weapon. A proper grout brush has firm, narrow bristles that are specifically designed to get right into those grout lines. A common mistake I see is people using an old toothbrush, but its soft bristles are simply no match for stubborn, embedded dirt and will flatten out in no time.
    • Spray Bottles: It’s always handy to have a couple of these on hand, especially for applying homemade solutions like a simple vinegar and water mix. They give you an even spray without completely soaking the area.
    • Microfibre Cloths and Sponges: You’ll need these for wiping away the cleaning solution and all the grime you’ve just loosened. Microfibre is fantastic because it actually traps the dirt particles instead of just pushing them around.
    • A Bucket: A simple bucket filled with clean water for rinsing is an absolute must. It’s crucial for wiping down the tiles afterwards to make sure no chemical residue is left behind.

    You'll notice more specialised cleaning tools on the market these days, and it isn't just a trend. People are realising that properly maintained grout is key to preventing bacteria growth and keeping their floors looking great.

    Power Tools for Tougher Jobs

    Let's be honest, sometimes a bit of elbow grease just isn't enough. This is especially true for large tiled areas or grout that hasn't had a deep clean in years. When you're facing a serious challenge, it's time to bring in the heavy hitters. These tools can slash your scrubbing time and deliver results that look truly professional.

    An electric scrubber is an absolute game-changer. These are handheld devices that often come with different brush heads, including small, stiff ones that are perfect for getting into grout lines. They do the hard work for you, providing a continuous, high-speed scrubbing action that will save your arms and back.

    For a powerful, chemical-free deep clean, a steam cleaner is an exceptional choice. It works by blasting high-pressure hot steam into the grout, which dissolves grime and kills 99.9% of germs and bacteria without any harsh chemicals. This makes it a brilliant option for households with pets, children, or anyone with allergies. It's no surprise that these devices are becoming more popular; the global market for grout cleaning equipment was valued at a hefty USD 240 million back in 2022. Here in the UK, floor care makes up a significant 31.89% of the entire cleaning services market, which really shows how much we value effective cleaning solutions. You can discover more about the grout cleaning equipment market on arizton.com.


    Choosing Your Cleaning Solution

    Once you have your tools, you need to decide what you're going to clean with. You've got two main routes: whipping up a homemade solution or buying a commercial-grade product. There's no single right answer; it really depends on the state of your grout and your personal preferences.

    Let’s quickly compare the options to help you figure out what's best for your situation.

    Comparing Grout Cleaning Solutions

    Solution Type Best For Pros Cons
    Homemade Light to moderate everyday dirt, regular maintenance, and eco-conscious cleaning. Cost-effective, uses common household ingredients, and is generally gentler on surfaces. Can be less effective on deep-set stains or mould, and may require more scrubbing.
    Commercial Tough, neglected stains, mould, mildew, and large-scale cleaning projects. Highly effective and fast-acting, often formulated to tackle specific problems like mould or discolouration. Can be more expensive, may contain harsh chemicals, and requires good ventilation during use.

    Ultimately, the choice is yours. For a quick refresh, a homemade mix is often all you need. But if you’re facing years of built-up grime, a specialised commercial cleaner will likely save you a lot of time and effort.

    The Practical Guide to Cleaning Your Grout

    Right, with your tools laid out, it's time to get stuck in. This isn't just about slopping some cleaner on the floor and hoping for the best. A bit of method is needed if you want brilliant results without damaging your tiles or spending hours scrubbing for nothing. We’ll walk through the entire process, from the crucial prep work to the final rinse.

    Think of it like painting a room. You wouldn't just start slapping paint on the walls without putting down dust sheets and taping the edges, would you? The same principle applies here—a little preparation goes a long way.

    Setting the Stage for Success

    Before you even think about opening a bottle of cleaner, a couple of quick checks are essential. Don't be tempted to skip these; they can save you a real headache down the line.

    First, get some air moving. Open any windows and doors in the room, and if you have an extractor fan, switch it on. This is non-negotiable if you're using a commercial cleaner, as the fumes can be quite potent.

    Next, and this is the big one, always do a patch test. Find a small, inconspicuous spot – maybe behind a door or under a cabinet – and test your cleaning solution on a small bit of grout. Let it sit, give it a scrub, and rinse it just as you would on the main floor. This simple check makes sure the cleaner won't discolour your grout or harm your tiles.

    A quick test patch can prevent a disaster. Imagine discovering your powerful new cleaner is bleaching your beautiful, coloured grout after you’ve done half the room. It’s a five-minute check that could save you a costly replacement job.

    Applying Your Cleaner and Getting to Work

    Once you're prepped and confident in your cleaner, it's time for the main event. The key here is to work in small, manageable sections, say no larger than a metre square at a time. If you try to do the whole floor at once, the cleaner at the far end will have dried out before you ever get to it.

    This picture gives you a good idea of the focused action needed during the scrubbing phase.

    Image

    It really captures that methodical, repetitive motion required to lift the grime out of the grout lines without having to use brute force.

    Here’s the breakdown for applying most cleaners:

    • Apply generously: Whether it's a spray or a paste, get it directly onto the grout lines. Don't be shy – make sure they're thoroughly coated.
    • Let it dwell: Check the instructions on the bottle. Many solutions, especially homemade ones like a bicarbonate of soda paste, need to sit for 5-15 minutes. This gives the active ingredients time to get to work breaking down the dirt and grime.
    • Scrub with purpose: Now for the satisfying part. Grab your stiff-bristled grout brush and scrub the grout lines using firm, back-and-forth or circular motions. This technique is far better at lifting stubborn, embedded dirt than a lazy wipe.

    Rinsing and Finishing Up

    After you've scrubbed a section, the final task is to get rid of all that loosened gunk and leftover cleaning solution. If you leave any residue behind, it will just become a magnet for more dirt.

    Get a bucket of clean, warm water. Using a big sponge or a microfibre cloth, wipe down the entire section you've just cleaned. You’ll need to rinse your sponge out frequently in the bucket to avoid spreading dirty water around. You might need to go over the area two or three times to get it completely clean.

    Once rinsed, grab a dry cloth or an old towel and wipe the section dry. This simple step prevents water spots from forming and stops dirty water from settling back into your freshly cleaned grout lines.

    Now, just move on to the next square and repeat the process. It’s a bit repetitive, I know, but this methodical approach is the secret to a professional-looking finish.

    How to Beat Stubborn Stains and Mould

    https://www.youtube.com/embed/gRs3gslHz1Y

    Let's be honest, sometimes a general clean just doesn't cut it. You’ve scrubbed until your arms ache, but those deep-set stains and ugly patches of mould are still there, mocking you. It’s a classic problem, especially in bathrooms where the constant damp creates a perfect home for stubborn black mould.

    When your first attempt doesn't work, don't throw in the towel. It just means it's time to change your game plan and bring in the specialists. Think of it as escalating from a routine clean to a targeted deep treatment. Different stains need different weapons, and knowing which one to choose is the secret to getting your grout looking brand new again.

    Tackling Persistent Mould and Mildew

    For those nasty black spots that love to hang around in shower corners and on bathroom floors, your average cleaner isn't going to get to the root of the problem. You need something more specific, which is where a dedicated mould and mildew remover comes in. These aren't just surface cleaners; they contain fungicides designed to kill the mould spores right down to the source.

    Before you start, get some fresh air moving. Open a window, switch on the extractor fan – proper ventilation is non-negotiable. Apply the product directly onto the mouldy grout, let it sit for the time stated on the bottle (usually 10-15 minutes is about right), and then give it a firm scrub before rinsing it all away. This direct attack is so much more effective than simply scrubbing harder with an all-purpose spray.

    Lifting Discolouration and Organic Stains

    What about the kitchen? We're talking about those yellowish or brownish stains from coffee spills, curry splatters, or just years of built-up cooking grease. For this type of discolouration, a homemade paste of hydrogen peroxide and bicarbonate of soda can be your best friend. The peroxide provides a gentle bleaching action, while the bicarb gives you just enough grit to scrub the stain away.

    Mix them together until you have a thick paste, a bit like toothpaste. Slather it right onto the stained grout, let it fizz and work its magic for about 10 minutes, then get scrubbing. You’ll be surprised how often the stain lifts right off.

    If you're up against a whole host of different marks around the house, our detailed guide on how to remove stubborn stains has plenty more expert tips for all sorts of surfaces.

    Your Secret Weapon: The Steam Cleaner

    If you want a truly deep, sanitising clean without reaching for harsh chemicals, a steam cleaner is an absolute game-changer. It uses high-pressure, hot steam to literally blast grime out of the grout, killing bacteria and dissolving stains that manual scrubbing can't touch. I've found it’s brilliant on greasy kitchen grout and can bring back the original colour like nothing else.

    Just pop the small detail nozzle on the end and move it slowly along the grout lines. The steam does all the heavy lifting, loosening the dirt so you can just wipe it away with a microfibre cloth. It’s a powerful, chemical-free method that doesn't just clean—it properly sanitises your surfaces too.

    How to Keep Your Grout Looking Brand New for Longer

    Image

    After putting in all that elbow grease, the last thing you want is to see that grime creep back in a few weeks. The real secret isn't just knowing how to clean grout between tiles; it's about shifting your mindset from reactive deep cleans to smart, preventative care that makes your hard work last.

    The single best thing you can do for your freshly cleaned grout is to seal it. Grout is naturally porous, a bit like a sponge. A good sealer creates an invisible shield, stopping moisture, dirt, and soap scum from soaking in and staining it. It’s a simple step, but it can make a massive difference, turning what would have been a stubborn stain into a spill you can just wipe away.

    Finding the Right Grout Sealer and Applying It Properly

    You'll quickly notice that not all sealers are the same, and picking the right one is key to getting the protection you need. Generally, they fall into two camps:

    • Penetrating Sealers: As the name suggests, these soak deep into the grout's pores to create a barrier from the inside out. They're my top recommendation for high-moisture areas like bathrooms and kitchens because they won’t just wear away with foot traffic or cleaning.
    • Surface Sealers: These form a waterproof film over the top of the grout line. They do a good job, but they can wear down over time, especially on floors, which means you'll likely need to reapply them more often.

    Putting the sealer on is straightforward, but it does demand a bit of patience. First, and this is crucial, make sure your grout is 100% clean and completely dry. If you seal over even slightly damp or dirty grout, you're just trapping the problem underneath.

    Use a small brush or a dedicated applicator to carefully paint the sealer onto the grout lines. Be sure to wipe any excess off the tiles themselves before it has a chance to dry.

    You've got to let the sealer cure properly. Check the manufacturer's instructions, but expect to leave it for at least 24 hours. I know it's tempting to use the shower or walk on the floor, but rushing this will ruin the protective barrier you just worked so hard to create.

    Small Habits That Make a Big Difference

    Beyond sealing, it’s the little things you do every day that prevent that dreaded build-up. These simple actions take just seconds but will save you hours of future scrubbing.

    For starters, wipe up spills the moment they happen. That splash of coffee on the kitchen floor or a blob of shampoo on the shower wall can seep into unsealed grout surprisingly fast, leaving a stain that looks permanent. Just keeping a cloth handy for quick wipe-downs makes all the difference.

    In the bathroom, the main enemy is moisture.

    • Grab a squeegee: After every shower, take 30 seconds to squeegee water off the tiles and glass. This simple act drastically cuts down on the moisture that would otherwise sit in your grout lines and invite mould.
    • Get some air moving: Run your extractor fan during your shower and for at least 20 minutes afterwards. No fan? Crack a window open to let all that steam escape.
    • Keep floors dry: If water tends to pool on your bathroom floor, use an old towel to soak it up. Mould and mildew hate a dry environment.

    It’s also interesting to see how cleaning habits are changing. There’s a huge demand now for maintenance products that are both gentle and effective. In fact, a recent report found that 60% of UK consumers say they'd happily pay more for eco-friendly cleaning solutions. This shows a clear shift towards products that work well without being harsh. You can discover further insights into the UK professional cleaning products market at astuteanalytica.com to see the full trend.

    And for those times when the job feels too big or you'd just rather leave it to the professionals, you can always book an expert cleaning service in Oxford with us.

    Your Top Grout Cleaning Questions, Answered

    Getting stuck into a big cleaning project always throws up a few questions. Even when you think you have it all planned out, something unexpected will pop up. So, to help you feel like you've got this completely under control, here are the answers to the questions we get asked all the time about cleaning grout.

    How Often Should I Really Be Deep Cleaning My Grout?

    Honestly, it all comes down to where the tiles are and how much use they get.

    Think about the main family bathroom or the kitchen floor—these are high-traffic, high-moisture zones. For these areas, giving the grout a proper deep clean every two to three months is a smart move. It stops everyday grime from setting in for good and keeps mould from getting a foothold.

    Now, what about a guest bathroom that barely sees any action or a tiled wall in a utility room? You can probably get away with a deep scrub just once or twice a year. The real trick is the little-and-often approach. Wiping up spills as they happen is a world away from scrubbing a stain that’s been there for weeks.

    The goal here is ongoing maintenance, not a last-minute rescue mission. A bit of regular attention means grout cleaning never becomes a dreaded, day-long ordeal.

    Is It Okay to Use Bleach on Grout?

    This is a big one. While it’s tempting to reach for the bleach for its whitening magic, it can be a real problem for grout. Chlorine bleach is incredibly harsh stuff. Used repeatedly, it can literally break down the structure of your grout, making it brittle and crumbly. If your grout is coloured, bleach can also ruin it, leaving you with patchy, uneven shades.

    If you're facing a really stubborn patch of mould and feel bleach is your only option, please be careful:

    • Water it down: A mix of one part bleach to ten parts water is more than enough.
    • Get the air flowing: Open every window and door. Switch on the extractor fan.
    • Never, ever mix it: This is crucial. Mixing bleach with other cleaners, particularly anything containing ammonia, can produce dangerous toxic gases.

    A far safer alternative that still packs a punch is an oxygen-based bleach powder. It does a fantastic job without the same harsh side effects.

    What’s the Best Grout Cleaner I Can Make at Home?

    You don't need fancy chemicals for a great result. The best and simplest homemade cleaner is a paste made from bicarbonate of soda and a little water. It's brilliant.

    The bicarb acts as a very gentle abrasive, lifting dirt out of the porous grout surface without any risk of scratching your tiles. It’s cheap, non-toxic, and works wonders on most day-to-day grime.

    For an extra bit of oomph, especially on greasy grout behind the hob, add a bit of white vinegar. You'll get a satisfying fizzing reaction that helps break down and lift stubborn gunk. Just apply the paste while it's foaming, leave it to work its magic for 15 minutes or so, then give it a good scrub and rinse away. For more practical tips like this, feel free to explore our Signal Cleaning blog.


    At Signal Cleaning, we truly believe a clean home is a happy home. If you're in the Oxford area and would rather hand this job over to the professionals, we'd be delighted to help. Book your professional cleaning service online in just 60 seconds.

  • What Is End of Tenancy Cleaning? A Complete Guide

    What Is End of Tenancy Cleaning? A Complete Guide

    When your tenancy agreement comes to an end, the last thing on your mind is probably cleaning. But this final step, known as an end of tenancy clean, is one of the most important parts of moving out. Think of it as hitting the ‘factory reset’ button for the property. Its main job? To get your security deposit back in full.

    The True Meaning of an End of Tenancy Clean

    This isn't your average weekly spruce-up. An end of tenancy clean is a completely different beast. It's an intensive, deep-cleaning marathon designed to satisfy the eagle eyes of landlords and letting agents, who will compare the property's final state to the initial inventory report.

    Image

    It goes way beyond just vacuuming and wiping surfaces. We’re talking about tackling the built-up grime in all those spots you might normally overlook. Getting this right is a crucial part of the moving process and has a direct impact on your finances.

    For tenants, this thorough clean is your ticket to getting that deposit back without any deductions. In the UK, the cost for a professional service can be anywhere from £170 to over £415, which really depends on the size of your home and where you live. You can discover more insights about professional cleaning prices and get a better idea of what to expect.

    Standard Clean vs. End of Tenancy Clean: A Quick Comparison

    To really grasp the difference, let’s put the two side-by-side. Your regular clean is about maintenance—keeping things tidy. An end of tenancy clean is about restoration—bringing the property back to its original condition. The level of detail required is worlds apart.

    The core goal is simple: leave the property in such a pristine state that the next tenants can move in immediately without any cleaning complaints. It’s about erasing any trace of your occupancy.

    This table breaks down exactly what that means in practice.

    Cleaning Task Standard Clean End of Tenancy Clean
    Oven Cleaning Exterior wipe-down only Full internal and external degreasing, including racks and hob
    Kitchen Cupboards External wipe-down Cleaned inside and out, including tops and handles
    Skirting Boards Light dusting if visible Dusted and wiped down in every room
    Appliances Exterior wipe-down Pulled out and cleaned behind (e.g., fridge, washing machine)
    Windows Basic interior wipe Cleaned inside, including sills and frames
    Limescale Removal Not typically included Full descaling of taps, showerheads, and tiles

    As you can see, the end of tenancy clean is far more exhaustive. It's a systematic process that leaves no stone unturned, ensuring every nook and cranny is spotless.

    Why This Clean Is Crucial for Your Deposit

    Let’s be honest, nobody enjoys the process of moving out. But amidst the chaos of packing boxes, there's one final task that can make or break your bank balance: the end-of-tenancy clean. Its main purpose is simple but critical: to get your full security deposit back.

    When you hand back the keys, your landlord or letting agent will go over the property with a fine-tooth comb, comparing its current state to the check-in inventory report. Any difference in cleanliness gives them a legitimate reason to deduct money from your deposit. It’s a common misconception to see the deposit as just another rental fee; it’s your money, held in trust, and you have every right to get it back by upholding your end of the bargain.

    The Financial Logic of a Professional Clean

    It’s easy to look at the cost of a professional clean and think of it as just another moving expense. But that's the wrong way to look at it. Think of it more as an insurance policy for your deposit. The reality is, disputes over cleaning are far and away the most common reason tenants lose out.

    In fact, a staggering 56% of all deposit disputes in the UK boil down to disagreements over the property's cleanliness. With the average deposit in our area hovering around £1,321, a landlord's deductions for cleaning can easily climb from £250 to £500. You can see a detailed breakdown of the costs versus deposit returns to understand the numbers better.

    When you put it that way, spending a fraction of that amount on a guaranteed professional job suddenly makes perfect sense. It’s a smart, calculated move that prevents a simple oversight from becoming a very expensive mistake.

    An end of tenancy clean is less about housekeeping and more about financial risk management. It's the final step that closes the loop on your rental agreement, ensuring you walk away with your full deposit intact.

    Ultimately, this clean isn't just about ticking a box in your tenancy agreement. It’s a shrewd financial decision, especially when moving is already so expensive. It ensures you don't lose hundreds of pounds over something as preventable as a grimy oven or dusty skirting boards.

    Your Ultimate Room-by-Room Cleaning Checklist

    To get a real sense of what an end-of-tenancy clean actually involves, it helps to see it broken down room by room. This is so much more than your average weekly tidy-up; think of it as a top-to-bottom deep clean designed to make the property look as good as it did the day you moved in. An inventory clerk or landlord will go through each room with a fine-tooth comb, and this checklist covers the exact things they’ll be looking for.

    Image

    Whether you're gearing up to do the work yourself or planning to call in the professionals, knowing what's expected is half the battle. It’s always the little details that catch tenants out and end up costing them part of their deposit.

    The Kitchen: The Heart of the Clean

    The kitchen is, without a doubt, the most challenging and heavily scrutinised room in any rental property. It’s the epicentre of grease, food splatters, and daily grime, which makes it the most time-consuming part of the job.

    • Oven and Hob: This is the big one. The oven needs a full deep clean, inside and out. That means getting every last bit of grease off the glass door, racks, and trays. The hob must be scrubbed free of any burnt-on food and polished to a shine.
    • Appliances: Don't forget the fridge and freezer. They need to be completely empty, defrosted, and wiped down. The dishwasher filter has to be cleaned out, and the washing machine drawer needs a good scrub to get rid of any mould or old soap scum.
    • Cupboards and Drawers: Every single cupboard and drawer has to be emptied and cleaned from the inside out. Remember to wipe down the tops of the wall cupboards, too—it's an easy spot to miss!
    • Surfaces and Sink: All worktops must be degreased and properly sanitised. The sink and taps should be descaled and polished until they gleam, making sure the plughole is clear of any gunk.

    Bathrooms and Living Areas

    Next up are the other high-traffic spots, which come with their own unique cleaning hurdles like limescale in the bathroom and dust everywhere else. These spaces need to feel completely fresh for the new tenants walking in.

    Bathrooms, for example, are a breeding ground for mould and limescale. All the tiles and grout need a thorough scrub, shower screens must be descaled and polished, and the toilet has to be sanitised from top to bottom—including around the back. The extractor fan needs to be cleared of dust as well.

    What tenants often need to realise is that "clean" in this context means getting every single surface back to its original condition. This includes scrubbing marks off walls, cleaning light fittings, and making sure all the skirting boards are free from dust and scuffs.

    For those really persistent marks, you might need a bit more know-how. We've put together some great advice in our guide on how to remove stubborn stains, which has practical tips for all sorts of common household spots.

    Finally, every living area and bedroom demands the same level of care:

    1. Dusting: Every surface needs dusting, from the light fittings and curtain rails right down to the skirting boards and plug sockets.
    2. Windows: All internal windows, sills, and frames must be cleaned until they are streak-free.
    3. Floors: Carpets need a very thorough vacuum, and hard floors should be swept and mopped. Sometimes, a professional carpet clean is even written into the tenancy agreement.
    4. Furniture: If the property came furnished, all furniture needs to be wiped down. Don't forget to lift the cushions on sofas and armchairs to vacuum underneath.

    Choosing Between a Professional Service and DIY

    It’s the classic tenant’s dilemma: do you roll up your sleeves and tackle the end-of-tenancy clean yourself, or do you call in the professionals?

    The DIY route often looks like the cheaper option on the surface. But it's easy to underestimate what's involved. You're not just looking at a few hours of work; it's a huge time commitment, requires a whole host of specific cleaning products, and demands an almost obsessive level of detail.

    Even if you spend an entire weekend scrubbing, there's always the risk that you'll miss something a sharp-eyed inventory clerk will spot. This can lead to frustrating disputes and, ironically, deductions from your deposit that end up costing more than a professional clean would have in the first place.

    On the flip side, hiring a professional service is really about buying peace of mind. It frees up your time and energy when you need it most—during a stressful move. You get the benefit of their experience, their professional-grade equipment, and, most importantly, their understanding of exactly what landlords and letting agents are looking for.

    The Guarantee That Protects Your Deposit

    The game-changer when you hire a professional team is the guarantee. Any reputable company will offer to come back and fix any cleaning-related issues flagged by your landlord or agent, typically within a 48 to 72-hour window.

    Think of this guarantee as an insurance policy for your security deposit. The responsibility for passing that final, meticulous inspection shifts from your shoulders to theirs. It's a powerful safety net.

    So, if the inventory check notes a dusty skirting board or a smear on a window, the cleaners return to sort it out at no extra charge to you. For many tenants, this assurance alone is worth the cost, ensuring a smooth handover and a full deposit return.

    The cost of a professional clean isn't just a random number; it's usually calculated based on the size of your property and the specific tasks required to get it back to standard.

    Image

    To help you decide what's right for you, let's break down the two options side-by-side.

    Hiring a Professional vs. DIY End of Tenancy Cleaning

    Factor Professional Cleaning DIY Cleaning
    Deposit Return High likelihood of full return, backed by a service guarantee. Risky. Missed spots can lead to costly deductions.
    Time & Effort Frees up your time entirely during a busy move. Extremely time-consuming; can take several full days.
    Cost Upfront cost for the service. Lower initial outlay, but you must buy all supplies.
    Equipment Uses industrial-grade equipment and specialised products. Relies on standard domestic cleaning tools and products.
    Stress Level Minimal stress. The responsibility lies with the company. High stress, with pressure to meet exacting standards.
    Quality Consistent, professional standard designed to pass inspection. Quality can be inconsistent and may not meet agency standards.

    Ultimately, while the DIY approach has its appeal, the convenience, security, and guaranteed results often make hiring experts the smarter choice for many Oxford residents.

    If you're ready to see just how simple it can be, you can get an instant quote and schedule your professional clean online.

    What Goes Into the Cost of an End of Tenancy Clean?

    Let's be honest, moving is expensive, and budgeting for it can feel like a real headache. One of the biggest question marks is often the end of tenancy clean. It’s easy to wonder where the numbers on a quote actually come from, but the final price isn't just plucked out of thin air. It’s a careful calculation based on the specific work your property needs.

    The biggest driver of the cost is, unsurprisingly, the size of your property. A snug studio flat is a completely different job from a large four-bedroom family home, and the price will reflect that. The number of bathrooms is also a huge factor – they are notoriously time-consuming, needing serious attention to detail for descaling, scrubbing, and sanitising every nook and cranny.

    Then there's the starting condition of the place. If you've kept on top of things, the cleaners can get the job done more efficiently, which keeps the cost down. On the other hand, a property that needs a lot more elbow grease to cut through built-up grime or tackle stubborn stains will naturally require more time and a bigger budget.

    The Nitty-Gritty: Key Factors Behind Your Final Quote

    Your postcode plays a part, too. Running a business in a major city costs more, and that's reflected in the pricing. In a competitive rental market like London, for example, the average cost for a professional end of tenancy clean often lands around £250 or more. For a closer look at how prices vary, it’s worth checking out a detailed guide on London end of tenancy cleaning prices to see how different factors come into play.

    It helps to think of the price as a direct reflection of the work required. This isn’t just a quick wipe-down; it’s about meticulously bringing the property back to the high standard that letting agents and landlords demand.

    Finally, the price will change if you need any extra services. These are the add-ons that aren’t always included in a standard clean but might be necessary to get your full deposit back:

    • Professional Carpet Cleaning: A must for getting rid of deep-down dirt, odours, and stains that a regular vacuum just can't touch.
    • Upholstery Sanitation: Crucial if you’re leaving a furnished property and need the sofas and armchairs properly cleaned.
    • Exterior Window Washing: Sometimes this is explicitly mentioned in the tenancy agreement, so it's worth checking.

    Getting a handle on these variables makes it much easier to understand your quote and plan your moving budget without any nasty surprises.

    Got Questions About Your Final Clean?

    Even the most organised move can throw up some last-minute questions. To help you feel completely on top of things, we’ve put together answers to the queries we hear most often from tenants about the final clean. Think of it as your go-to guide for those nagging doubts.

    Image

    Getting these practical details straight can be the difference between a frantic handover and a smooth, stress-free move. It’s all about knowing what to expect.

    How Long Does an End of Tenancy Clean Take?

    This is a world away from your usual weekly spruce-up. For a studio flat, a professional team of two might spend 3-4 hours, but a three-bedroom house could easily take a full day's work, often clocking in at 6-8 hours or more.

    The final timing really boils down to two things: the property’s size and its condition when the cleaners arrive.

    Do I Need to Provide Any Cleaning Supplies?

    Nope, not a thing. A good professional company turns up with a van full of industrial-grade equipment and specialist cleaning products. This isn't just a bit of bleach and a cloth; we’re talking powerful steam cleaners for carpets, and specific solutions designed to obliterate tough limescale, baked-on grease, and stubborn stains that your supermarket sprays won't touch.

    The real advantage of hiring a professional service is their arsenal and expertise. They know exactly what letting agents look for and have the right tools to get the job done efficiently.

    This means every nook and cranny is cleaned to a professional standard, and you don’t have to buy or rent a single piece of gear.

    Can My Landlord Force Me to Use Their Preferred Cleaner?

    Absolutely not. In the UK, the Tenant Fees Act 2019 is crystal clear on this point. It makes it illegal for landlords to insist you use a specific cleaning company as part of your tenancy agreement.

    Your only legal duty is to return the property in the same state of cleanliness as it was when you moved in. This gives you total freedom to:

    • Hire any professional service you like.
    • Do the clean yourself, provided you can hit that same high standard.

    What Happens If My Landlord Still Isn't Happy?

    This is where a professional service really proves its worth. Most reputable companies offer a guarantee, usually for 48-72 hours, after they’ve finished. If your landlord or letting agent raises any cleaning-related issues during the check-out inspection, the company will pop back and sort them out at no extra charge.

    This guarantee, backed up by a detailed invoice, is solid proof if you need to challenge any deposit deductions. For more tips on tenant rights and responsibilities, check out the expert advice on the Signal Cleaning blog.

  • How to Maintain a Clean House Effortlessly

    How to Maintain a Clean House Effortlessly

    Look, the secret to keeping your house clean isn't about scrubbing for eight hours every Saturday. Who has time for that? The real magic lies in consistency over intensity. It’s about building small, manageable habits into your everyday life that stop the mess from getting out of control in the first place. A little bit of effort each day goes a surprisingly long way.

    The Secret to a Permanently Tidy Home

    The idea of a home that’s always clean can sound exhausting, bringing to mind images of non-stop chores. But that's not what this is about. We’re not aiming for a sterile, show-home feel, but a genuinely comfortable and organised space that helps you relax and think clearly. You get there by creating a simple cleaning rhythm that just becomes part of your normal routine.

    This is all about shifting your mindset from reactive, marathon cleaning sessions to proactive, daily upkeep. I like to call it the '15-Minute Daily Reset'—a short, focused burst of activity to handle the most important tasks. Wiping down the kitchen surfaces while the kettle boils or sorting the post as you walk in the door prevents those little jobs from turning into a mountain of chores later.

    It’s clear that having a clean home is a big deal for many of us here in the UK. With life getting busier, it’s not surprising that 17% of private households now hire a cleaner. In fact, the UK's cleaning industry is worth almost £60 billion, which really shows how much we value a hygienic and pleasant place to live. You can dig into the UK cleaning industry statistics to see the full picture of just how much a tidy home means to people across the country.

    The best way to maintain a clean house isn't through huge, rare efforts. It’s the combined power of all the small, consistent things you do every single day.

    Ultimately, this system proves you don't need to find more hours in the day to have a clean home—you just need a smarter approach. When you nail these small, repeatable habits, your weekly clean becomes a quick top-up rather than a dreaded, all-day chore.

    Building Your Daily Tidying Habits

    Image

    The real trick to keeping your house consistently clean isn't about those heroic, marathon cleaning sessions on a Saturday. It's all in the small, almost unnoticeable things you do every day. These little habits are what stop the clutter and grime from building up in the first place, turning a massive weekend job into a quick, manageable task.

    Think about the daily post. Instead of letting it colonise the kitchen counter, try the 'one-touch rule'. As soon as you bring it in, deal with it. Junk mail goes straight into the recycling, bills get filed, and anything important finds its proper home. Just this one small change can stop one of the biggest sources of household clutter dead in its tracks.

    Create Simple Micro-Routines

    The best way to make cleaning stick is to weave it into your existing schedule. You don't need to magically find more hours in the day; you just need to tack new habits onto things you already do automatically. It’s a technique some people call 'habit stacking', and it makes the whole process feel effortless.

    Here are a couple of my favourite micro-routines, each taking less than five minutes:

    • Post-Dinner Kitchen Reset: Once you've finished eating, get straight into the habit of wiping down the worktops, loading the dishwasher, and giving the floor a quick sweep for crumbs.
    • Before-Bed Bathroom Refresh: While you're brushing your teeth, grab a cloth and give the sink and counter a quick wipe. Pop any stray toiletries away and hang up the towels.

    These simple acts of personal hygiene are actually the building blocks of a clean home. A YouGov survey revealed that 82% of UK adults always wash their hands after using the toilet, which is a fantastic baseline for stopping germ transmission. In the same way, the 72% of adults who brush their teeth more than once a day are reinforcing a mindset of cleanliness that easily spills over into their home environment. You can read more about UK hygiene habits and trends to see how it all connects.

    The goal isn't daily perfection. It’s about doing small, consistent things that prevent chaos from setting in. A 15-minute tidy-up every evening is so much more effective than a three-hour cleaning frenzy once a month.

    By embedding these little tasks into your day, you’re not just cleaning up; you're actively preventing messes from happening. This proactive approach is the genuine secret to maintaining a clean house without all the stress and effort.

    Mastering Your Weekly Cleaning Reset

    Who wants to sacrifice an entire Saturday to a cleaning marathon? Nobody. The secret to keeping your house consistently clean, without losing your weekend, is to have a smarter weekly plan. Instead of staring down a long, random list of chores, we'll borrow a trick from the productivity world: task batching.

    This just means grouping similar jobs together. Think about it: instead of cleaning one bathroom today and another tomorrow, you set aside one block of time to blitz them all. You get your supplies out once, get into a rhythm, and the whole process becomes surprisingly quick. It’s about being focused, not frantic.

    Your Efficient Weekly Checklist

    Here’s a practical checklist that hits all the essentials without taking over your life. The idea is to find a rhythm that feels right for you. Maybe you spread these jobs out over a couple of evenings, or perhaps you prefer to get it all done in an hour on Sunday morning.

    • Bathrooms: Give the toilets, showers, sinks, and mirrors a proper clean.
    • Kitchen Deep Dive: Wipe down the outside of all your appliances, clean the hob, and sanitise the worktops and sink.
    • Floors: A thorough vacuum of all carpets and rugs, followed by a good mop of any hard floors.
    • Dusting: Hit the key spots in high-traffic areas – think living room tables, bookshelves, and bedside tables.
    • Bedding: Strip and wash all your bed linens. There's nothing better than fresh sheets.

    Of course, cleaning is a nightmare if you have to tidy up first. A simple decluttering process, like the one below, is your best friend here. It stops the weekly clean from feeling like an uphill battle.

    Image

    This guide shows you how to sort through your stuff systematically, which is a game-changer. Once everything has a home, the actual cleaning becomes so much easier.

    Pro Tips for Better Results

    Working smarter also means using better techniques. For mirrors that are actually streak-free, don't spray the glass. Instead, lightly mist a good microfibre cloth with your cleaner and wipe in an 'S' pattern from top to bottom.

    When you're vacuuming, slow down. Don't just rush back and forth. For a much deeper clean on carpets, especially in busy spots, go over the area slowly in overlapping rows. Go north-to-south first, then go over it again east-to-west. This lifts the carpet pile from different directions and pulls out way more trapped dirt.

    By folding these focused strategies into your week, the reset becomes a quick, satisfying routine. You'll get better results in less time and, most importantly, you’ll get your weekend back.

    Conquering Monthly and Seasonal Deep Cleans

    Image

    While your daily tidies and weekly resets are brilliant for keeping the everyday chaos under control, it's the bigger, less frequent jobs that really preserve the health and longevity of your home. These are the deep-cleaning tasks that stop grime from building up in all those nooks and crannies.

    The secret to tackling them without feeling completely overwhelmed? A simple, rotating schedule. Instead of staring down a monstrous to-do list, you just dedicate a small chunk of time once a month to a few specific areas. It’s a proactive approach that stops these jobs from spiralling into huge, daunting projects.

    Your Monthly Deep Clean Hit List

    Breaking these jobs down makes them feel so much more achievable. By focusing on just a few key areas each month, you can keep your home in fantastic condition without a massive effort.

    Here are a few things to pop on your monthly rotation:

    • Kitchen Appliances: Give the inside of your microwave a good wipe-down, run a cleaning cycle on the dishwasher, and descale your kettle.
    • Forgotten Surfaces: It's amazing how much dust gathers here. Wipe down all your skirting boards, door frames, and light switches.
    • Upholstery and Vents: Get the vacuum out and give your furniture a proper going-over (especially under the cushions!). Don't forget to clean the extractor fan vents too.

    A Simple Seasonal Rotation

    For those even bigger jobs, thinking seasonally is a game-changer. This approach spreads the really heavy work evenly across the year, meaning you’ll know how to maintain a clean house without sacrificing entire weekends.

    By tying major tasks to specific seasons, you build a predictable rhythm for your home care. This completely avoids that frantic "spring clean" panic where it feels like you have to do everything all at once.

    A practical seasonal schedule might look something like this:

    • Spring: A great time to deep-clean carpets and wash all the curtains and blinds.
    • Summer: When the weather's good, wash all the windows (inside and out!) and maybe even pressure wash the patio or decking.
    • Autumn: Before winter sets in, clear out the gutters and get the chimney swept.
    • Winter: Perfect for indoor projects like decluttering wardrobes and deep cleaning inside kitchen cupboards and the pantry.

    Let's be realistic, tackling these larger projects can feel like a lot, and sometimes life just gets in the way. If you’re short on time or energy for a deep clean, bringing in a professional can be a fantastic way to hit the reset button on your home.

    You can easily explore professional cleaning services in Oxford to get your space back on track. This organised, cyclical approach is the final piece of the puzzle for a home that feels genuinely clean and cared for all year round.

    Smart Cleaning Hacks and Essential Products

    Image

    Keeping your house clean isn’t about scrubbing for hours on end; it's about working smarter. A few clever shortcuts can seriously slash your cleaning time and, even better, stop grime from building up in the first place. That makes your weekly clean-up a whole lot less daunting.

    One of my favourite tricks is to hang a squeegee in the shower. After you’ve finished, a quick 30-second wipe of the glass and tiles prevents soap scum and hard water stains from ever getting a foothold. Another lifesaver? The humble lemon. Just pop a bowl of water with lemon slices into the microwave for a few minutes. The steam loosens all the caked-on food, so you can wipe it clean without any effort.

    Choosing Your Cleaning Arsenal

    You don’t need a cupboard overflowing with dozens of different bottles to get the job done. Honestly, a cluttered collection of niche cleaners just makes everything feel more complicated. The real secret is to pick a handful of high-quality, versatile basics that can tackle most messes around the house.

    A simple but powerful toolkit should always include:

    • High-Quality Microfibre Cloths: These are a must-have. They grab dust and dirt far more effectively than old t-shirts and give you a streak-free finish on everything from mirrors to worktops.
    • A Great All-Purpose Spray: Find one with a neutral pH that’s safe for multiple surfaces. You want something you can confidently use on countertops, tiles, and even painted woodwork.
    • A Reliable Vacuum Cleaner: Don’t underestimate the difference a good vacuum makes. Investing in a decent one is key to keeping floors and carpets free from dust and allergens.

    The best approach is to simplify. A few core products you trust will always be more effective than a chaotic assortment of single-use cleaners. This minimalist mindset saves you time, money, and precious cupboard space.

    This streamlined approach is also much kinder to the planet. The UK household cleaners market, which is on track to hit £1.60 billion, is seeing a big shift towards eco-friendly and multipurpose products. As you can see in these UK cleaning product trends on statista.com, this is especially true for younger people in smaller city homes where versatile solutions are a necessity.

    Of course, there are times when a simple spray and wipe just won't cut it. For those tougher jobs, check out our guide on how to remove stubborn stains.

    Common Cleaning Questions Answered

    https://www.youtube.com/embed/G6JGitfwjuM

    Even the most organised cleaning routine can get derailed by life. It happens to all of us. Let's tackle some of the most common questions I get asked about keeping a house clean when things get tricky.

    How Do I Stay Motivated to Clean Regularly?

    Here’s a secret: motivation is unreliable. It’s habits that truly keep a home in order. The best way to build a habit is to attach it to something you already do without thinking. It's a technique called 'habit stacking'. For example, while the kettle is boiling for your morning tea, give the kitchen worktops a quick wipe. It only takes a minute but makes a world of difference.

    If you're really struggling to start, try the 10-minute trick. Set a timer and just clean for that long. Anyone can do 10 minutes, right? You'll be amazed at how much you can get done. And honestly, putting on a good podcast or your favourite upbeat playlist can turn a chore into something you almost look forward to.

    What Is the Best Way to Deal with Clutter?

    Clutter is the biggest obstacle to a clean home. It just makes everything harder. To stop it from building up in the first place, try adopting a 'one in, one out' rule. Every time you bring something new into the house, something similar has to go.

    For the clutter you already have, the four-box method is a lifesaver. Get four boxes and label them: 'Keep', 'Donate', 'Bin', and 'Relocate'. The trick is to start small—tackle a single drawer, not an entire room. This stops you from feeling overwhelmed. A clutter-free space isn't just visually calming; it's genuinely faster to clean.

    A shared home requires shared responsibility. The key is clear and kind communication, not assuming others know what you expect. When everyone understands their role, it reduces conflict and ensures the workload is fair.

    How Can I Get My Family or Flatmates to Help?

    Getting others on board is often the biggest challenge. A simple, visible cleaning rota is a great place to start. It divides the tasks fairly and makes it clear who is responsible for what. For kids, turning chores into a game or linking them to pocket money or screen time works wonders.

    With flatmates, assigning specific zones (like bathrooms) or a rotating weekly job can prevent any one person from shouldering the burden. When everyone knows what’s expected, there’s far less room for arguments. For more in-depth advice on home topics, you can explore other articles on the Signal Cleaning blog.


    Feeling overwhelmed or just short on time? Signal Cleaning provides professional, reliable cleaning services across Oxford. Let us handle the hard work so you can enjoy a spotless home. Book your clean online in just 60 seconds!