Cleaning grout isn't as daunting as it looks. At its core, it’s a simple process: apply a good cleaner, give it a proper scrub with a stiff brush, and rinse it all away. You can often get brilliant results with a homemade paste of bicarbonate of soda and water, though for really tough grime, a specialised commercial cleaner might be what you need.
Why Your Grout Looks So Grimy
If you're looking at your once-pristine grout lines and wondering how they got so discoloured, you’re definitely not the first. The problem is baked into what grout actually is: a porous, cement-based material that acts like a tiny, rigid sponge.
Because it's so absorbent, it eagerly soaks up everything around it – moisture, dirt, oils, you name it. In a bathroom, this means a steady build-up of soap scum, body oils, and minerals from hard water. In the kitchen, it becomes a magnet for splattered cooking grease, food spills, and general grime from foot traffic. It doesn't take long for this accumulation to become a breeding ground for mould and mildew, which is where those ugly dark stains come from.
The Real Culprits Behind Dirty Grout
Figuring out what’s causing the staining is the key to picking the right cleaning tactic. It usually comes down to one of these common offenders:
- Moisture and Mildew: In constantly damp places like showers, that persistent moisture allows mildew and mould to grow deep within the grout’s pores.
- Soap Scum: That film left behind by soaps, shampoos, and conditioners builds up over time, trapping dirt and creating a stubborn, grimy layer.
- Everyday Dirt: For floors in high-traffic spots like hallways or kitchens, simple dirt and mud get ground into the grout lines, causing them to darken and look worn.
- Spills and Stains: Kitchen spills are notorious. A splash of coffee, a drop of wine, or a bit of pasta sauce can seep into the grout and leave what looks like a permanent stain if not tackled quickly.
This is more than just a cosmetic problem. Dirty grout can harbour all sorts of bacteria. If you leave it, trapped moisture can even start to compromise the tiles themselves. The scale of this maintenance task is huge; floor care was the biggest slice of the UK's professional cleaning market in 2024, making up nearly 32% of the industry’s massive £15.4 billion revenue. It just goes to show how much work goes into keeping our surfaces clean, both in our homes and commercially. You can read more interesting UK cleaning industry statistics on policybee.co.uk.
Gathering Your Grout Cleaning Toolkit
Before we dive into how to clean grout between your tiles, let’s talk about getting your gear in order. Showing up to the job with the wrong equipment is like trying to paint a portrait with a roller—it’s just frustrating, and you won’t get the results you want. Having a well-stocked toolkit makes the entire process smoother, faster, and a whole lot more effective.
The good news? You don’t need to break the bank. Many of the best tools for the job are simple, inexpensive items you might already have tucked away in a cupboard. This isn't just about grabbing any brush; it’s about having the right one for the task at hand.
The Essential Grout Cleaning Supplies
First things first, let's cover the basics. These are the non-negotiable items that are the foundation of any successful grout cleaning project. Think of this as your core arsenal for tackling everyday grime.
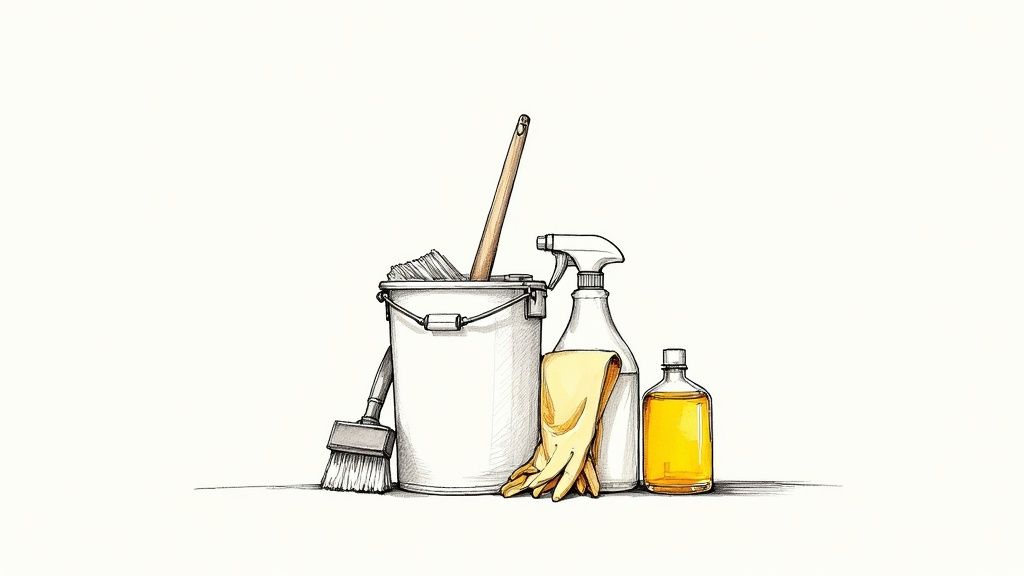
- A Stiff-Bristled Grout Brush: This is your primary weapon. A proper grout brush has firm, narrow bristles that are specifically designed to get right into those grout lines. A common mistake I see is people using an old toothbrush, but its soft bristles are simply no match for stubborn, embedded dirt and will flatten out in no time.
- Spray Bottles: It’s always handy to have a couple of these on hand, especially for applying homemade solutions like a simple vinegar and water mix. They give you an even spray without completely soaking the area.
- Microfibre Cloths and Sponges: You’ll need these for wiping away the cleaning solution and all the grime you’ve just loosened. Microfibre is fantastic because it actually traps the dirt particles instead of just pushing them around.
- A Bucket: A simple bucket filled with clean water for rinsing is an absolute must. It’s crucial for wiping down the tiles afterwards to make sure no chemical residue is left behind.
You'll notice more specialised cleaning tools on the market these days, and it isn't just a trend. People are realising that properly maintained grout is key to preventing bacteria growth and keeping their floors looking great.
Power Tools for Tougher Jobs
Let's be honest, sometimes a bit of elbow grease just isn't enough. This is especially true for large tiled areas or grout that hasn't had a deep clean in years. When you're facing a serious challenge, it's time to bring in the heavy hitters. These tools can slash your scrubbing time and deliver results that look truly professional.
An electric scrubber is an absolute game-changer. These are handheld devices that often come with different brush heads, including small, stiff ones that are perfect for getting into grout lines. They do the hard work for you, providing a continuous, high-speed scrubbing action that will save your arms and back.
For a powerful, chemical-free deep clean, a steam cleaner is an exceptional choice. It works by blasting high-pressure hot steam into the grout, which dissolves grime and kills 99.9% of germs and bacteria without any harsh chemicals. This makes it a brilliant option for households with pets, children, or anyone with allergies. It's no surprise that these devices are becoming more popular; the global market for grout cleaning equipment was valued at a hefty USD 240 million back in 2022. Here in the UK, floor care makes up a significant 31.89% of the entire cleaning services market, which really shows how much we value effective cleaning solutions. You can discover more about the grout cleaning equipment market on arizton.com.
Choosing Your Cleaning Solution
Once you have your tools, you need to decide what you're going to clean with. You've got two main routes: whipping up a homemade solution or buying a commercial-grade product. There's no single right answer; it really depends on the state of your grout and your personal preferences.
Let’s quickly compare the options to help you figure out what's best for your situation.
Comparing Grout Cleaning Solutions
| Solution Type | Best For | Pros | Cons |
|---|---|---|---|
| Homemade | Light to moderate everyday dirt, regular maintenance, and eco-conscious cleaning. | Cost-effective, uses common household ingredients, and is generally gentler on surfaces. | Can be less effective on deep-set stains or mould, and may require more scrubbing. |
| Commercial | Tough, neglected stains, mould, mildew, and large-scale cleaning projects. | Highly effective and fast-acting, often formulated to tackle specific problems like mould or discolouration. | Can be more expensive, may contain harsh chemicals, and requires good ventilation during use. |
Ultimately, the choice is yours. For a quick refresh, a homemade mix is often all you need. But if you’re facing years of built-up grime, a specialised commercial cleaner will likely save you a lot of time and effort.
The Practical Guide to Cleaning Your Grout
Right, with your tools laid out, it's time to get stuck in. This isn't just about slopping some cleaner on the floor and hoping for the best. A bit of method is needed if you want brilliant results without damaging your tiles or spending hours scrubbing for nothing. We’ll walk through the entire process, from the crucial prep work to the final rinse.
Think of it like painting a room. You wouldn't just start slapping paint on the walls without putting down dust sheets and taping the edges, would you? The same principle applies here—a little preparation goes a long way.
Setting the Stage for Success
Before you even think about opening a bottle of cleaner, a couple of quick checks are essential. Don't be tempted to skip these; they can save you a real headache down the line.
First, get some air moving. Open any windows and doors in the room, and if you have an extractor fan, switch it on. This is non-negotiable if you're using a commercial cleaner, as the fumes can be quite potent.
Next, and this is the big one, always do a patch test. Find a small, inconspicuous spot – maybe behind a door or under a cabinet – and test your cleaning solution on a small bit of grout. Let it sit, give it a scrub, and rinse it just as you would on the main floor. This simple check makes sure the cleaner won't discolour your grout or harm your tiles.
A quick test patch can prevent a disaster. Imagine discovering your powerful new cleaner is bleaching your beautiful, coloured grout after you’ve done half the room. It’s a five-minute check that could save you a costly replacement job.
Applying Your Cleaner and Getting to Work
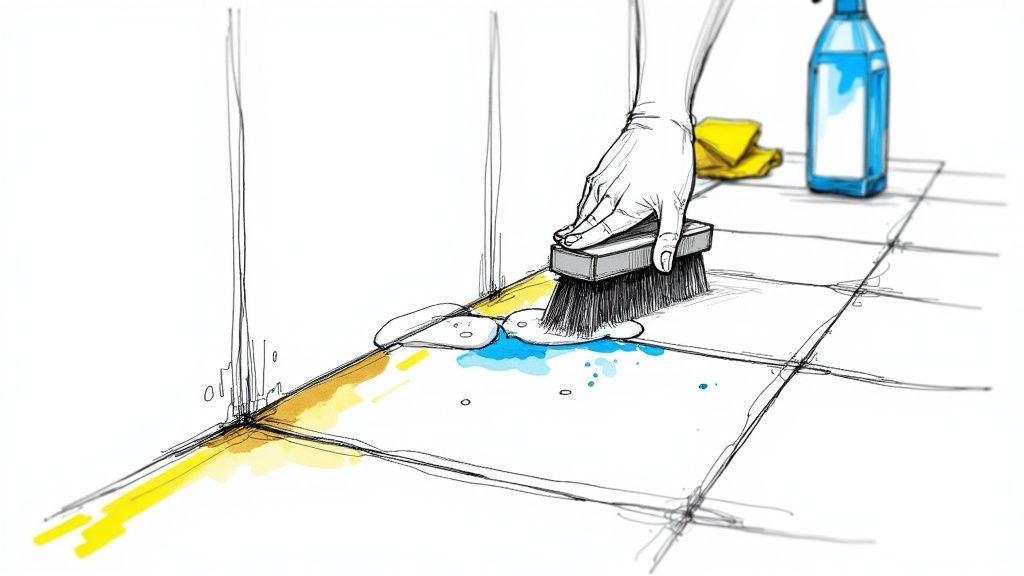
Once you're prepped and confident in your cleaner, it's time for the main event. The key here is to work in small, manageable sections, say no larger than a metre square at a time. If you try to do the whole floor at once, the cleaner at the far end will have dried out before you ever get to it.
This picture gives you a good idea of the focused action needed during the scrubbing phase.
It really captures that methodical, repetitive motion required to lift the grime out of the grout lines without having to use brute force.
Here’s the breakdown for applying most cleaners:
- Apply generously: Whether it's a spray or a paste, get it directly onto the grout lines. Don't be shy – make sure they're thoroughly coated.
- Let it dwell: Check the instructions on the bottle. Many solutions, especially homemade ones like a bicarbonate of soda paste, need to sit for 5-15 minutes. This gives the active ingredients time to get to work breaking down the dirt and grime.
- Scrub with purpose: Now for the satisfying part. Grab your stiff-bristled grout brush and scrub the grout lines using firm, back-and-forth or circular motions. This technique is far better at lifting stubborn, embedded dirt than a lazy wipe.
Rinsing and Finishing Up
After you've scrubbed a section, the final task is to get rid of all that loosened gunk and leftover cleaning solution. If you leave any residue behind, it will just become a magnet for more dirt.
Get a bucket of clean, warm water. Using a big sponge or a microfibre cloth, wipe down the entire section you've just cleaned. You’ll need to rinse your sponge out frequently in the bucket to avoid spreading dirty water around. You might need to go over the area two or three times to get it completely clean.
Once rinsed, grab a dry cloth or an old towel and wipe the section dry. This simple step prevents water spots from forming and stops dirty water from settling back into your freshly cleaned grout lines.
Now, just move on to the next square and repeat the process. It’s a bit repetitive, I know, but this methodical approach is the secret to a professional-looking finish.
How to Beat Stubborn Stains and Mould
https://www.youtube.com/embed/gRs3gslHz1Y
Let's be honest, sometimes a general clean just doesn't cut it. You’ve scrubbed until your arms ache, but those deep-set stains and ugly patches of mould are still there, mocking you. It’s a classic problem, especially in bathrooms where the constant damp creates a perfect home for stubborn black mould.
When your first attempt doesn't work, don't throw in the towel. It just means it's time to change your game plan and bring in the specialists. Think of it as escalating from a routine clean to a targeted deep treatment. Different stains need different weapons, and knowing which one to choose is the secret to getting your grout looking brand new again.
Tackling Persistent Mould and Mildew
For those nasty black spots that love to hang around in shower corners and on bathroom floors, your average cleaner isn't going to get to the root of the problem. You need something more specific, which is where a dedicated mould and mildew remover comes in. These aren't just surface cleaners; they contain fungicides designed to kill the mould spores right down to the source.
Before you start, get some fresh air moving. Open a window, switch on the extractor fan – proper ventilation is non-negotiable. Apply the product directly onto the mouldy grout, let it sit for the time stated on the bottle (usually 10-15 minutes is about right), and then give it a firm scrub before rinsing it all away. This direct attack is so much more effective than simply scrubbing harder with an all-purpose spray.
Lifting Discolouration and Organic Stains
What about the kitchen? We're talking about those yellowish or brownish stains from coffee spills, curry splatters, or just years of built-up cooking grease. For this type of discolouration, a homemade paste of hydrogen peroxide and bicarbonate of soda can be your best friend. The peroxide provides a gentle bleaching action, while the bicarb gives you just enough grit to scrub the stain away.
Mix them together until you have a thick paste, a bit like toothpaste. Slather it right onto the stained grout, let it fizz and work its magic for about 10 minutes, then get scrubbing. You’ll be surprised how often the stain lifts right off.
If you're up against a whole host of different marks around the house, our detailed guide on how to remove stubborn stains has plenty more expert tips for all sorts of surfaces.
Your Secret Weapon: The Steam Cleaner
If you want a truly deep, sanitising clean without reaching for harsh chemicals, a steam cleaner is an absolute game-changer. It uses high-pressure, hot steam to literally blast grime out of the grout, killing bacteria and dissolving stains that manual scrubbing can't touch. I've found it’s brilliant on greasy kitchen grout and can bring back the original colour like nothing else.
Just pop the small detail nozzle on the end and move it slowly along the grout lines. The steam does all the heavy lifting, loosening the dirt so you can just wipe it away with a microfibre cloth. It’s a powerful, chemical-free method that doesn't just clean—it properly sanitises your surfaces too.
How to Keep Your Grout Looking Brand New for Longer

After putting in all that elbow grease, the last thing you want is to see that grime creep back in a few weeks. The real secret isn't just knowing how to clean grout between tiles; it's about shifting your mindset from reactive deep cleans to smart, preventative care that makes your hard work last.
The single best thing you can do for your freshly cleaned grout is to seal it. Grout is naturally porous, a bit like a sponge. A good sealer creates an invisible shield, stopping moisture, dirt, and soap scum from soaking in and staining it. It’s a simple step, but it can make a massive difference, turning what would have been a stubborn stain into a spill you can just wipe away.
Finding the Right Grout Sealer and Applying It Properly
You'll quickly notice that not all sealers are the same, and picking the right one is key to getting the protection you need. Generally, they fall into two camps:
- Penetrating Sealers: As the name suggests, these soak deep into the grout's pores to create a barrier from the inside out. They're my top recommendation for high-moisture areas like bathrooms and kitchens because they won’t just wear away with foot traffic or cleaning.
- Surface Sealers: These form a waterproof film over the top of the grout line. They do a good job, but they can wear down over time, especially on floors, which means you'll likely need to reapply them more often.
Putting the sealer on is straightforward, but it does demand a bit of patience. First, and this is crucial, make sure your grout is 100% clean and completely dry. If you seal over even slightly damp or dirty grout, you're just trapping the problem underneath.
Use a small brush or a dedicated applicator to carefully paint the sealer onto the grout lines. Be sure to wipe any excess off the tiles themselves before it has a chance to dry.
You've got to let the sealer cure properly. Check the manufacturer's instructions, but expect to leave it for at least 24 hours. I know it's tempting to use the shower or walk on the floor, but rushing this will ruin the protective barrier you just worked so hard to create.
Small Habits That Make a Big Difference
Beyond sealing, it’s the little things you do every day that prevent that dreaded build-up. These simple actions take just seconds but will save you hours of future scrubbing.
For starters, wipe up spills the moment they happen. That splash of coffee on the kitchen floor or a blob of shampoo on the shower wall can seep into unsealed grout surprisingly fast, leaving a stain that looks permanent. Just keeping a cloth handy for quick wipe-downs makes all the difference.
In the bathroom, the main enemy is moisture.
- Grab a squeegee: After every shower, take 30 seconds to squeegee water off the tiles and glass. This simple act drastically cuts down on the moisture that would otherwise sit in your grout lines and invite mould.
- Get some air moving: Run your extractor fan during your shower and for at least 20 minutes afterwards. No fan? Crack a window open to let all that steam escape.
- Keep floors dry: If water tends to pool on your bathroom floor, use an old towel to soak it up. Mould and mildew hate a dry environment.
It’s also interesting to see how cleaning habits are changing. There’s a huge demand now for maintenance products that are both gentle and effective. In fact, a recent report found that 60% of UK consumers say they'd happily pay more for eco-friendly cleaning solutions. This shows a clear shift towards products that work well without being harsh. You can discover further insights into the UK professional cleaning products market at astuteanalytica.com to see the full trend.
And for those times when the job feels too big or you'd just rather leave it to the professionals, you can always book an expert cleaning service in Oxford with us.
Your Top Grout Cleaning Questions, Answered
Getting stuck into a big cleaning project always throws up a few questions. Even when you think you have it all planned out, something unexpected will pop up. So, to help you feel like you've got this completely under control, here are the answers to the questions we get asked all the time about cleaning grout.
How Often Should I Really Be Deep Cleaning My Grout?
Honestly, it all comes down to where the tiles are and how much use they get.
Think about the main family bathroom or the kitchen floor—these are high-traffic, high-moisture zones. For these areas, giving the grout a proper deep clean every two to three months is a smart move. It stops everyday grime from setting in for good and keeps mould from getting a foothold.
Now, what about a guest bathroom that barely sees any action or a tiled wall in a utility room? You can probably get away with a deep scrub just once or twice a year. The real trick is the little-and-often approach. Wiping up spills as they happen is a world away from scrubbing a stain that’s been there for weeks.
The goal here is ongoing maintenance, not a last-minute rescue mission. A bit of regular attention means grout cleaning never becomes a dreaded, day-long ordeal.
Is It Okay to Use Bleach on Grout?
This is a big one. While it’s tempting to reach for the bleach for its whitening magic, it can be a real problem for grout. Chlorine bleach is incredibly harsh stuff. Used repeatedly, it can literally break down the structure of your grout, making it brittle and crumbly. If your grout is coloured, bleach can also ruin it, leaving you with patchy, uneven shades.
If you're facing a really stubborn patch of mould and feel bleach is your only option, please be careful:
- Water it down: A mix of one part bleach to ten parts water is more than enough.
- Get the air flowing: Open every window and door. Switch on the extractor fan.
- Never, ever mix it: This is crucial. Mixing bleach with other cleaners, particularly anything containing ammonia, can produce dangerous toxic gases.
A far safer alternative that still packs a punch is an oxygen-based bleach powder. It does a fantastic job without the same harsh side effects.
What’s the Best Grout Cleaner I Can Make at Home?
You don't need fancy chemicals for a great result. The best and simplest homemade cleaner is a paste made from bicarbonate of soda and a little water. It's brilliant.
The bicarb acts as a very gentle abrasive, lifting dirt out of the porous grout surface without any risk of scratching your tiles. It’s cheap, non-toxic, and works wonders on most day-to-day grime.
For an extra bit of oomph, especially on greasy grout behind the hob, add a bit of white vinegar. You'll get a satisfying fizzing reaction that helps break down and lift stubborn gunk. Just apply the paste while it's foaming, leave it to work its magic for 15 minutes or so, then give it a good scrub and rinse away. For more practical tips like this, feel free to explore our Signal Cleaning blog.
At Signal Cleaning, we truly believe a clean home is a happy home. If you're in the Oxford area and would rather hand this job over to the professionals, we'd be delighted to help. Book your professional cleaning service online in just 60 seconds.
Leave a Reply