
Thinking about how to get your deposit back usually happens when you’re packing boxes to leave, but the real work starts the moment you get the keys. Honestly, the secret to a hassle-free deposit return is all about being meticulous from day one and making sure your money is legally protected. Get this right, and you're building a solid foundation for getting every penny back.
Securing Your Deposit From Day One
So many tenants think the fight for their deposit is waged in the final week of their tenancy. In reality, the most important moves are made right at the very beginning. The proactive steps you take when you first move in are your best defence against any future arguments over deductions. You’re essentially creating an undeniable "before" picture of the property's condition.
This initial record becomes your proof if a landlord tries to claim for damage that was already there when you arrived. Without it, you're stuck in a frustrating "your word against theirs" battle, and that rarely goes in a tenant's favour. A couple of hours spent documenting everything at the start can genuinely save you hundreds of pounds and a whole lot of stress down the line.
Create a Bulletproof Photographic Record
Your smartphone is your best friend here. Before you even think about unpacking, do a thorough walkthrough of every single room and document its condition. I’m talking time-stamped photos and videos. Don't just settle for wide-angle shots of the room; get right up close to any existing scuffs, marks, or imperfections.
Your photo and video evidence should cover everything:
- Flooring: Get shots of any scuffs, scratches, or stains on carpets, laminate, or tiles.
- Walls and Ceilings: Document any chips in the paint, existing nail holes, or faint marks.
- Fixtures and Fittings: Photograph the light switches, plug sockets, curtain rails, and any signs of general wear and tear.
- Appliances: Open up the oven, fridge, and dishwasher to record how clean they are and their general condition.
This kind of visual evidence is almost impossible to argue with. The metadata on your photos automatically includes the date and time, which is crucial. Back these files up to a cloud service like Google Drive or Dropbox immediately. As a final step, email a link to the folder to your landlord or letting agent. This creates a digital paper trail that proves you flagged these things from the start.
Master the Inventory and Check-In Report
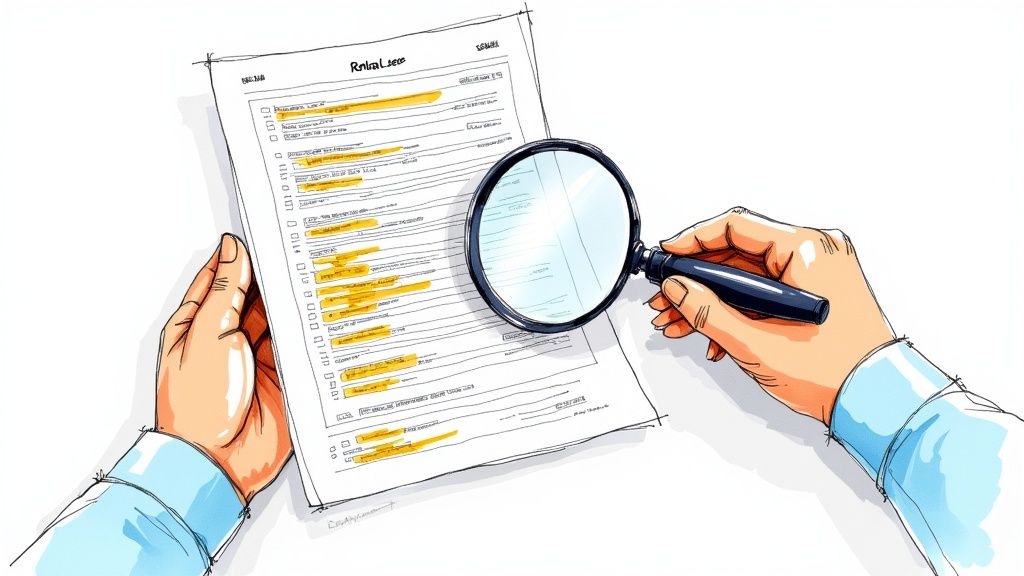
The inventory, sometimes called a check-in report, is the formal document that lists everything in the property and its condition. Never, ever just sign it without going through it with a fine-tooth comb. Walk around the property, report in hand, and check that every detail is accurate.
If you find things that don't match up—a scratch on the hob that isn’t mentioned, or curtains described as "new" that are clearly a bit faded—make a note directly on the report. Be specific. Instead of just writing "mark on wall," write "2cm black scuff mark on the wall next to the living room doorway."
Your signed and amended check-in report is a legally important document. It sets the baseline for the property's condition, and it's what everything will be compared against when you move out. A detailed, accurate report is your single most powerful tool for fighting off unfair deductions.
Confirm Your Deposit Is Protected
This is probably the most important step of all. You need to verify that your landlord has put your deposit into a government-backed Tenancy Deposit Scheme (TDS). In the UK, they are legally required to do this within 30 days of you paying it.
They must also give you some specific written details, often called the 'Prescribed Information,' which should include:
- The address of the property you're renting.
- Exactly how much deposit you paid.
- The name and contact details of the specific TDS provider.
- Your landlord's or agent's name and contact details.
If your landlord doesn't do this, they can be ordered to pay you compensation. You can easily check if your deposit is protected by going to the websites of the three approved schemes in England and Wales: the Tenancy Deposit Scheme, MyDeposits, and the Deposit Protection Service. A quick check gives you peace of mind and confirms your landlord is following the rules, which helps start the tenancy on the right foot.
Mastering the End of Tenancy Clean
After you’ve lived somewhere for a while, a bit of wear and tear is totally normal. The problem is, the line between everyday living and actual neglect is often where deposit disputes kick off. In fact, cleaning issues are consistently the number one reason landlords hold back money, making this final clean one of the most important jobs you'll do when moving out.
Your tenancy agreement will almost certainly say the property needs to be returned in the same state of cleanliness as when you moved in, minus "fair wear and tear." This doesn’t mean your usual weekly tidy-up. It means aiming for a professional standard, which is a much higher bar. Getting this right is the key to getting your deposit back without a fight.
So, What Actually Counts as "Fair Wear and Tear"?
Before you even think about cleaning, you need to know what you’re actually responsible for. Landlords can't charge you for the natural ageing of their property. "Fair wear and tear" is all about the minor signs of life that happen from simply living in a home.
Let's look at some real-world examples to clear this up:
- Carpets: A carpet that's a bit flattened in the hallway where everyone walks? That's fair wear and tear. A massive red wine stain in the living room? That's damage.
- Paintwork: Minor scuffs around a light switch or where your sofa has been resting against the wall are expected. Your toddler's crayon masterpiece across the bedroom wall, however, is not.
- Curtains: If the curtains have faded a little from the sun, that’s a classic example of wear and tear. A big rip or a dark, noticeable stain is classed as damage.
Understanding these differences helps you focus your energy on what matters and gives you the confidence to push back on any unreasonable claims.
The DIY Cleaning Route
Taking on the clean yourself can save you a good chunk of cash, but don't underestimate the task. This isn't a job for a single afternoon; you really need to block out a full weekend. Your goal is to make the place look like a professional team has been through it.
The best way to start is with a detailed, room-by-room checklist. This is your secret weapon against forgetting those easy-to-miss spots that letting agents are trained to spot instantly.
Your Kitchen Cleaning Hit List:
- The Oven is Priority Number One: This is almost always the biggest and dirtiest job. Get a proper, heavy-duty oven cleaner and give it your full attention. Don't forget the hob, the extractor fan filter, and the grill pan. A greasy oven is an instant red flag.
- Inside Every Single Cupboard: Empty them out completely. Wipe down every internal surface, the doors (inside and out), and the handles.
- Big Appliances: You have to pull the fridge and washing machine out. It's grim, but you need to clean behind and underneath them. Defrost the freezer properly, and scrub the rubber seals on all appliance doors.
Bathroom Focus Points:
- Limescale is the Enemy: Use a good descaling product on taps, showerheads, and glass shower screens. White vinegar is a decent alternative but you might need to let it soak for a while to really work.
- Grout and Seals: Scrub any mould or mildew from the tile grout and the silicone seals around the bath and sink. A dedicated mould and mildew spray is your best friend here.
- Drains and Plugholes: Make sure you clear all hair and gunk from the plugholes so water can drain away quickly.
Sometimes you'll come across a stain that just won't budge. For those particularly tough spots, it helps to know what you're dealing with. You can find detailed guides on how to remove stubborn stains that break down the best methods for different materials.
Should You Just Hire a Professional?
While the DIY approach saves money upfront, hiring a professional end-of-tenancy cleaning company can be a brilliant investment. It takes a huge amount of stress and effort off your plate during what is already a frantic time.
A huge selling point for professional services is the guarantee. If the letting agent finds any fault with the clean at the check-out, the company will come back and fix it for free. This peace of mind can be invaluable for avoiding a cleaning dispute altogether.
The cost for a pro clean will depend on your property's size, but you can generally expect to pay between £150 and £400. When you're weighing up the cost, think about how much your own time is worth and the risk of losing a much larger chunk of your deposit if your clean isn't up to scratch.
If you do decide to bring in the pros, make sure you pick a good one.
- Look for a company with plenty of positive online reviews.
- Get a detailed quote in writing that lists exactly what’s included.
- Confirm they specialise in end-of-tenancy cleans and know the high standards that agents expect.
In the end, whether you do it yourself or hire help, the goal is the same. Leaving that property absolutely sparkling removes the most common reason for deposit deductions and gets you one giant step closer to seeing that money back in your bank account.
Navigating the Final Inspection and Handover
The final check-out inspection is the last hurdle standing between you and your deposit. Think of it as your final opportunity to walk through the property with your landlord or letting agent and agree on how you've left things. Just treating this as a formality is a rookie mistake, and it can be a costly one. You absolutely need to be there, be prepared, and be ready to speak up.
Your single most powerful tool for this meeting is the original inventory and check-in report. You know, the one you went through with a fine-toothed comb when you first moved in? That document is your official baseline. Bring a copy with you, either on paper or a tablet, and use it to guide the entire inspection.
The trick is to systematically go through each area, comparing it to your initial report and your own move-out photos. This isn’t just about hoping for the best; it’s about building an undeniable case for getting every penny of your deposit back.
Why Being There Is Non-Negotiable
It's tempting to just drop off the keys and disappear, but that leaves you completely defenceless. If you're not at the inspection, the agent or landlord gets to create the final report on their own terms, without any input from you. Their version of events becomes the official record.
By making sure you attend, you can:
- Immediately talk through any potential issues as they come up.
- Point out scuffs or marks that were already noted on your check-in report.
- Explain why a minor issue is just "fair wear and tear" and not damage.
- Negotiate on the spot. You could offer to touch up a small scuff mark yourself, which is far better than being hit with a huge bill for a decorator.
Your presence transforms the inspection from a one-sided verdict into a proper conversation. It shows you're a responsible tenant, which often makes landlords think twice about trying to claim for trivial or unfair deductions.
The check-out isn't just a hunt for problems; it's about agreeing on a final state of play. Being there ensures your voice is heard and you can defend your position in real-time, stopping small disagreements from blowing up into a formal dispute.
Understanding Fair Wear and Tear
As you walk through each room, hold up the check-in report and compare the "then" with the "now". If the report mentioned a small stain on the carpet in the spare room and it's still there, point it out. This is a simple way to reinforce that you aren't responsible for pre-existing flaws.
But what about new issues? This is where understanding fair wear and tear becomes your superpower. Landlords can't charge you for the natural ageing of a property. A disagreement over this is one of the most common reasons tenants lose part of their deposit.
Here’s a breakdown to help you tell the difference:
Fair Wear and Tear vs Tenant Damage
| Issue | Fair Wear and Tear (Not Deductible) | Tenant Damage (Deductible) |
|---|---|---|
| Carpets | Minor wear in high-traffic areas, faint fading. | Burns, permanent stains (e.g., red wine, paint), tears. |
| Walls | Faded paint, a few small scuffs or pinholes from pictures. | Large holes, crayon marks, unauthorised paint colours. |
| Furniture | Minor scratches on a wooden table from normal use. | Broken chair leg, deep gouges, significant water rings. |
| Kitchen | Worn worktop surfaces, slightly loose cupboard handles. | Chipped worktops, burns, broken appliance doors. |
| Curtains | Fading from sunlight over time. | Rips, pet-related damage, heavy staining. |
Knowing these distinctions gives you the confidence to push back on unreasonable claims. If they point to a slightly faded patch on the curtains, you can calmly explain it's a result of two years of sunlight, not negligence. And if you've already had the place professionally cleaned, your position is even stronger. For total peace of mind, you can book a guaranteed end of tenancy clean through specialist providers to make sure everything is up to scratch. You can easily arrange a professional clean online.
The Official Handover
Once the inspection is done and you've (hopefully) reached an agreement on the property's condition, the last step is handing over the keys. Whatever you do, don't just leave them on the counter or pop them through the letterbox.
Hand the keys directly to the landlord or agent. This is crucial: ask for a signed and dated receipt confirming you've returned all sets of keys and that the tenancy has officially ended. An email sent right there and then works just as well. This tiny piece of proof stops any potential claims that you didn't move out on time—a sneaky tactic sometimes used to charge extra rent. Your active role in this final meeting is what secures your deposit and ensures a smooth, clean break.
What to Do When Deposit Disputes Arise
Even after you've done everything right, you might find yourself in a standoff with your landlord over deductions. It's a common, frustrating scenario, but don't panic. You have clear rights and a powerful, free system on your side. You absolutely do not have to accept an unfair charge or get dragged into a stressful court battle.
The crucial thing to remember is this: a landlord can't just take your money. They need your agreement to make any deductions. If you don't agree, the disputed amount stays safely locked in your Tenancy Deposit Scheme (TDS) until the issue is sorted. This is your moment to challenge their claims and fight for what's yours.
Your Secret Weapon: The Dispute Resolution Service
Every single government-approved Tenancy Deposit Scheme in the UK offers a free and impartial Alternative Dispute Resolution (ADR) service. Think of it as a referee, there to settle disagreements fairly without anyone having to set foot in a courtroom.
The process is evidence-based and handled by an independent adjudicator. Their job is to look at everything—the check-in report, your photos, emails, the landlord's claims—and make a final, legally binding decision. It’s a brilliant tool for tenants because it forces landlords to prove their case with facts, not just opinions.
Building an Unshakeable Case
Winning a dispute comes down to one thing: evidence. The good news is that the burden of proof is on the landlord to justify every penny they want to keep. But the stronger your own evidence, the more you tip the scales in your favour.
Here’s the essential evidence you should pull together:
- The Tenancy Agreement: This is the rulebook. Pinpoint the clauses about cleaning, condition, and your responsibilities at the end of the tenancy.
- The Check-In Report: Your single most important document. This is the "before" snapshot of the property's condition that you (hopefully) signed off on.
- The Check-Out Report: The "after" picture. If you disagreed with anything the landlord or agent noted, your own comments or a follow-up email are vital.
- Photos & Videos: Time-stamped pictures and walk-through videos from the day you moved in and the day you left are incredibly persuasive. Visuals don't lie.
- Written Communication: Dig out every email, text, or letter you exchanged with the landlord or agent. This includes repair requests, their replies, and any conversation about moving out.
- Receipts & Invoices: Got the place professionally cleaned? Hired a handyman to patch up a wall? Those receipts are proof you took your responsibilities seriously.
Get everything organised chronologically into a digital folder. This not only makes the dispute process a breeze but also shows the adjudicator you're a serious, organised tenant.
The adjudicator has never seen the property. They rely solely on the evidence presented to them. A clear, well-organised case file with dated photos and signed documents makes their job easy and significantly increases your chances of getting your deposit back.
How to Officially Start a Dispute
When it's obvious you and your landlord aren't going to see eye to eye, it's time to make it official. Don't delay—you typically only have three months from the end of your tenancy to kick off the process.
Here’s how it usually plays out:
-
Put It in Writing: First things first, send a formal email or letter to your landlord. State clearly that you disagree with their proposed deductions. List the specific charges you're disputing and briefly explain why. End by saying that if you can't reach an agreement, you'll be raising a formal dispute with the Tenancy Deposit Scheme.
-
Contact Your TDS Provider: Head to the website of the scheme protecting your deposit (like DPS, MyDeposits, or TDS) and log in. You'll find an option to start the dispute resolution process.
-
Submit Your Evidence: The scheme will give you a deadline to upload your entire case file. This is where your organised folder pays off. Submit everything that supports your position, along with a short, clear summary explaining your side of the story.
-
Await the Decision: Once both sides have submitted their evidence, the case goes to the independent adjudicator. They'll review it all and make a final decision, usually within 28 days. The scheme then pays out the deposit according to that ruling.
The whole system is designed so you don't need a solicitor. By staying calm, being methodical with your proof, and following the steps, you can confidently challenge unfair claims and get your money back.
Understanding the UK Deposit Return Scheme
Have you ever considered that the deposit you pay on a rental property uses the same logic as a massive national environmental plan? It’s all about accountability. Paying a small, refundable fee encourages us to return something in good condition, and that very principle is now being scaled up to tackle recycling across the UK.
This isn't just a theory; it's the foundation for the UK's upcoming Deposit Return Scheme (DRS) for drinks containers. It’s a huge initiative designed to completely change our relationship with single-use plastics and cans.
So, What Is This Deposit Return Scheme?
At its heart, the scheme is beautifully simple. When you buy a drink in a single-use container, you'll pay a small extra deposit. Once the drink is finished, you just need to return the empty bottle or can to a collection point – think reverse vending machines in supermarkets – and you get your money back. Instantly.
This whole idea mirrors the tenancy deposit system. It’s about creating a clear incentive to return something valuable, whether that's a set of house keys or a plastic bottle.
The government has been mapping out the details for a while now, as you can see from their consultation page below.
This level of planning shows a real commitment to building a circular economy by making recycling not just easy, but financially rewarding.
The plan is for the DRS to launch across the UK in October 2027. It will cover a huge range of drinks containers – from plastic and aluminium to steel cans – between 150ml and 3 litres. The goal? To push our recycling rates up to an incredible 90% by 2030.
This isn't a shot in the dark, either. This model has been proven in over 50 countries. Germany, for example, boasts a mind-boggling return rate of 98%. A new body, the Deposit Management Organisation (DMO), will be set up to make sure the system runs like clockwork. You can read more about the UK's plans for the Deposit Return Scheme to get the full picture.
Just as a tenancy deposit protects a landlord's property, the DRS protects our shared environment. It cleverly redefines a disposable bottle as something that holds value, giving us all a direct reason to recycle and cut down on litter.
Looking at the DRS really helps us understand the psychology behind deposit systems. It proves that when there’s a direct financial motivation, people are far more likely to do the right thing. That’s a lesson that applies just as much to a tenant moving out as it does to a shopper finishing a fizzy drink.
What We Can Learn from Successful Deposit Schemes Abroad
To really get a feel for how powerful deposit systems are, you just need to look at what’s already working across Europe. These schemes prove that when there's a small financial nudge to return something in good condition, people respond in droves. The UK's upcoming Deposit Return Scheme isn't some brand-new experiment; it's built on a foundation of proven international success.
Take Germany, for instance. They've had a Deposit Return Scheme (DRS) running since the early 2000s, and today, they boast a staggering container return rate of 98%. That’s not a typo. It’s a crystal-clear example of how a simple deposit can radically boost recycling and cut down on the rubbish cluttering up streets and parks. It just goes to show the behavioural shift a small financial stake can inspire.
Lessons From Recent Adopters
For a more recent success story, look at Latvia. They launched their DRS in February 2022 and the results were almost immediate.
In just two short years, their collection rates for PET containers shot up from 45% to 83%. This kind of rapid improvement shows just how quickly a well-designed scheme can make a difference.
The most stunning environmental impact was seen on Latvia's coastline, where plastic bottle litter plummeted by an astonishing 61% after the scheme started. This is the kind of hard evidence that makes the case for similar initiatives here in the UK.
These international wins give us a powerful glimpse of what's possible. When you hear that nearly 97% of British beaches were polluted by drinks-related waste in 2023, you start to see just how massive the positive impact could be. If you want to dive deeper, you can learn more about how these schemes are helping to clean up our communities on GOV.UK.
The thread connecting your tenancy deposit to these schemes is the same: it’s all about a shared responsibility to return something valuable in the state you found it.
Your Questions Answered
Moving out often throws up a few tricky questions. I've been helping tenants with this for years, so let's clear up some of the most common worries about getting your deposit back.
How Long Does My Landlord Have to Return My Deposit?
Once you've both agreed on the amount you're getting back, the clock starts ticking. In the UK, your landlord has 10 days to return the money.
If there's a disagreement and you have to go through a dispute resolution service, it'll naturally take longer. But remember, they should still return any part of the deposit that isn't in dispute within that initial 10-day window.
Can I Be Charged for Redecorating?
This is a big one, and it all comes down to "fair wear and tear". Your landlord can't charge you for minor scuffs or paint that has naturally faded over time. That's just part of a property being lived in.
However, if the damage goes beyond that—think large holes from a TV mount you didn't fill, or a feature wall you painted dark purple without permission—they can absolutely deduct the cost of making it right.
The key thing to remember is that a landlord can only charge for their actual financial loss. If you've left a small stain on a five-year-old carpet, they can't bill you for a brand new replacement. They can only claim for the diminished value of the old, already-used carpet.
What if My Landlord Is Ghosting Me?
It’s incredibly frustrating when your landlord or agent goes silent. If your polite calls and emails are being ignored, it’s time to get a bit more formal.
Put your request in writing. Send a clear, dated email or even a letter stating when your tenancy ended and formally asking for your deposit back. If you still get radio silence, your next step is to raise a dispute directly with the Tenancy Deposit Scheme that protects your money.
For more practical advice on managing landlord communication and other tenancy issues, our landlord and tenant advice blog is full of useful tips.
Moving out is stressful enough without the deep clean hanging over your head. Let the professionals at Signal Cleaning take care of it with a guaranteed service designed to satisfy the toughest letting agents. You can book your clean in just 60 seconds and get one step closer to securing your full deposit. Find out more at https://signalcleaning.co.uk.
Leave a Reply