The real secret to a perfectly clean, streak-free mirror is surprisingly simple. You just need a solution of equal parts distilled water and white vinegar, along with two microfibre cloths. One cloth is for applying the solution, and the second is your secret weapon for buffing the mirror completely dry. This two-cloth method is what prevents mineral deposits and leftover moisture from creating those annoying smudges.
Why Your Mirrors Get Streaky and How to Stop It
Have you ever finished cleaning a mirror, stepped back to admire your work, only to see it looks even worse than before? That frustrating, streaky finish is a common battle, but it's not you—it's your technique and your tools. Figuring out what causes those streaks is the first step to getting a flawless shine every time.

It’s no surprise this is such a common source of frustration. A recent survey revealed that 51% of UK adults experience stress related to home cleanliness. And since window washing—a very similar job—is one of the most disliked household chores, it's clear that achieving a perfect, streak-free shine is a major pain point for many. You can discover more insights into UK cleaning habits on litmag.co.uk.
The Real Reasons for a Streaky Finish
So, what's actually going on when you see those streaks? The culprit is usually one of these common mistakes:
- Using Tap Water: The water from your tap is full of minerals like calcium and magnesium. When it evaporates, these minerals get left behind as faint, chalky deposits on the glass.
- Residue from Commercial Cleaners: Many shop-bought glass cleaners contain soaps, waxes, or fragrances. Instead of evaporating cleanly, these additives leave a thin film that you end up just smearing around.
- The Wrong Type of Cloth: Paper towels and old cotton rags are the worst offenders for leaving tiny fibres behind. This lint gets trapped on the surface and ruins all your hard work.
The key takeaway is this: streaks are caused by residue. Whether it's minerals from tap water, additives from a cleaning product, or lint from a cloth, anything left on the surface will spoil the finish.
Think about cleaning a mirror in direct sunlight. The cleaning solution evaporates almost instantly, which doesn't give you nearly enough time to wipe it away properly. This practically guarantees a smudged result. By getting to the root of these issues, you can finally stop fighting with your reflection.
Getting Your Streak-Free Cleaning Kit Together
The secret to a mirror so clean it looks invisible isn't some expensive, shop-bought spray. It all comes down to a few simple tools, most of which are probably hiding in your cupboards right now. Before you even think about tackling those smudges, let's get your kit in order.
Trust me, a little prep work makes all the difference. We’re not after fancy chemicals here; we’re aiming for a professional finish using the basics.
Your Go-To Cleaning Solution
Put down that bottle of blue stuff. The most powerful mirror cleaner I've ever used is one you can whip up yourself in under a minute. It cuts through grime brilliantly and, most importantly, doesn't leave behind the residue that causes those frustrating streaks.
All you need is two simple ingredients:
- Distilled Water: This is the game-changer. Tap water is full of minerals that leave behind chalky spots when they dry. Distilled water is pure, so it evaporates without a trace.
- White Vinegar: The gentle acetic acid in vinegar is a natural powerhouse, dissolving everything from greasy fingerprints to dried-on toothpaste splatters with ease.
Just mix equal parts distilled water and white vinegar in a clean spray bottle. That’s the entire recipe. This DIY solution often works better than commercial cleaners because it has no soaps or fragrances—the very things that usually cause a streaky finish.
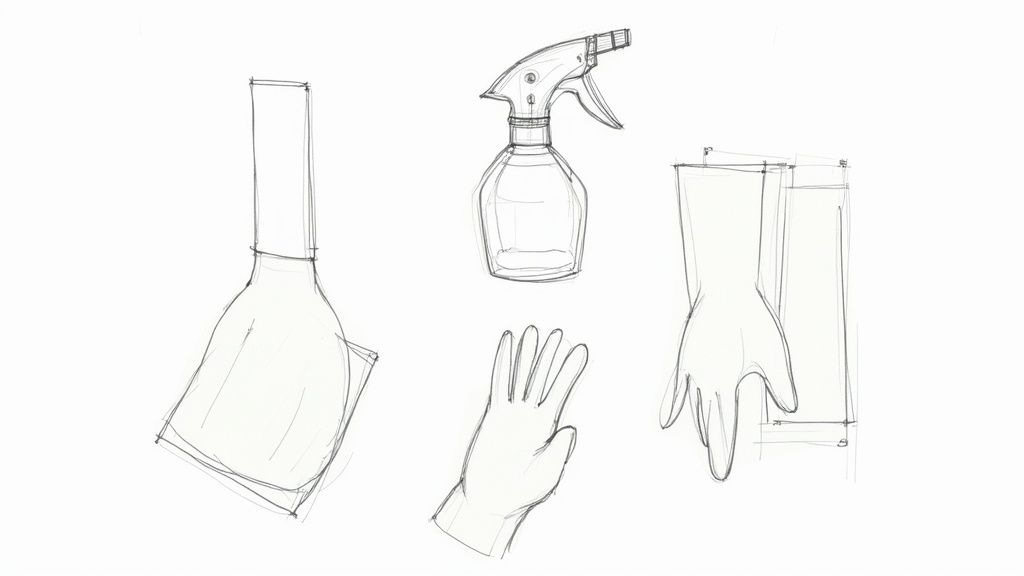
Your Essential Tools
Here’s a quick look at the simple supplies that will guarantee a flawless result every time.
Essential Tools for a Streak-Free Shine
| Tool | Why It's Essential | Top Tip |
|---|---|---|
| Two Microfibre Cloths | One cloth cleans, the other buffs. This two-step process is crucial for lifting all moisture and preventing streaks from forming as the surface dries. | Always use a completely dry cloth for the final buffing stage. Even a slightly damp cloth can leave marks. |
| DIY Vinegar Solution | The 50/50 mix of distilled water and white vinegar cleans effectively without leaving behind the soapy, filmy residue that commercial cleaners often do. | Label your spray bottle so you don't mix it up with other cleaners. It’s also great for windows! |
| Clean Spray Bottle | A dedicated, clean bottle prevents contamination from old cleaning products, which could sabotage your streak-free efforts from the start. | Rinse the bottle thoroughly with hot water before mixing your solution to ensure it's completely clean. |
Having these specific items ready to go is the first real step towards that perfect, invisible-glass look.
The Non-Negotiable Wiping Tools
What you wipe with matters just as much as what you spray with. It’s tempting to grab a paper towel, but they just disintegrate and leave a blanket of linty fluff all over your freshly cleaned mirror. A standard cotton cloth? It often just smears the dirt around.
For a truly professional finish, the only tool for the job is a high-quality microfibre cloth. The magic is in its incredibly dense weave, which is designed to grab and hold onto dirt, dust, and moisture, lifting it cleanly off the surface.
You’ll want two clean, dry microfibre cloths at the ready. You'll use the first one to apply your solution and wipe away the initial layer of grime. The second, completely dry cloth is for the final buff. This is where you polish the mirror, erasing every last bit of moisture and revealing that perfect, streak-free shine. This two-cloth method is the secret I swear by.
The Pro Method for a Flawless Mirror Finish
Forget everything you’ve been told about cleaning mirrors. The real secret to getting that perfect, streak-free shine isn't about harsh chemicals or endless scrubbing. It’s all about technique. Professional cleaners have a simple, repeatable process that gets flawless results every time, and it’s surprisingly easy to learn.
This method transforms a frustrating chore into a quick, satisfying task. The goal is to work smarter, not harder, by controlling the amount of cleaning solution and getting it off the glass before it can dry and leave those annoying streaks. Get this right, and you'll nail it on the first try.
Master the Two-Cloth System
The heart of this professional technique is the two-cloth system. One cloth is for applying the cleaner, and the second is solely for drying and buffing. If you're serious about a streak-free finish, this separation is non-negotiable.
Your first microfibre cloth will be slightly damp with your cleaning solution. The second cloth needs to be completely clean and bone-dry. Think of this dry cloth as your secret weapon—it whisks away every last bit of moisture, leaving nothing but a crystal-clear reflection.
This visual guide breaks down the essential prep work to get you started on the right foot.
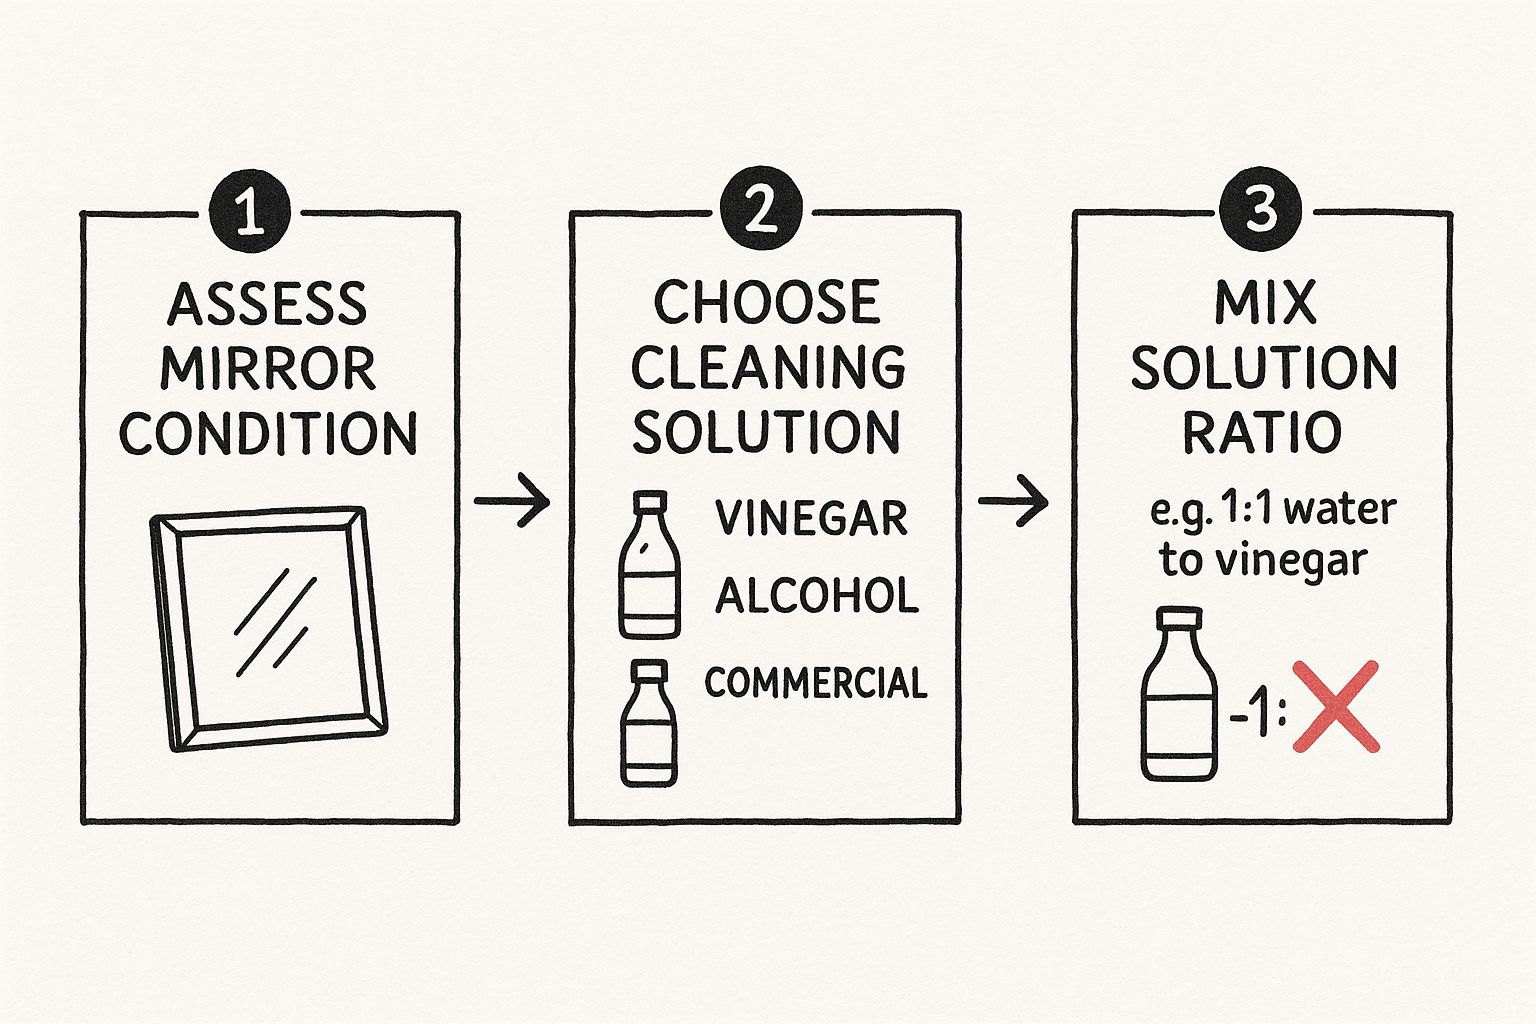
It's all about checking what you’re up against and grabbing the right supplies before you even touch the glass.
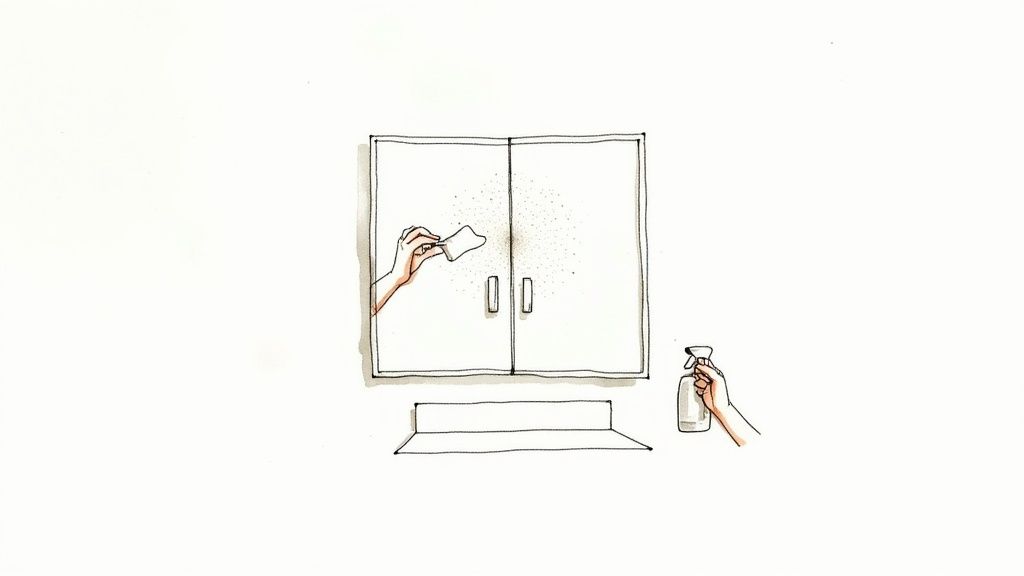
One of the most common mistakes people make is spraying cleaner directly onto the mirror. This not only leads to drips that can seep behind the glass and damage the silvering or the frame, but it also puts way too much liquid on the surface. That excess moisture is the number one cause of streaks.
Always lightly mist your cleaning cloth, not the mirror. Just a few spritzes are plenty. This gives you total control over the moisture, which is the absolute key to preventing streaks.
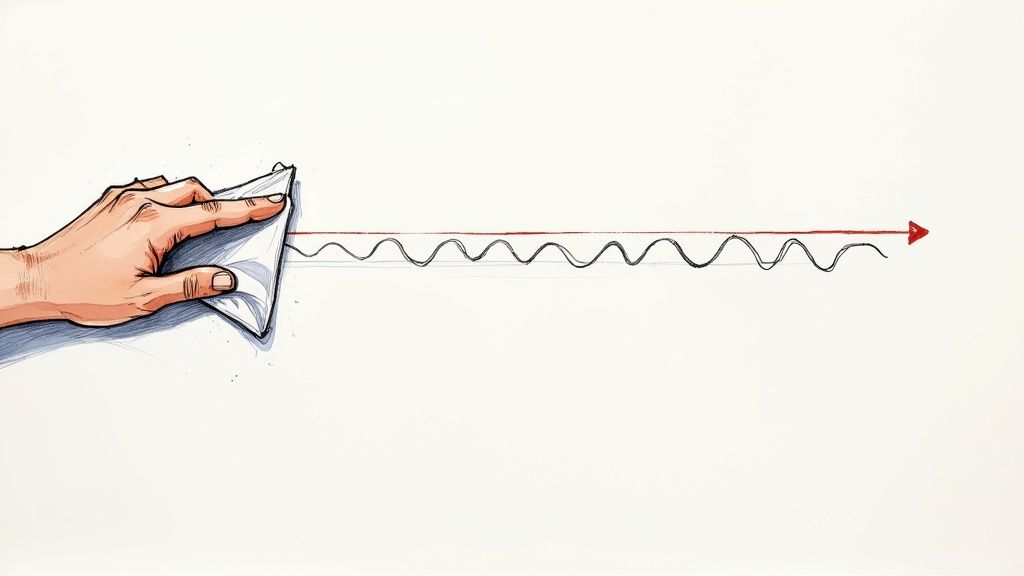
Execute the S-Pattern Wipe-Down
Now for the action. To avoid just smearing dirt around, you need a methodical approach. Random circles are out. Professionals use a specific technique called the ‘S-Pattern’ to ensure every square inch is covered efficiently.
Start in one of the top corners and wipe your damp cloth straight across to the opposite corner. Drop down just enough to overlap your last stroke and wipe back across. Continue this back-and-forth, S-shaped motion all the way down to the bottom of the mirror.
It’s a simple but brilliant pattern that systematically moves dirt down and off the surface, instead of just pushing it into areas you’ve already cleaned.
The moment you finish with the damp cloth, grab your second, dry microfibre cloth. Don't hesitate! Following the same top-to-bottom S-pattern, immediately buff the entire surface. This final pass polishes the glass and removes any lingering moisture before it can evaporate into a streak. The result? A perfectly clear mirror, every single time.
How To Remove Hairspray And Other Stubborn Spots
Let's be honest, sometimes a quick spray and wipe just won't cut it. Bathroom mirrors, in particular, face a daily assault from dried toothpaste flecks, greasy fingerprints, and that notoriously stubborn, sticky film from hairspray. If you don't deal with these first, you're just going to smear them around.
Tackling these problem areas before you do your main clean is the secret to getting that perfect, streak-free finish.
A little pre-treatment makes a world of difference. It stops you from turning a small spot into a giant, greasy smear across the entire mirror.
Spot-Treating Sticky Residues
For anything sticky or greasy, your best friend is rubbing alcohol (also known as isopropyl alcohol). It’s brilliant at cutting through residues that normal cleaners just can't handle, and it evaporates in a flash without leaving any film behind.
I've found this works wonders on hairspray build-up and those waxy smudges from fingerprints.
- Just pop a small amount of rubbing alcohol onto a cotton pad or ball.
- Gently work on the spot using small, circular motions.
- You'll see the alcohol dissolve the gunk, making it easy to wipe away completely.
This targeted trick isolates the problem right at the source, saving you a massive headache later on.
By pre-treating sticky spots with rubbing alcohol, you're not just cleaning; you're preventing streaks before they even have a chance to form. It’s the key to a flawless final wipe-down.
Dealing With Dried-On Splatters
We’ve all seen it: those rock-hard splatters of toothpaste that seem almost fused to the glass. Whatever you do, don't reach for an abrasive scourer—you'll end up with permanent scratches.
Instead, take your alcohol-dampened cotton pad and hold it against the mark for a few seconds. This helps soften it up. Then, a gentle rub should be enough to lift it away without any force.
Pre-treating these little annoyances ensures they won't get dragged across the mirror when you do your final clean, which is a classic rookie error that causes ghosting and streaks. For more tips on tackling tough marks, you can find extra advice in our guide on how to remove stubborn stains.
Right, your mirror is gleaming. The last thing you want is for it to get grubby again straight away. The secret isn't more elbow grease; it's about a few clever habits to stop the build-up in its tracks.
The simplest trick I've learned is to just keep a dry microfibre cloth hanging near the mirror. Give it a quick once-over each day to catch any fresh water splashes or fingerprints before they dry into stubborn marks. It takes seconds, but it makes a world of difference and pushes your next proper clean way down the line.
Good ventilation is another game-changer, especially in the bathroom. Pop the extractor fan on when you’re showering and leave it running for a bit afterwards. This pulls the steam out of the air before it can settle on the glass and create that annoying cloudy film.
Small Tweaks, Big Results
Often, it’s the little things that keep a mirror looking its best. Think about the products you're using around it.
- Watch Out for Aerosols: When you’re using hairspray or dry shampoo, just turn away from the mirror. A fine mist can leave a sticky residue that’s a magnet for dust.
- Tackle Splatters Instantly: Toothpaste and soap splashes happen. The key is to wipe them off with your dedicated cloth while they’re still wet, before they have a chance to set.
It's really about shifting your mindset from doing a big cleaning chore to just simple, daily maintenance. These tiny actions save you so much time in the long run.
This idea of using gentler, more thoughtful methods is catching on. In fact, about 60% of UK consumers now say they'd pay more for eco-friendly cleaning supplies, partly because they want to avoid the harsh chemical residues that often cause streaks. You can dive into the details by checking out the full YouGov survey findings.
Frequently Asked Questions About Cleaning Mirrors
Even with the best approach, you might still have a few nagging questions when you're chasing that perfect, streak-free finish. Let's tackle some of the most common ones we hear, so you can get your mirrors looking flawless.
Is It a Good Idea to Use Newspaper?
This is a classic tip that many of us heard growing up, but it’s a bit outdated now. Years ago, it worked reasonably well, but modern newspapers often use soy-based inks. These can leave behind a faint, oily residue on the glass – the very thing you're trying to remove.
On top of that, the paper itself can shed tiny fibres, leaving your mirror covered in lint. A good quality microfibre cloth is a much better bet for a truly clean and streak-free shine every time.
Why does a simple mix of distilled water and white vinegar work so well? It's because it cuts through grease and grime and then evaporates completely, leaving nothing behind. Many commercial cleaners, on the other hand, contain soaps and additives that leave a film, which is a major cause of streaks.
Why Are There Streaks After My Mirror Dries?
Ah, the classic post-cleaning frustration. This almost always comes down to one of two things. Either there was some leftover residue on the mirror that your cloth just spread around, or your cloth was simply too wet. Any excess moisture left on the surface will just create new marks as it dries.
The solution is all in the finish. Immediately after you've wiped the mirror clean, grab a second, completely dry microfibre cloth and buff the entire surface. This crucial step removes every last bit of moisture before it has a chance to evaporate and form new streaks.
How Often Should I Be Cleaning My Bathroom Mirror?
For a mirror that sees a lot of action, like the one in the main bathroom, giving it a quick wipe-down with a dry cloth each day can work wonders. This little bit of upkeep stops water spots and toothpaste splatters from building up.
A proper, deep clean using the methods we've covered is really only needed about once every week or two. It all depends on how quickly it gets splashed. For more handy cleaning tips for every room in your house, feel free to have a look at our Signal Cleaning blog.
Leave a Reply